 PUSH & LIFTPUSH & LIFT
Push & Lift · paint your car in layers and take it to iRacing
LIVERY STUDIO is the Push & Lift paint shop. Build your livery in layers on the car’s official iRacing template and install it in iRacing with one button.

These buttons are shared by all PIT apps and explained in the SUITE manual. LIVERY STUDIO uses the Suite language; change it inside the app with ES EN DE FR IT ZH.
If you do not yet have the iRacing templates, the home screen shows Preparando LIVERY STUDIO (preparing LIVERY STUDIO) instead of buttons:
When finished, “Listo. Ya puedes pintar.” (Ready to paint) appears with the buttons. On failure, it asks you to check the connection and reopen LIVERY STUDIO.
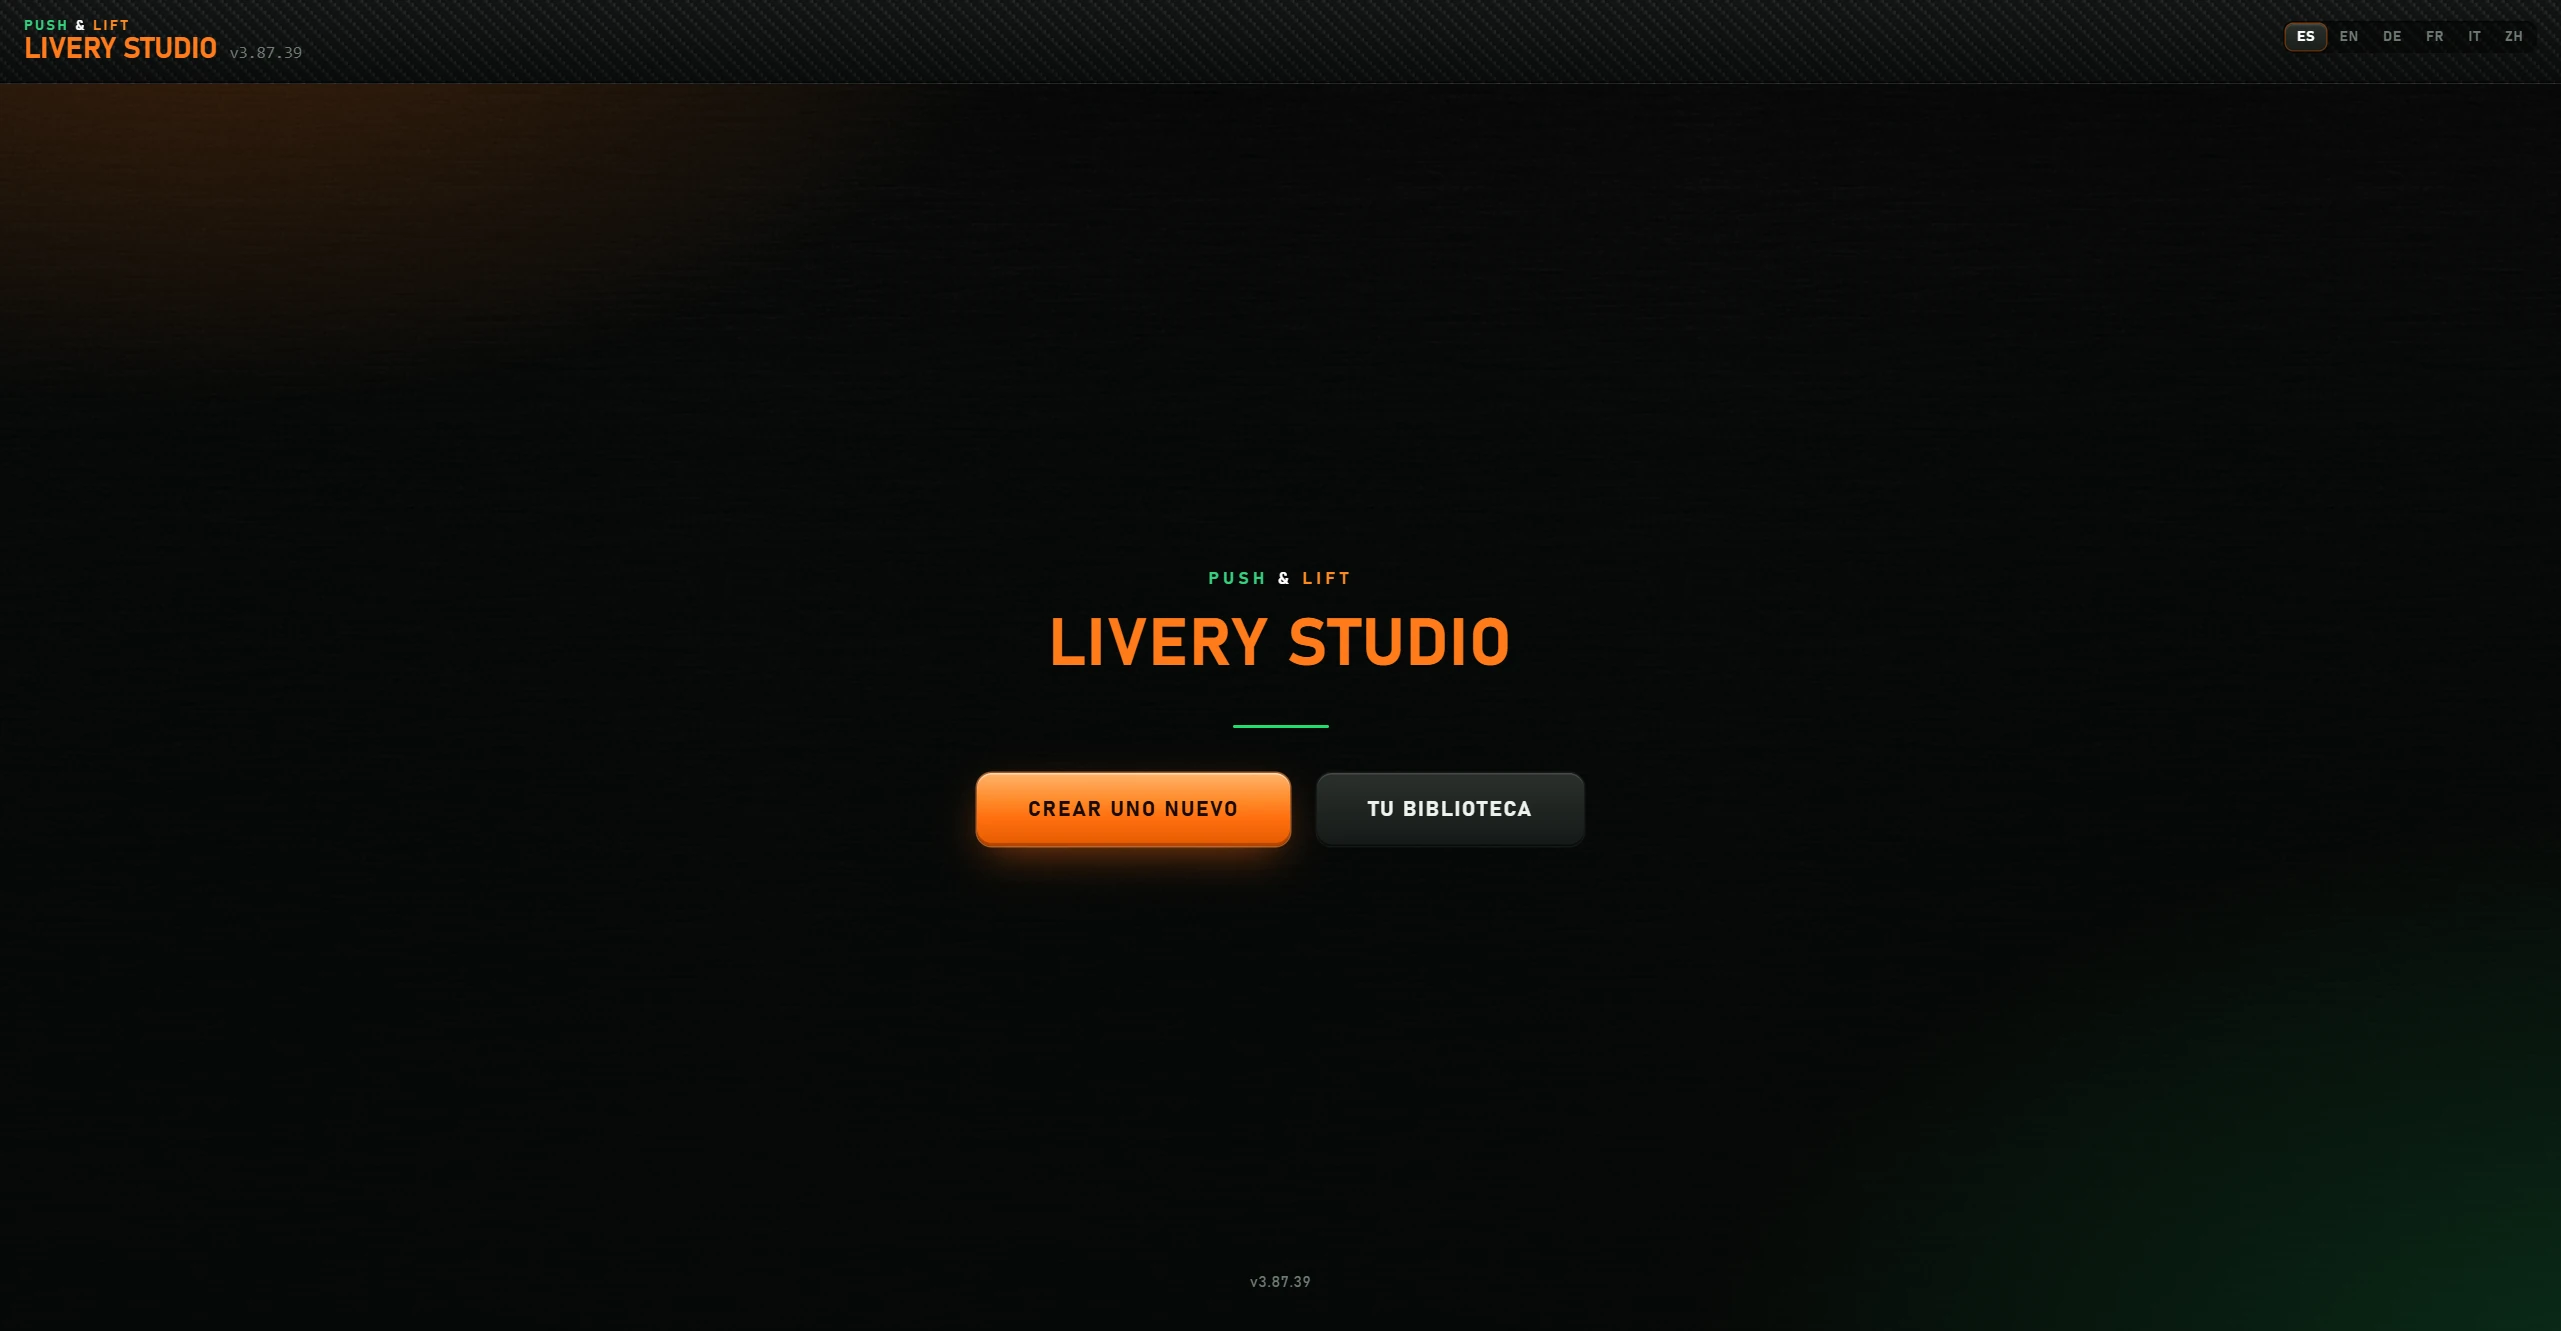
Top left, PUSH & LIFT · LIVERY STUDIO and version. On the right, languages ES, EN, DE, FR, IT and ZH: the active language is highlighted; text changes immediately.
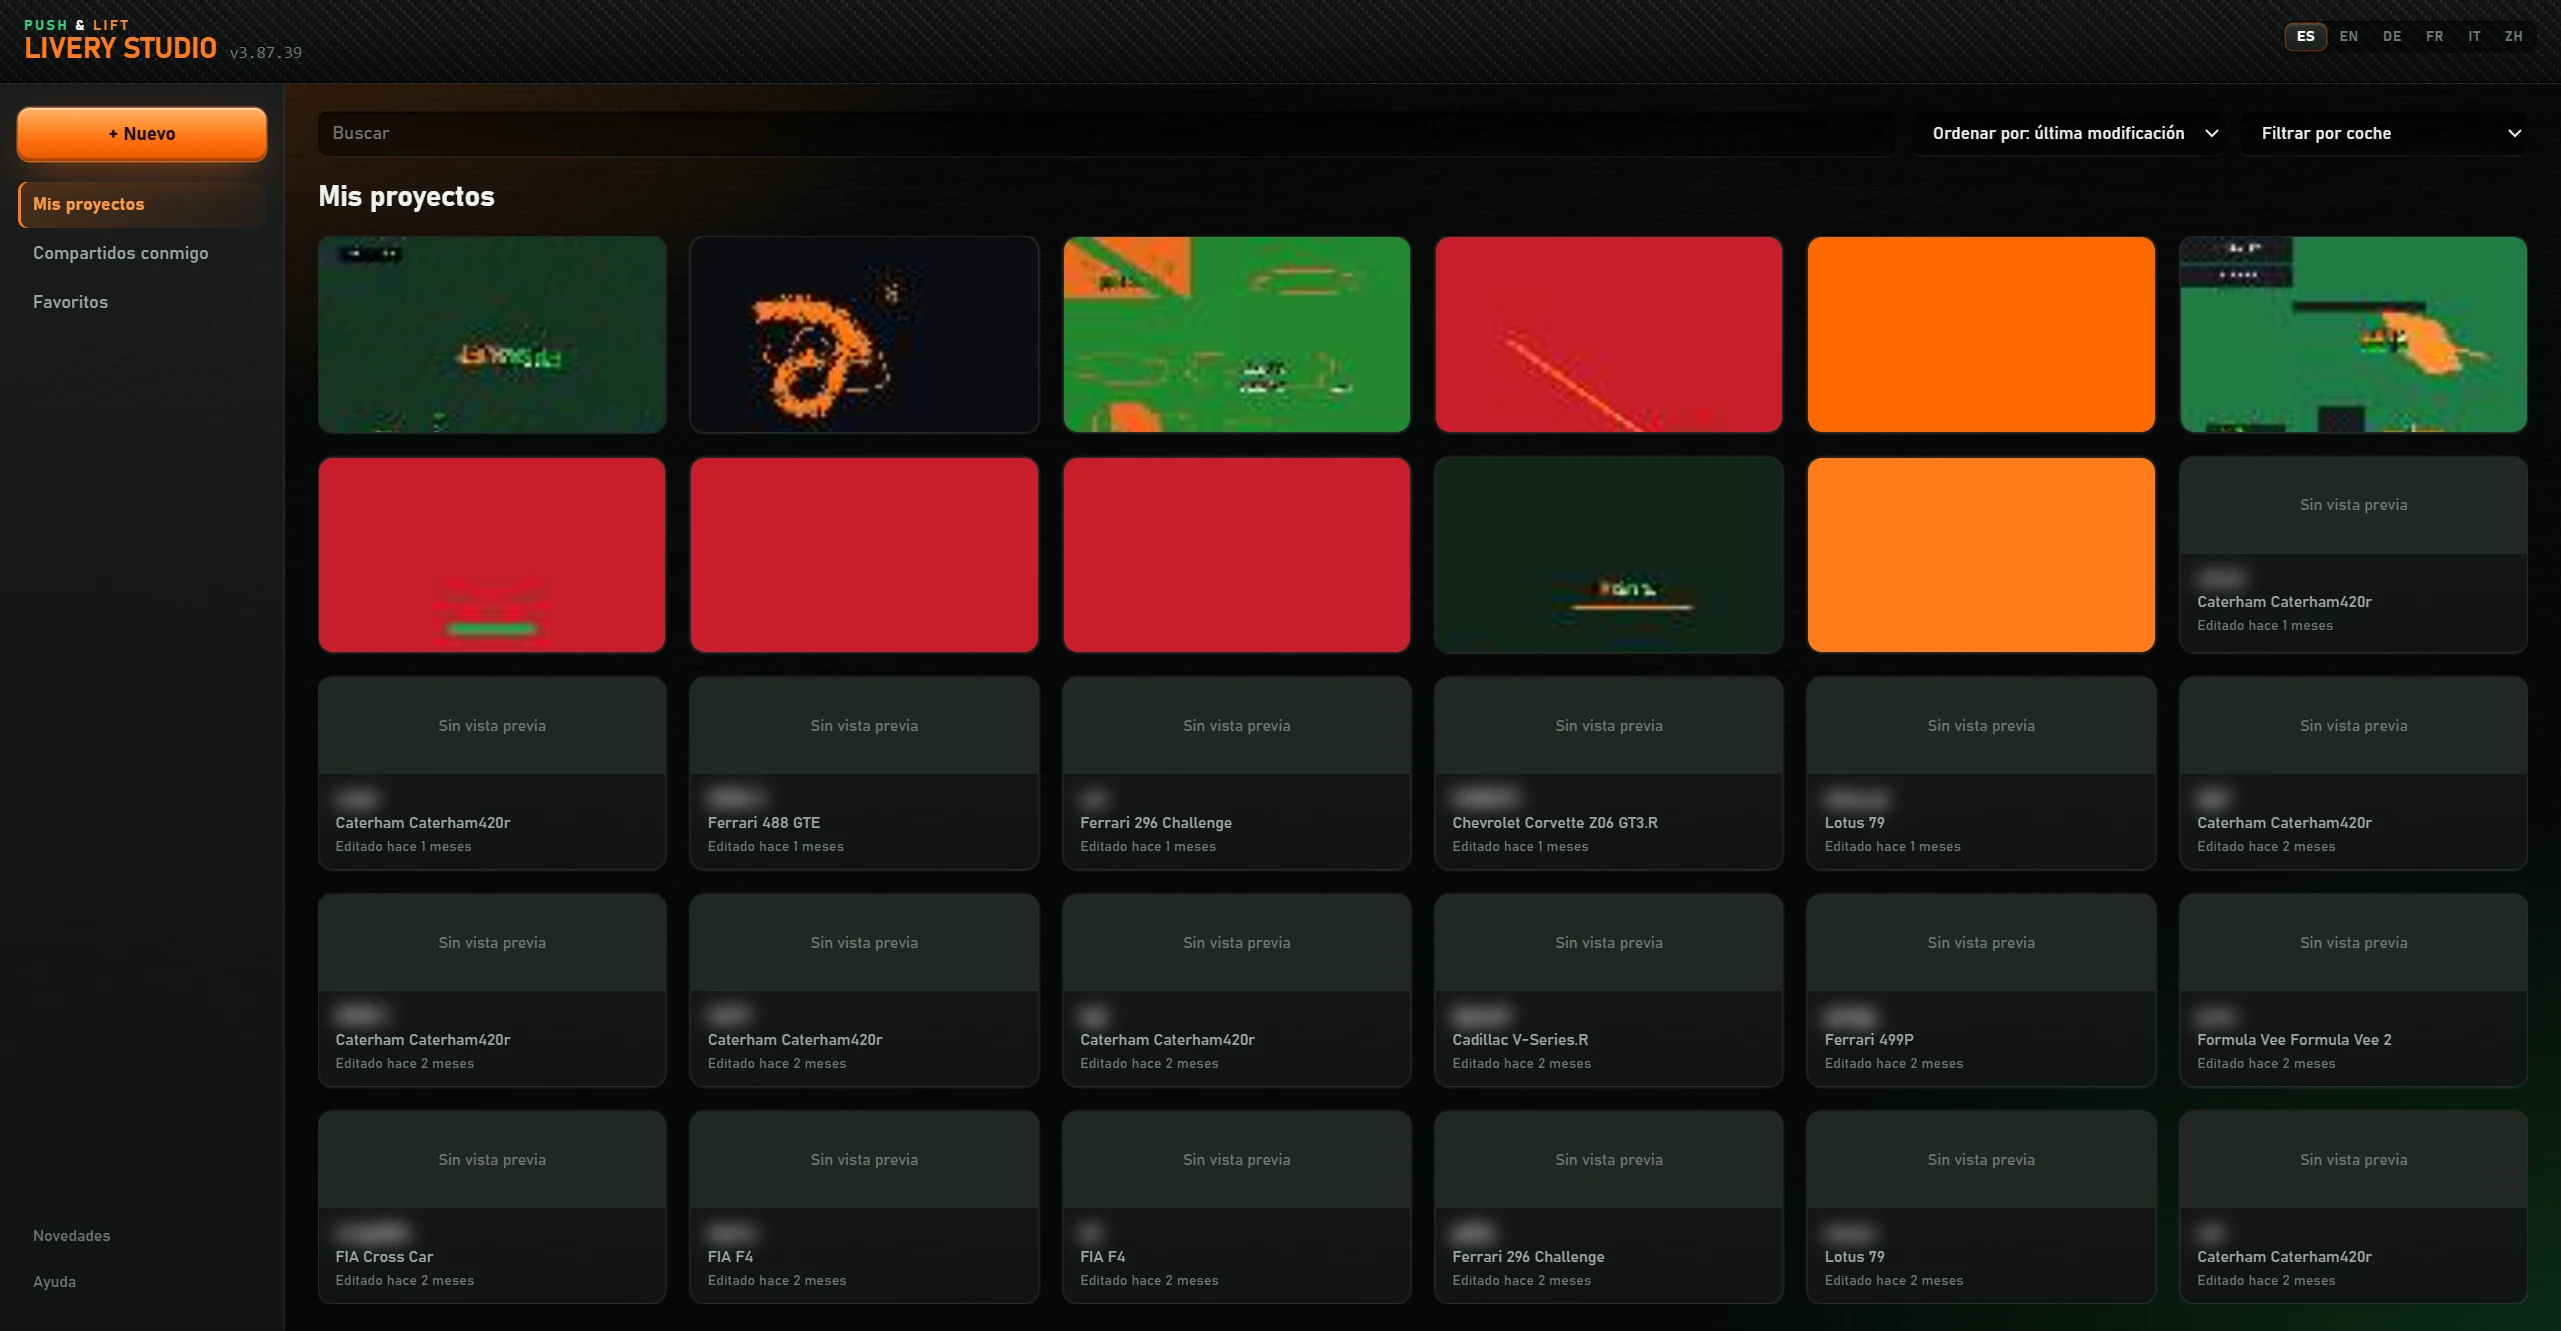
| Button or field | What it does |
|---|---|
| + Nuevo (new) | Opens the new-project wizard. |
| Mis proyectos (my projects) | The displayed list of your projects. |
| Compartidos conmigo (shared with me), Favoritos (favourites), Novedades (new items) | Not functional yet: displays “Todavía no está disponible.” (not available yet). |
| Ayuda (help) | Opens the Manual de LIVERY STUDIO (LIVERY STUDIO manual) box with help text. Close with ✕ or click outside. |
| Buscar (search) | Filters by project name. |
| Ordenar por (sort by) | Ordenar por: última modificación (last modified) (newest first) or Ordenar por: nombre (name). |
| Filtrar por coche (filter by car) | Shows projects for one car. The list contains cars from your projects. |
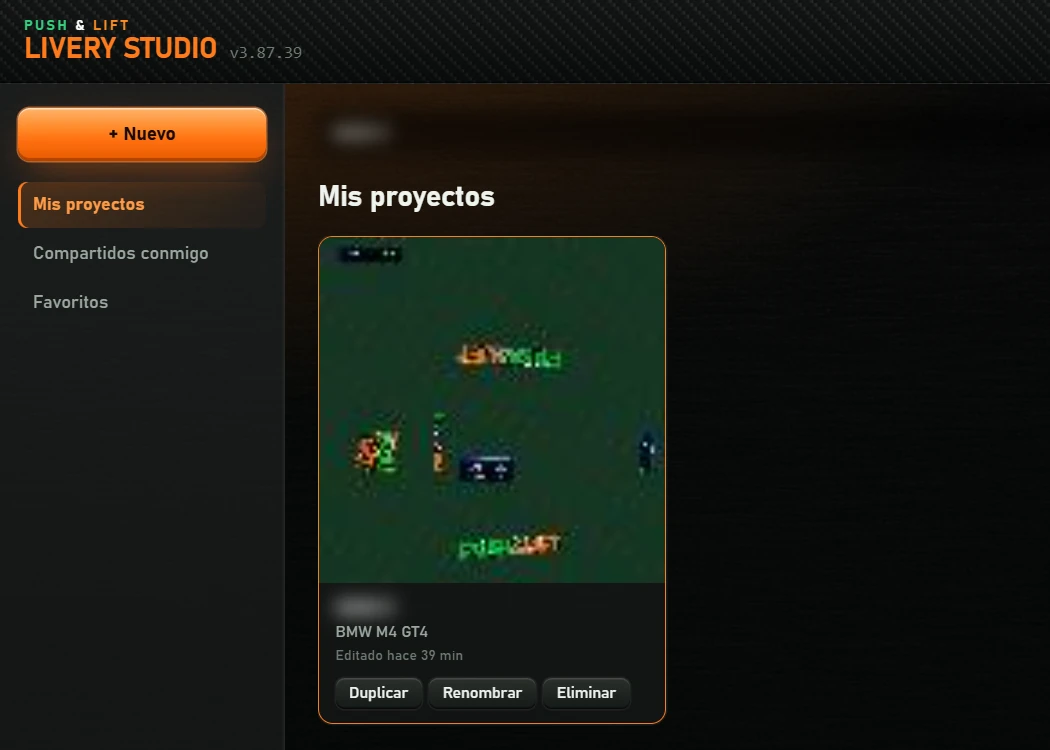
Without projects the grid reads “Sin pinturas guardadas” (no saved paints).
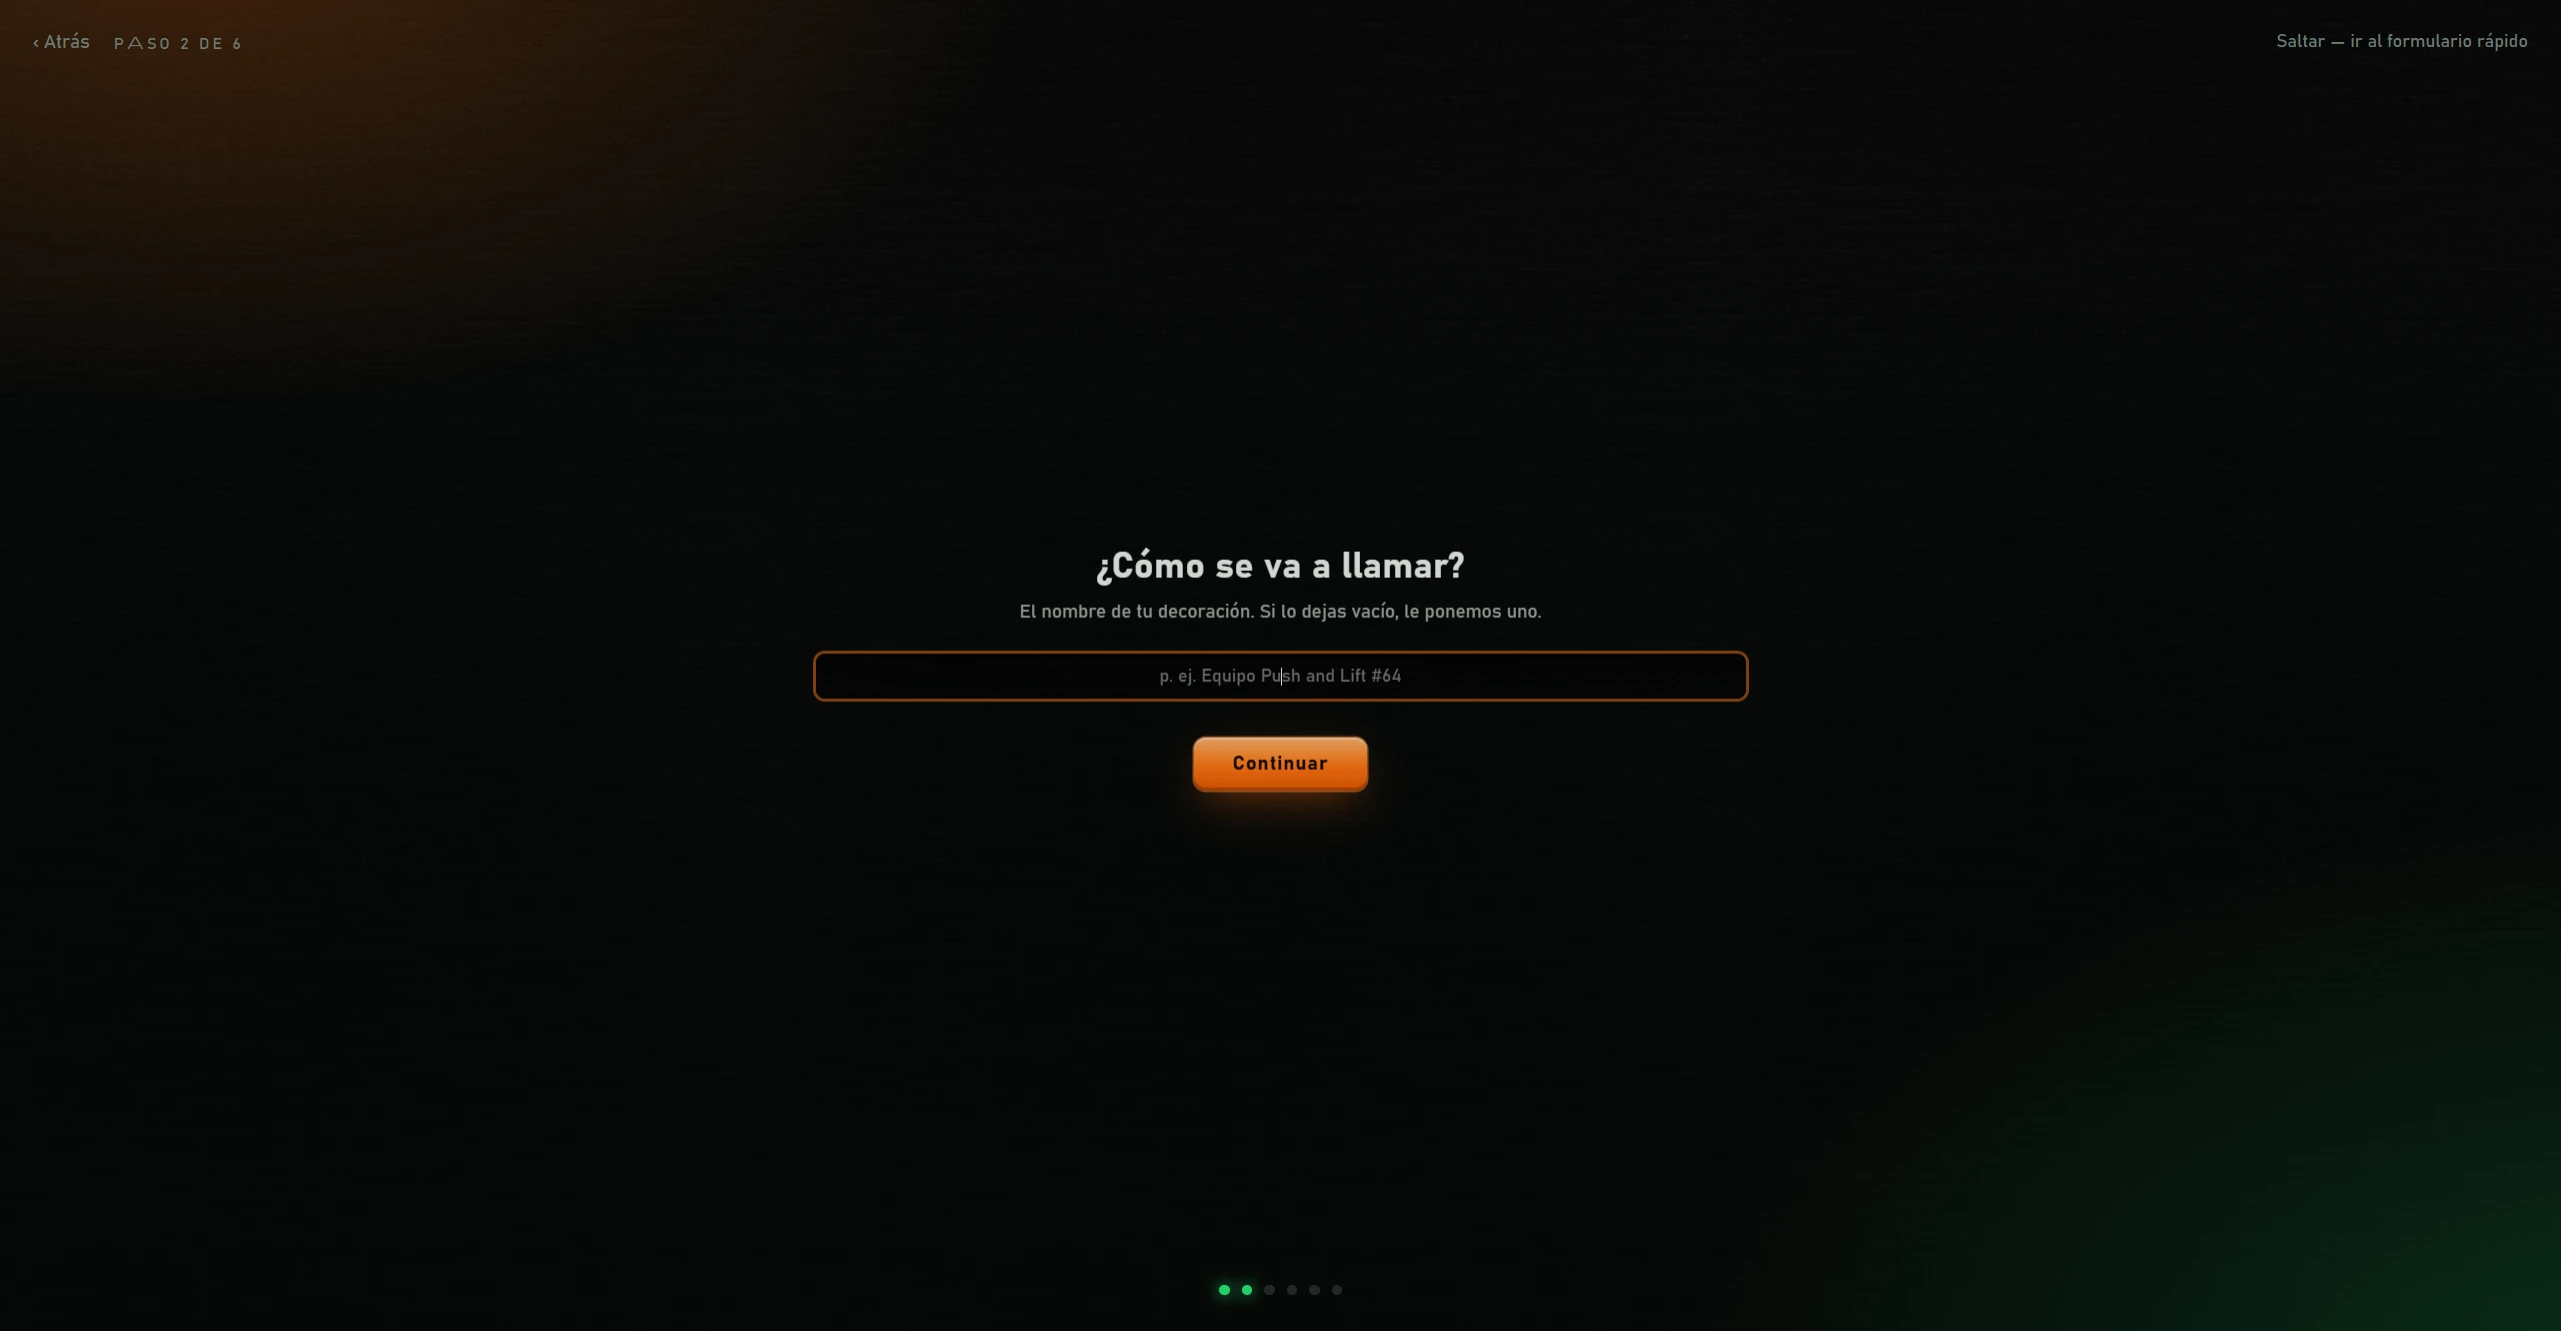
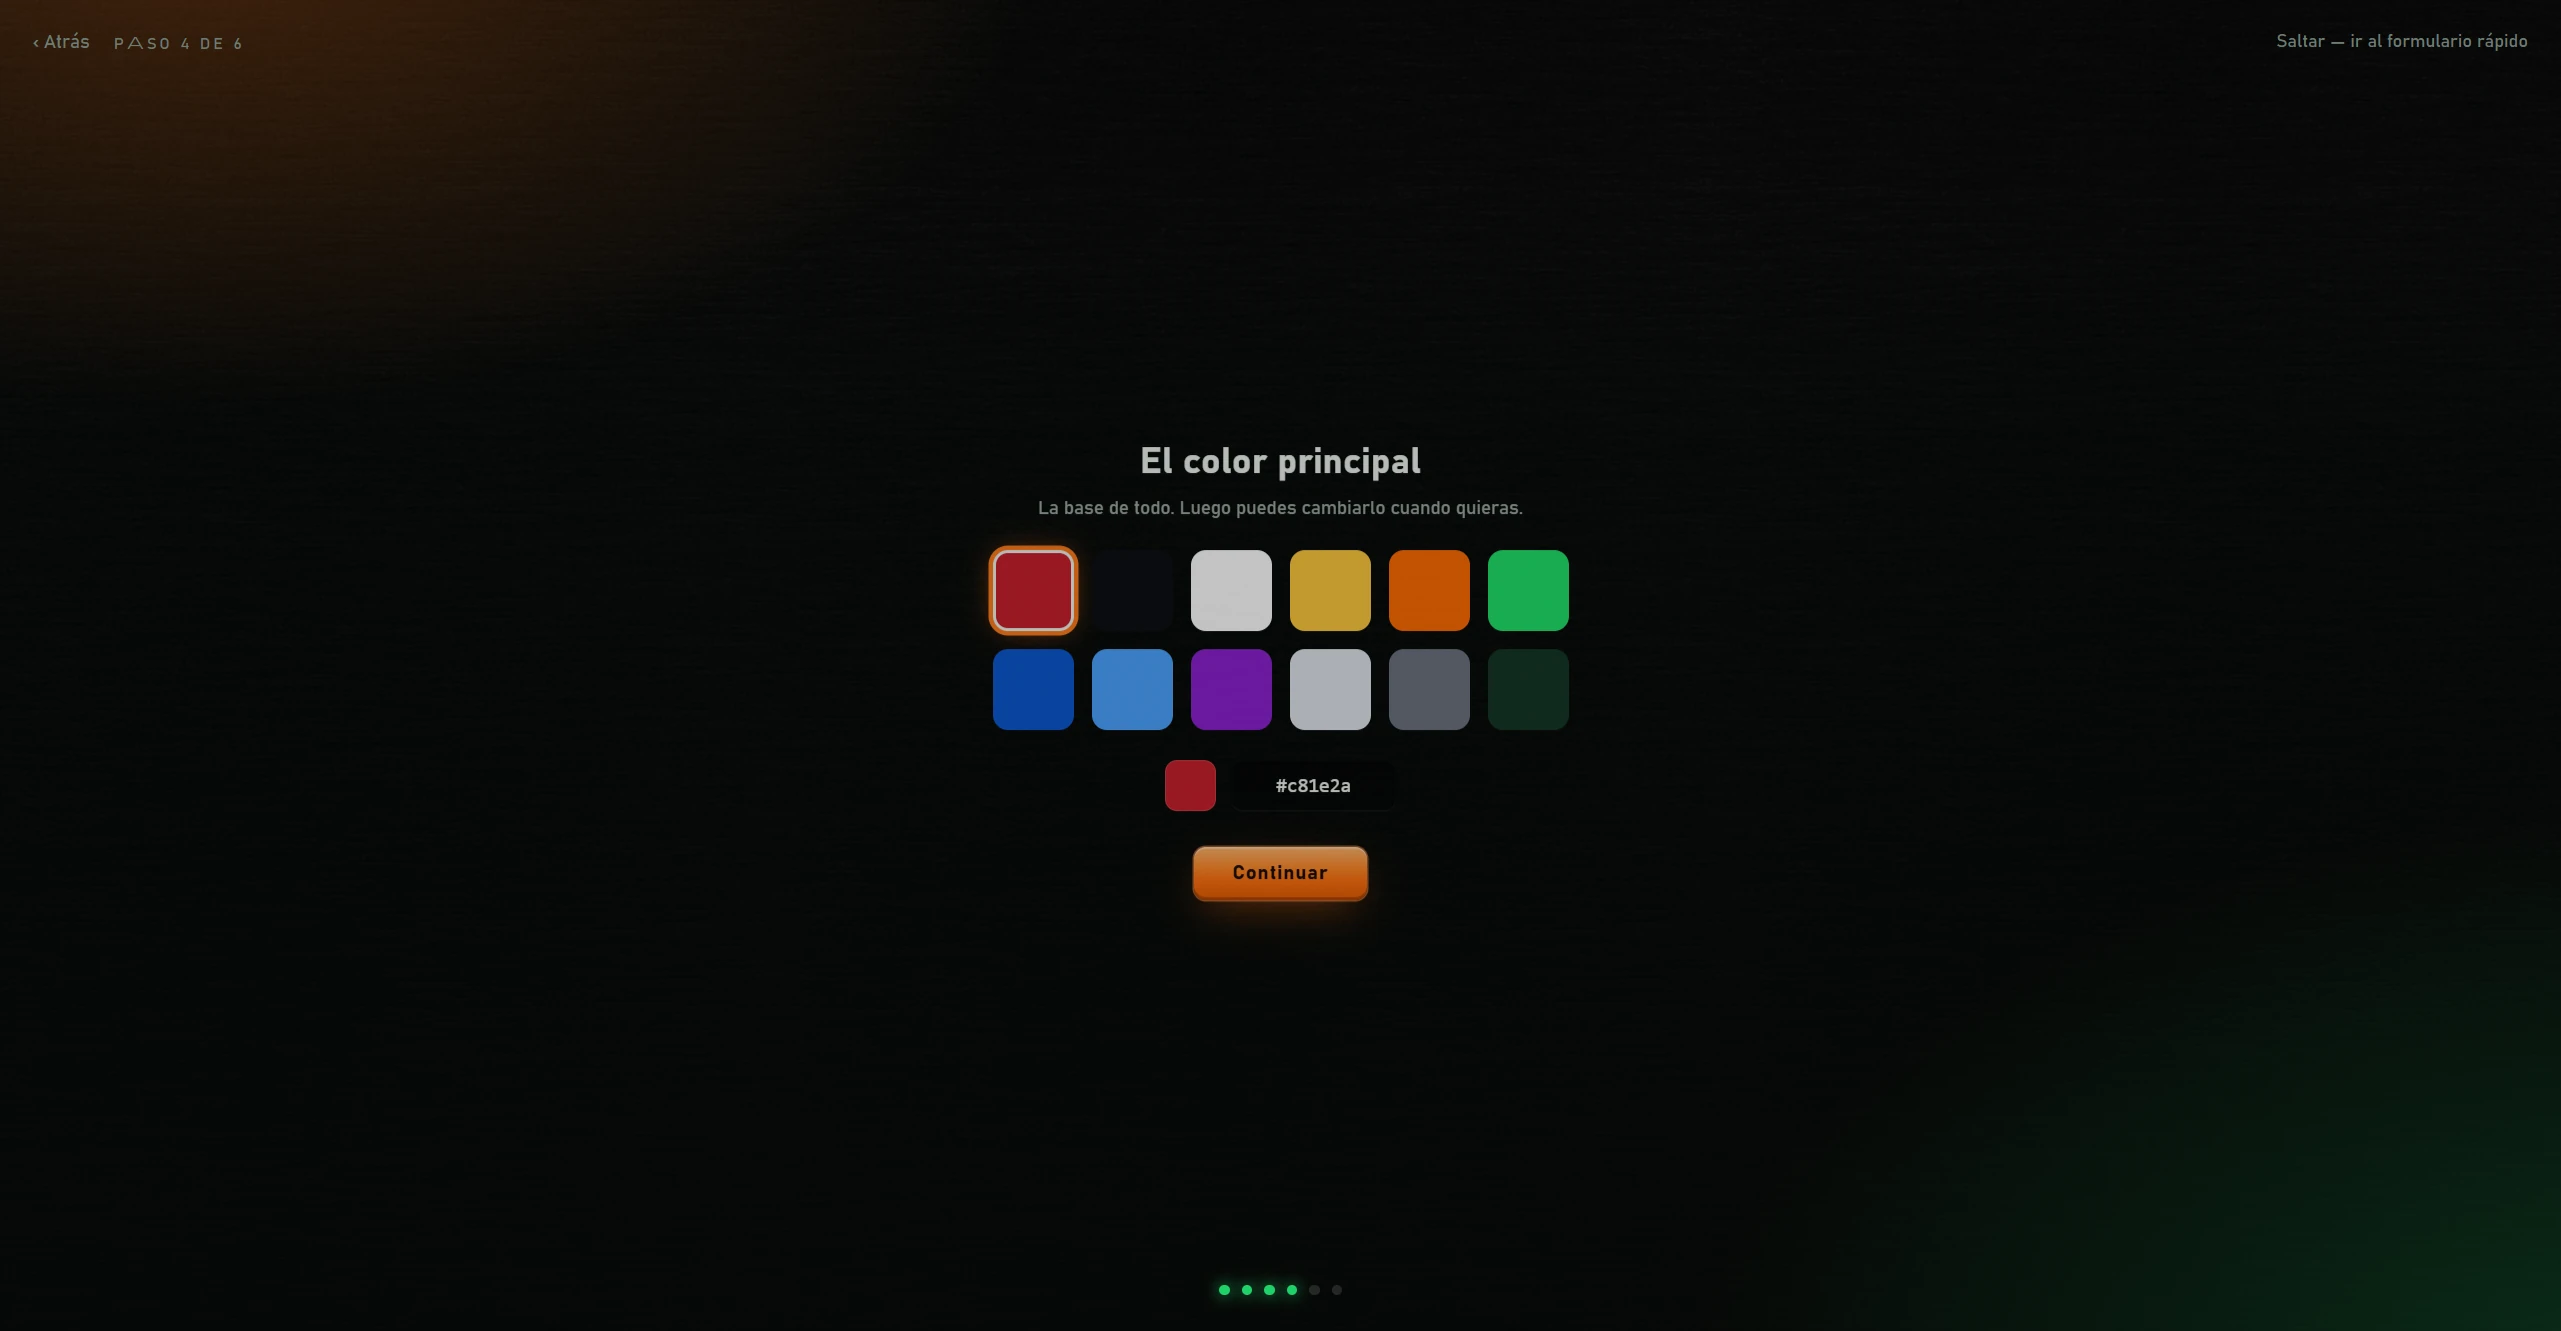
Opens with CREAR UNO NUEVO (create new) or with + Nuevo (new). Six steps. At the top: ‹ Atrás (back) (from step 2), “Paso … de 6” (step … of 6) and Saltar — ir al formulario rápido (skip to quick form). Progress dots below. Nothing is created until the final button.
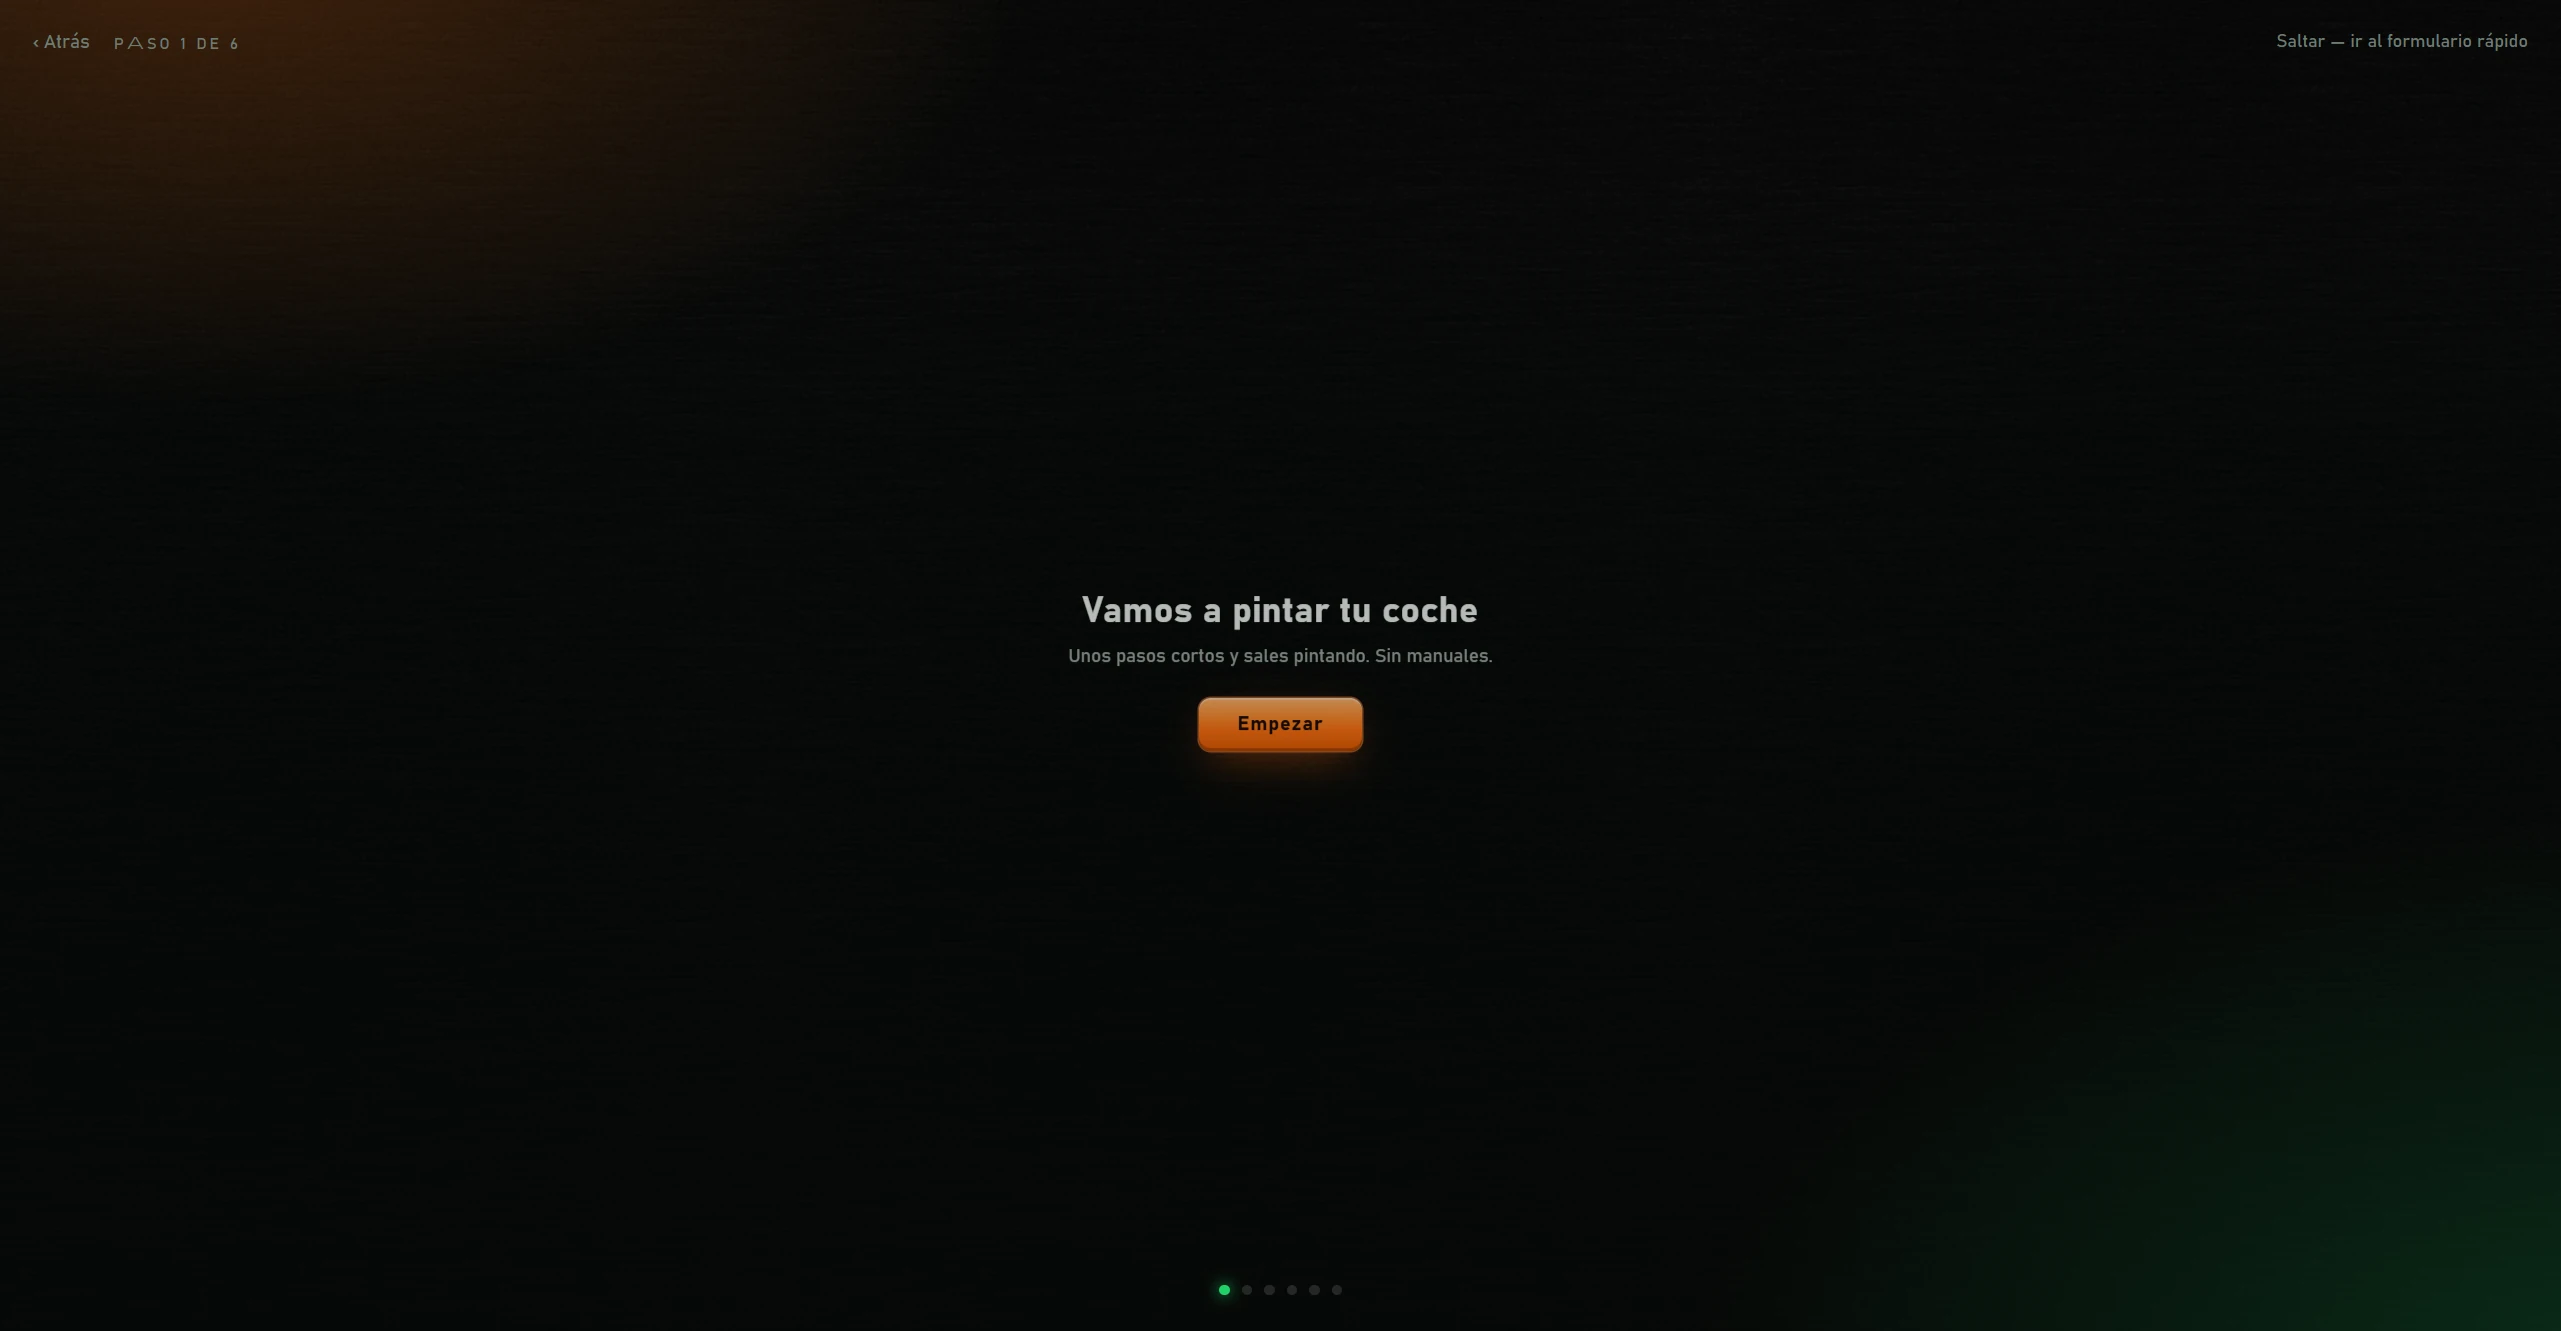
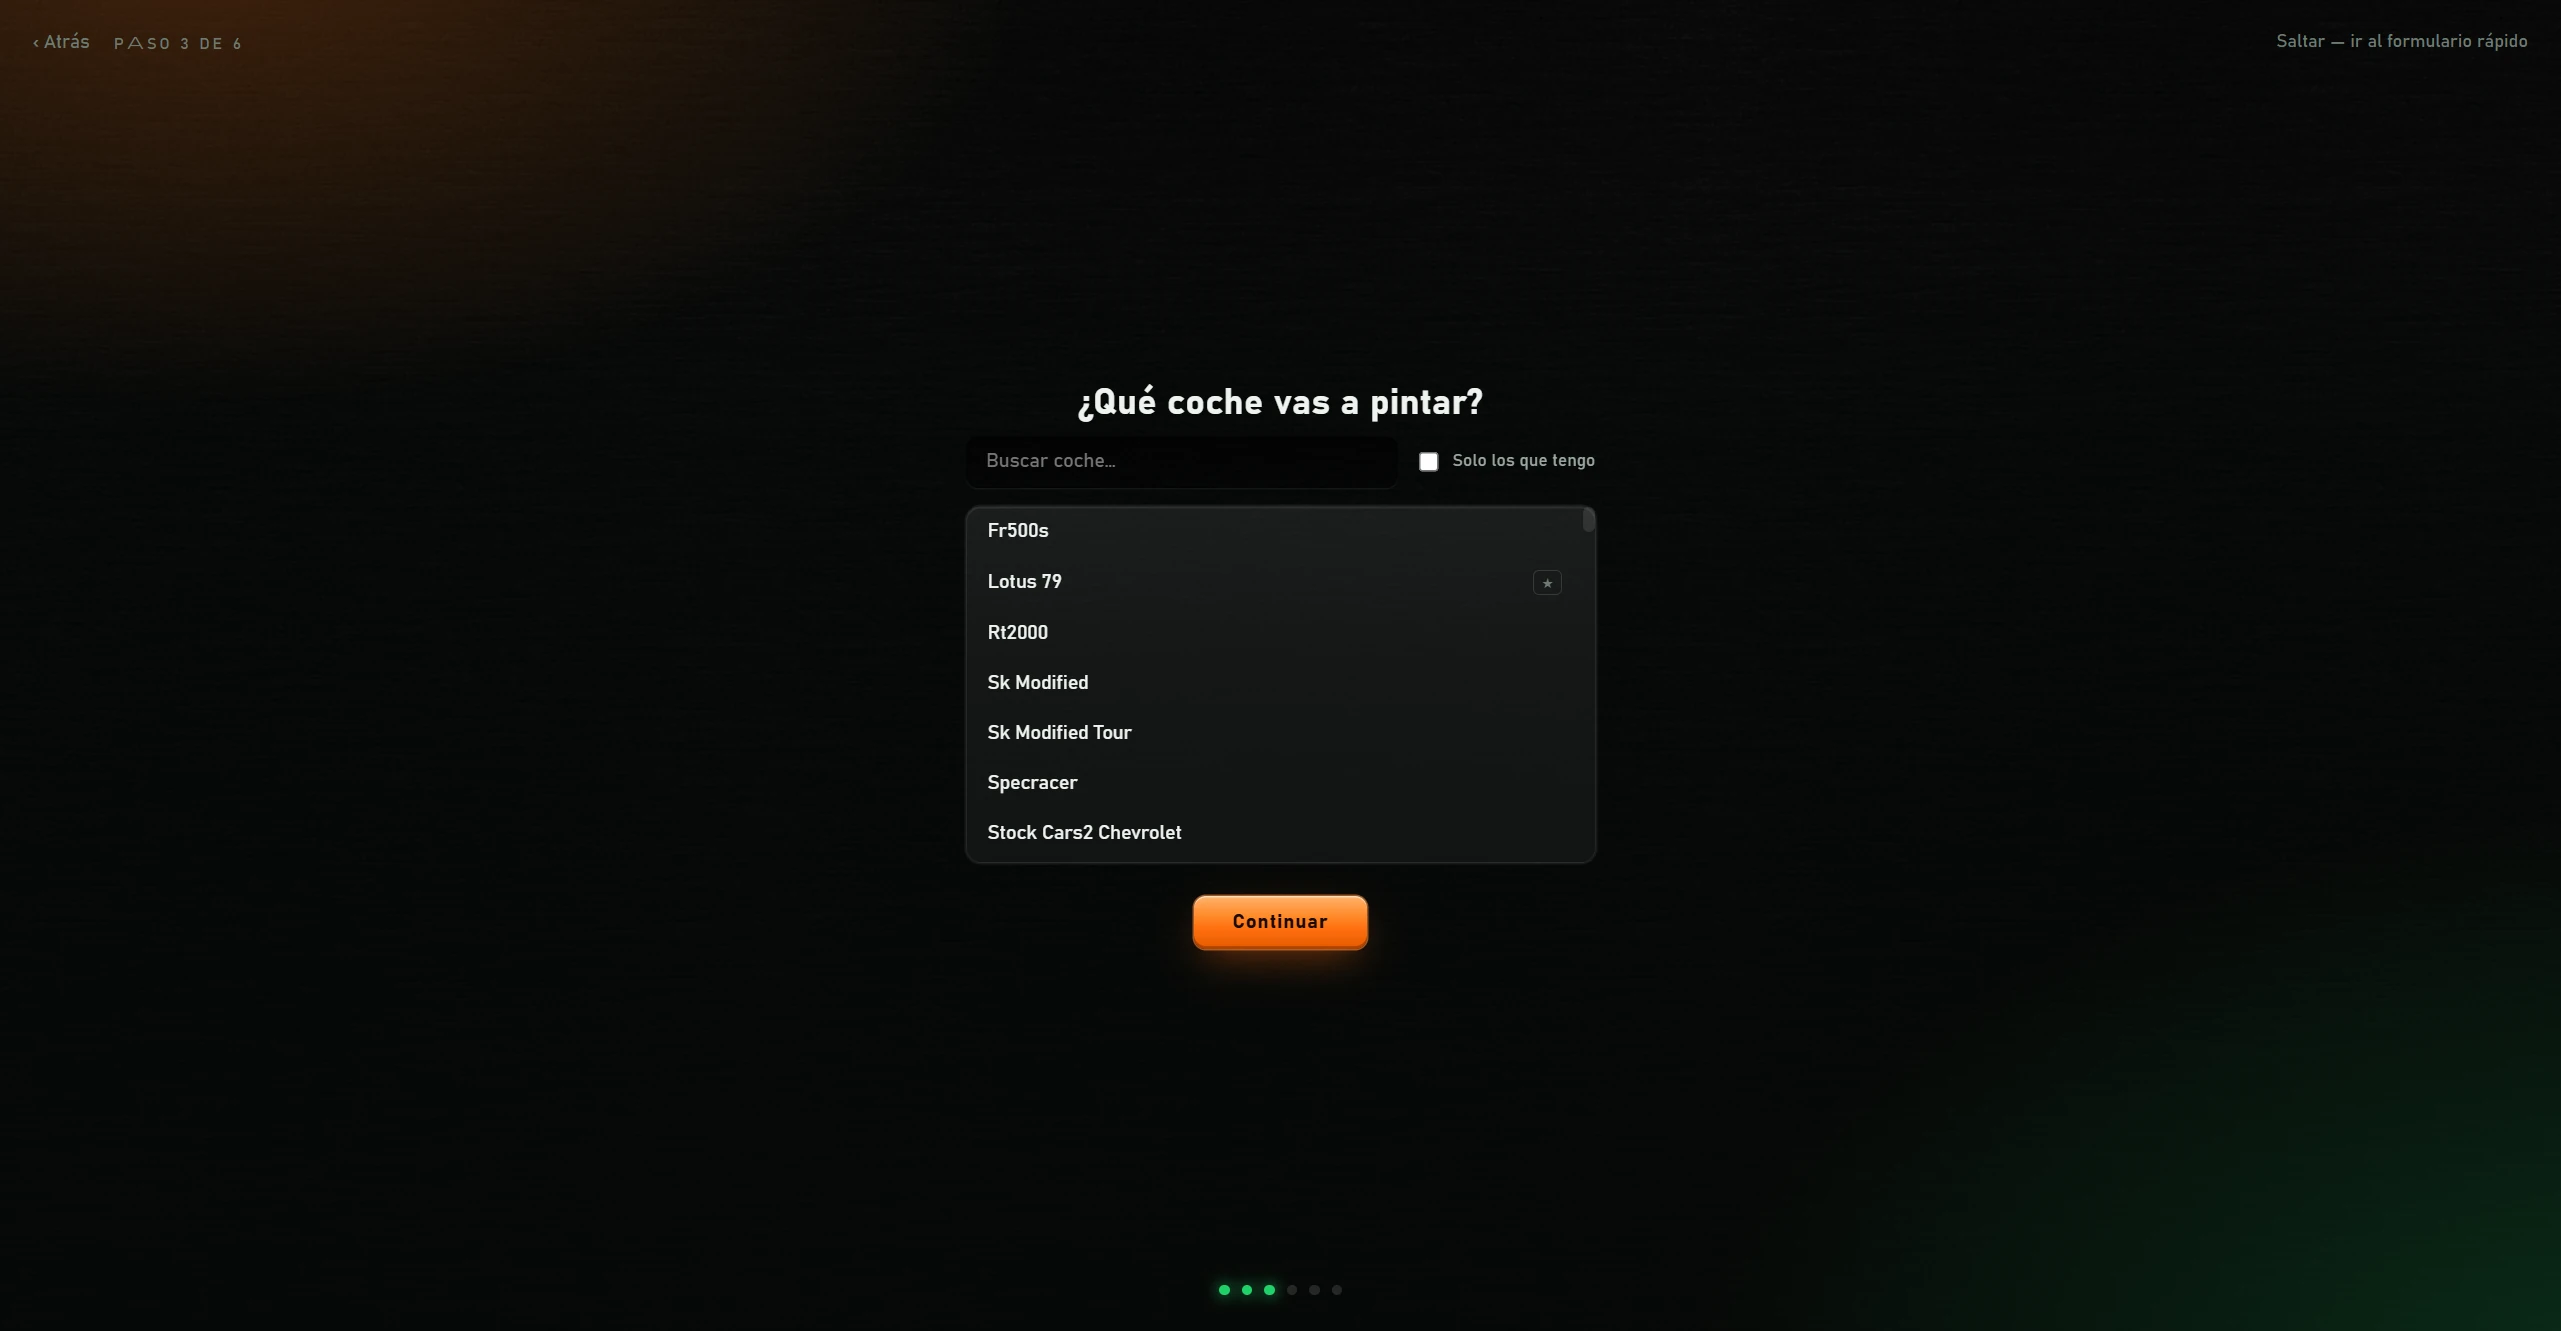
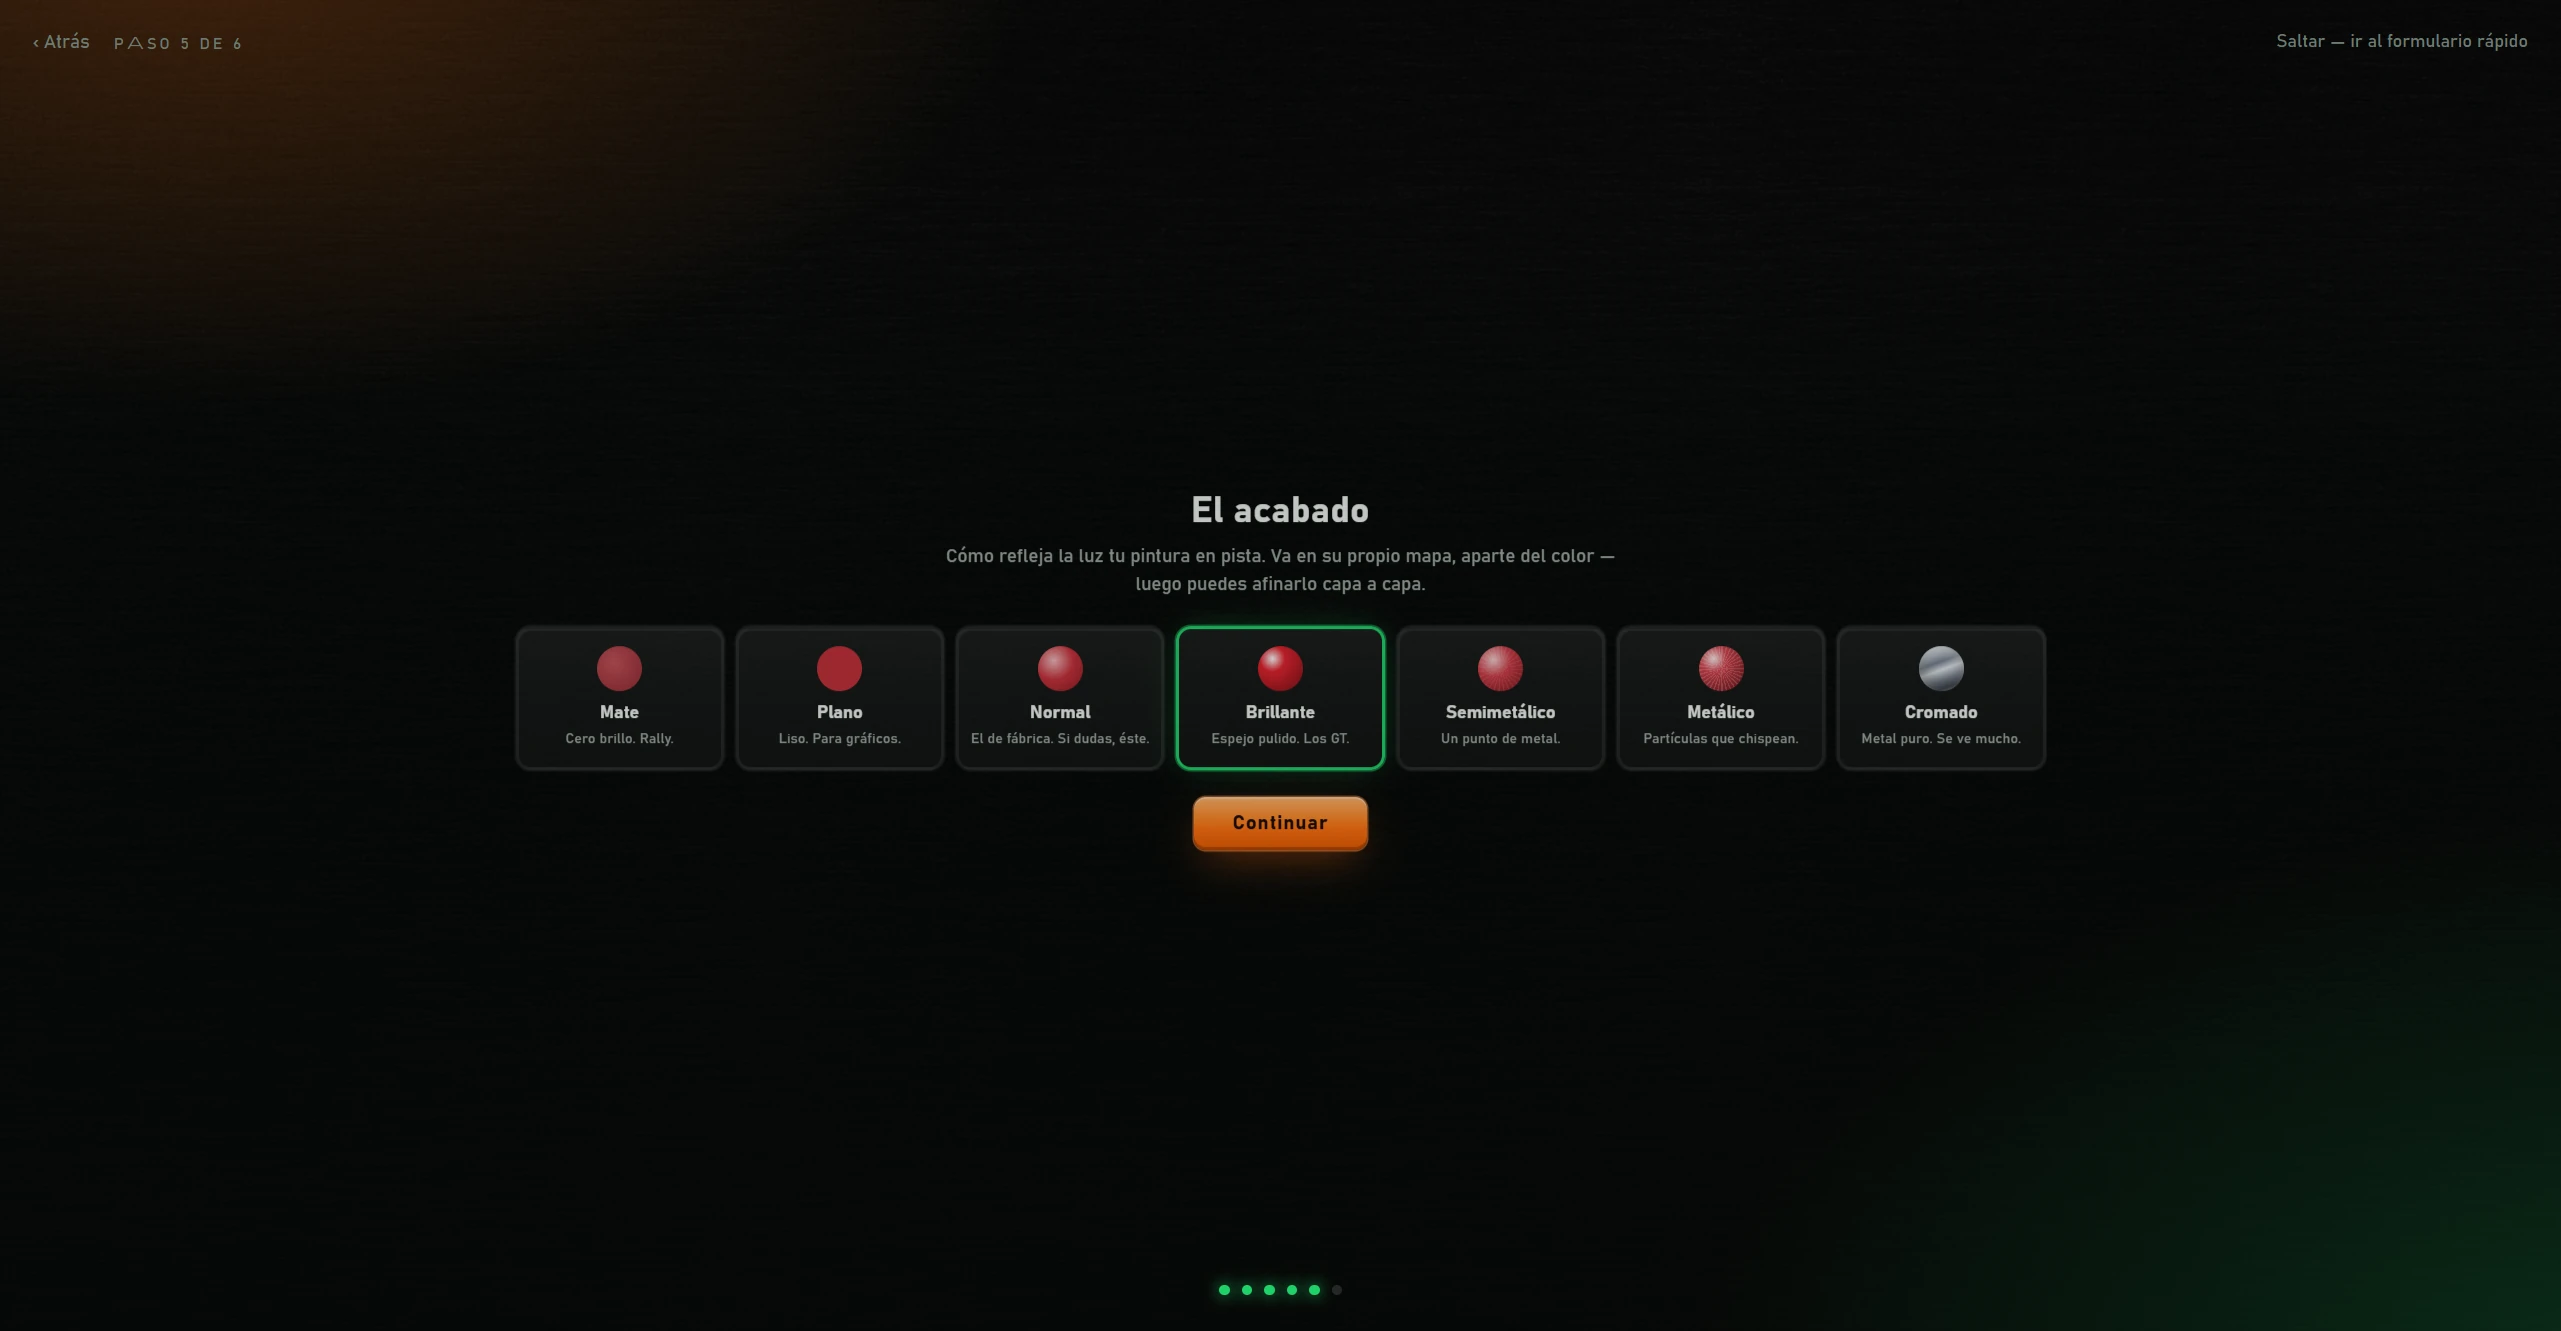
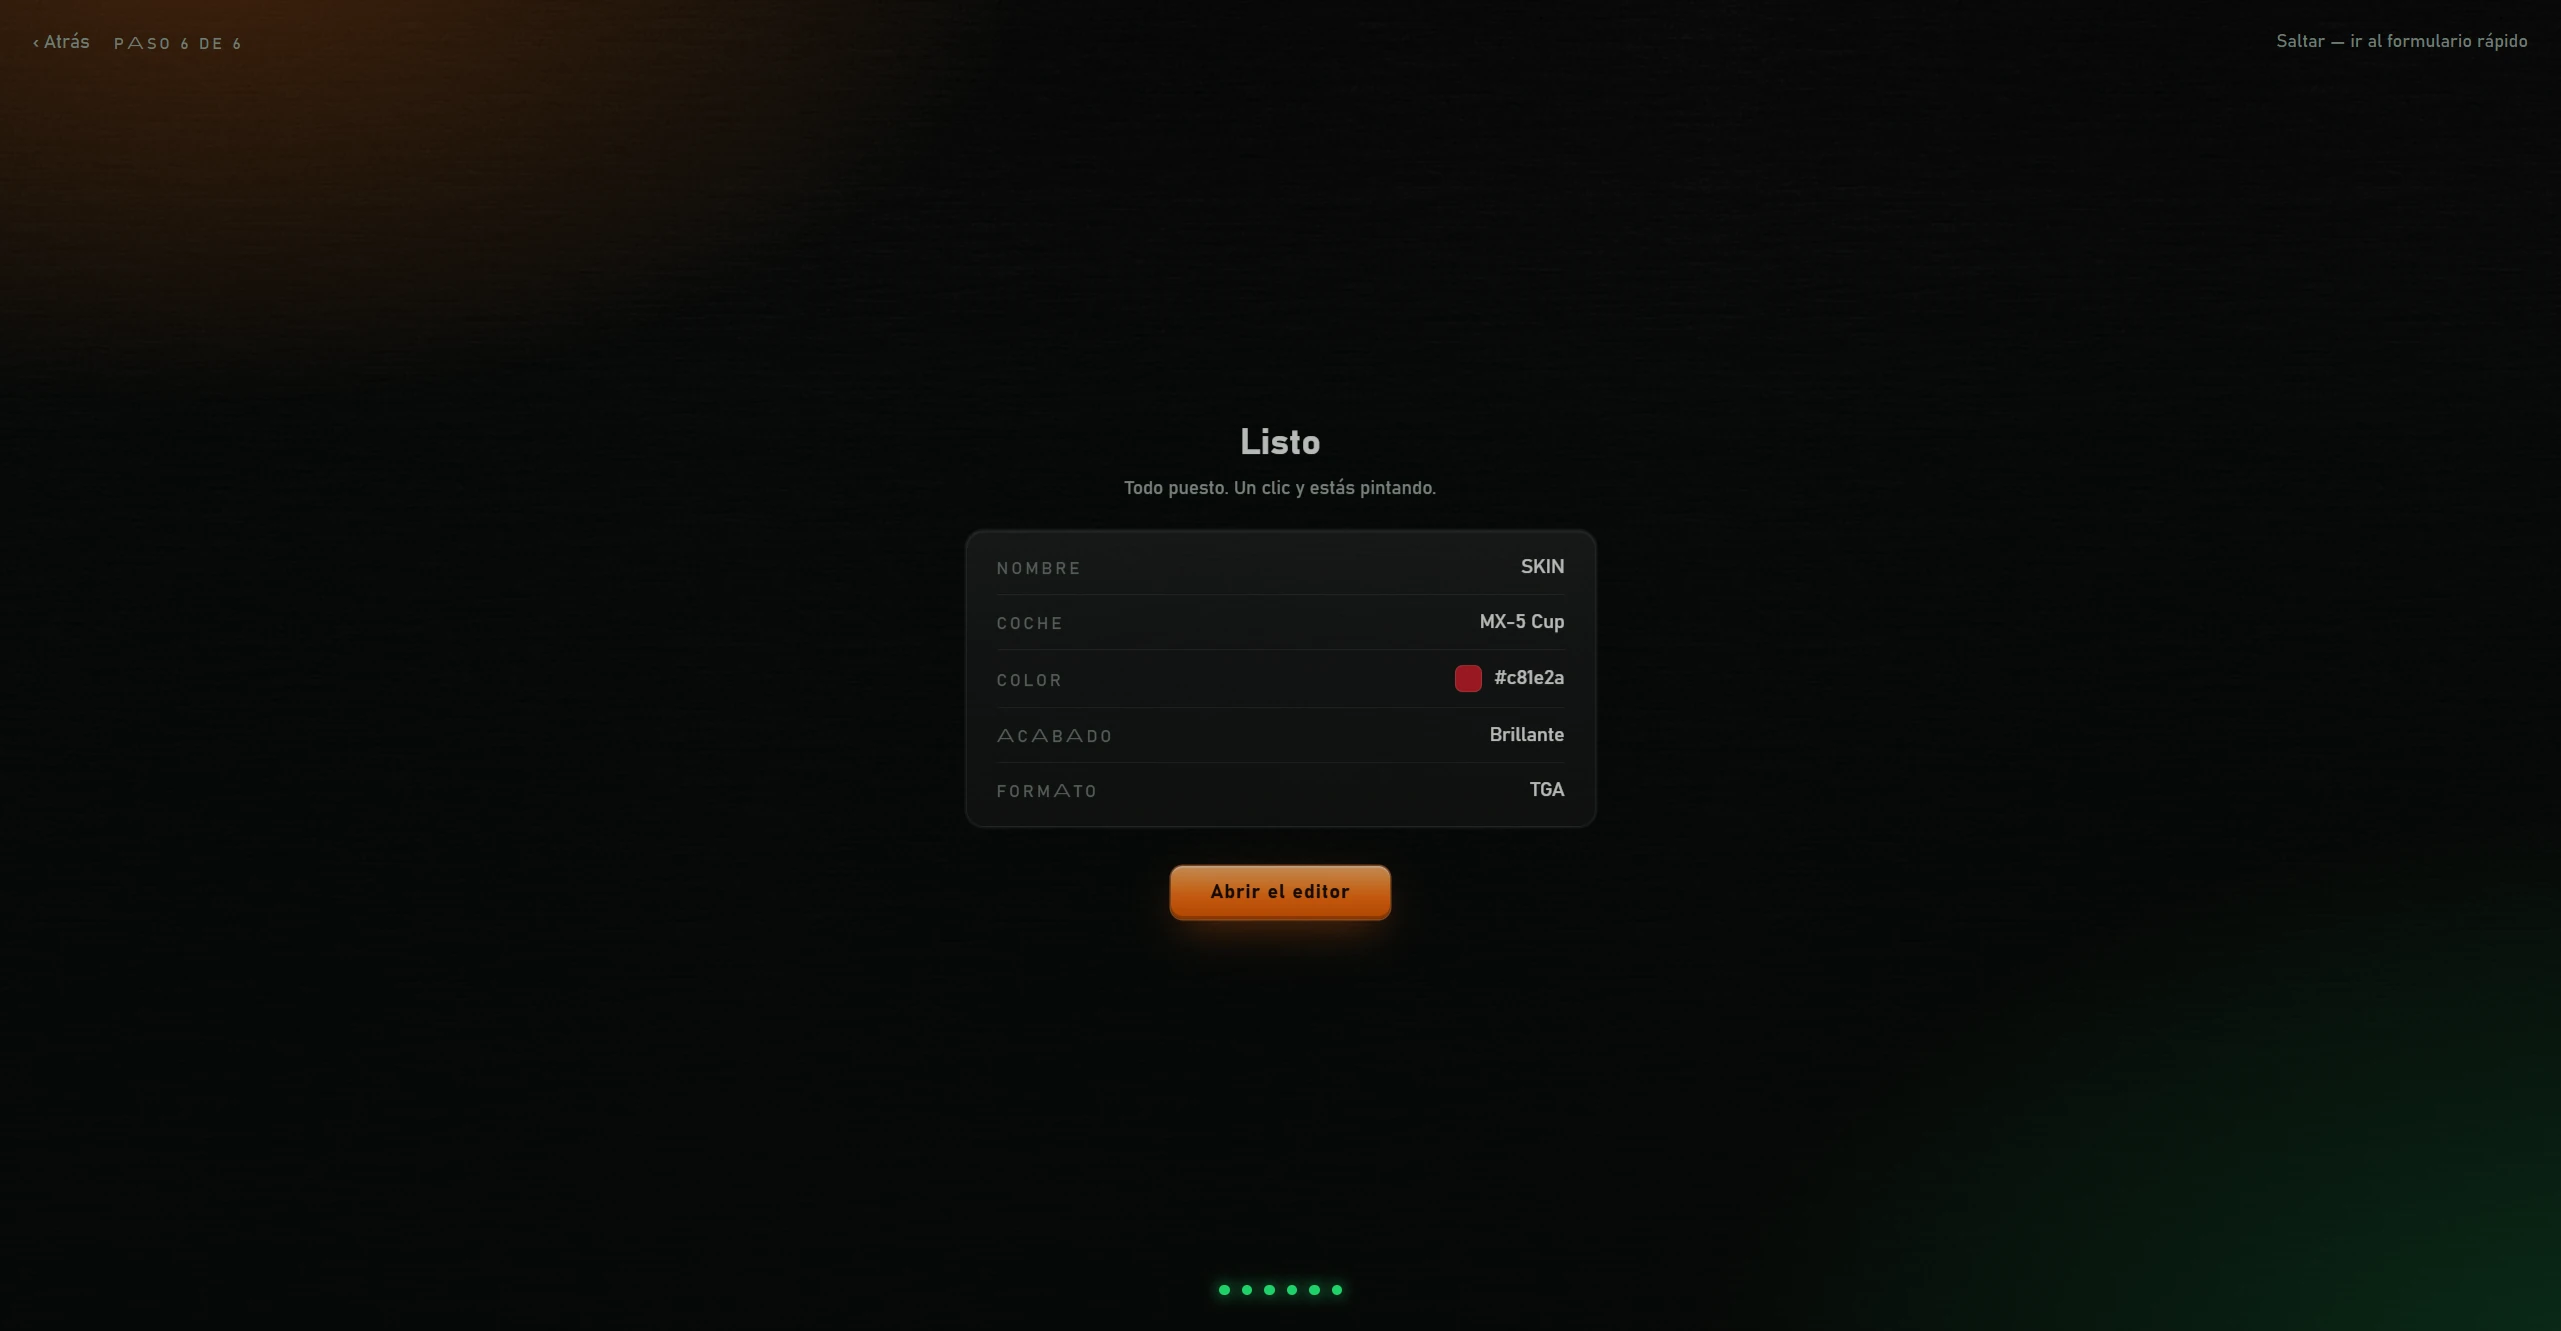
Steps 2 and 4 contain a text field and colour grid, with Continuar:
Wizard-created projects open with Ver mapa de acabado (show finish map) enabled (see 4.11), showing finish settings for each layer. Customer ID comes from the quick form, filled automatically if known.
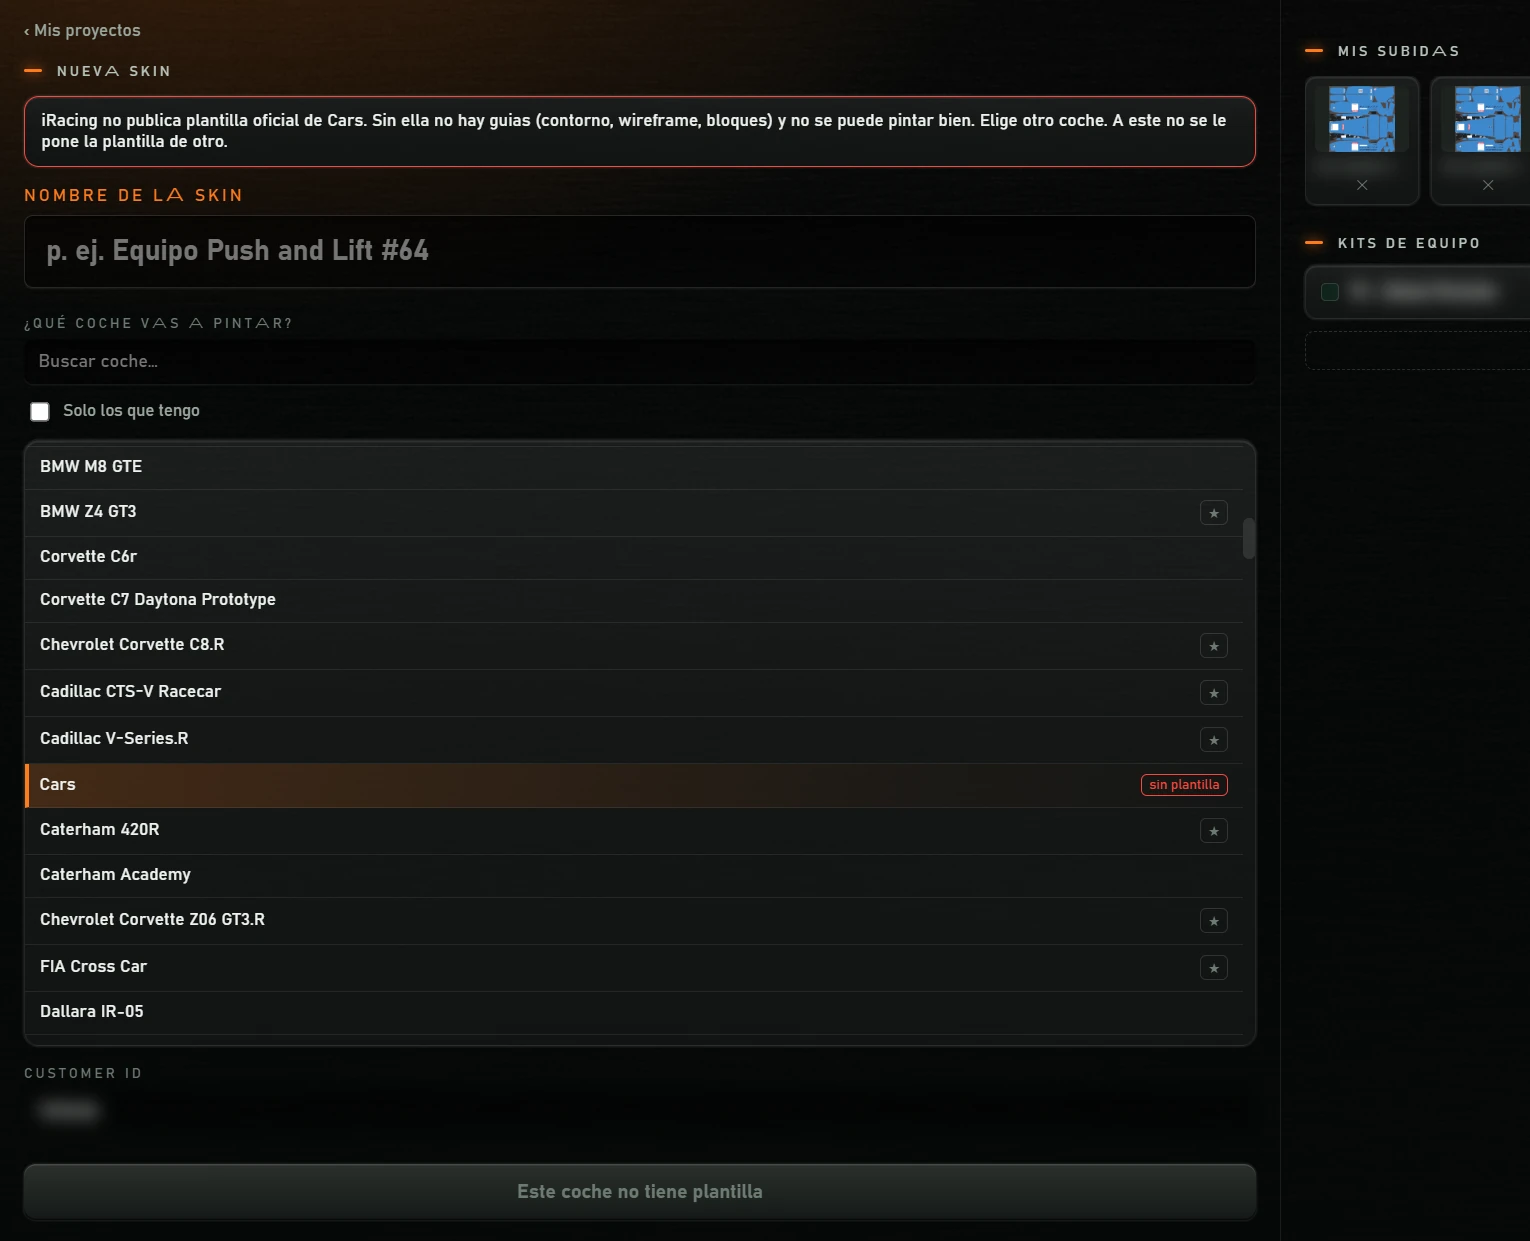
Shown via Saltar — ir al formulario rápido (skip to quick form). Everything on one screen:
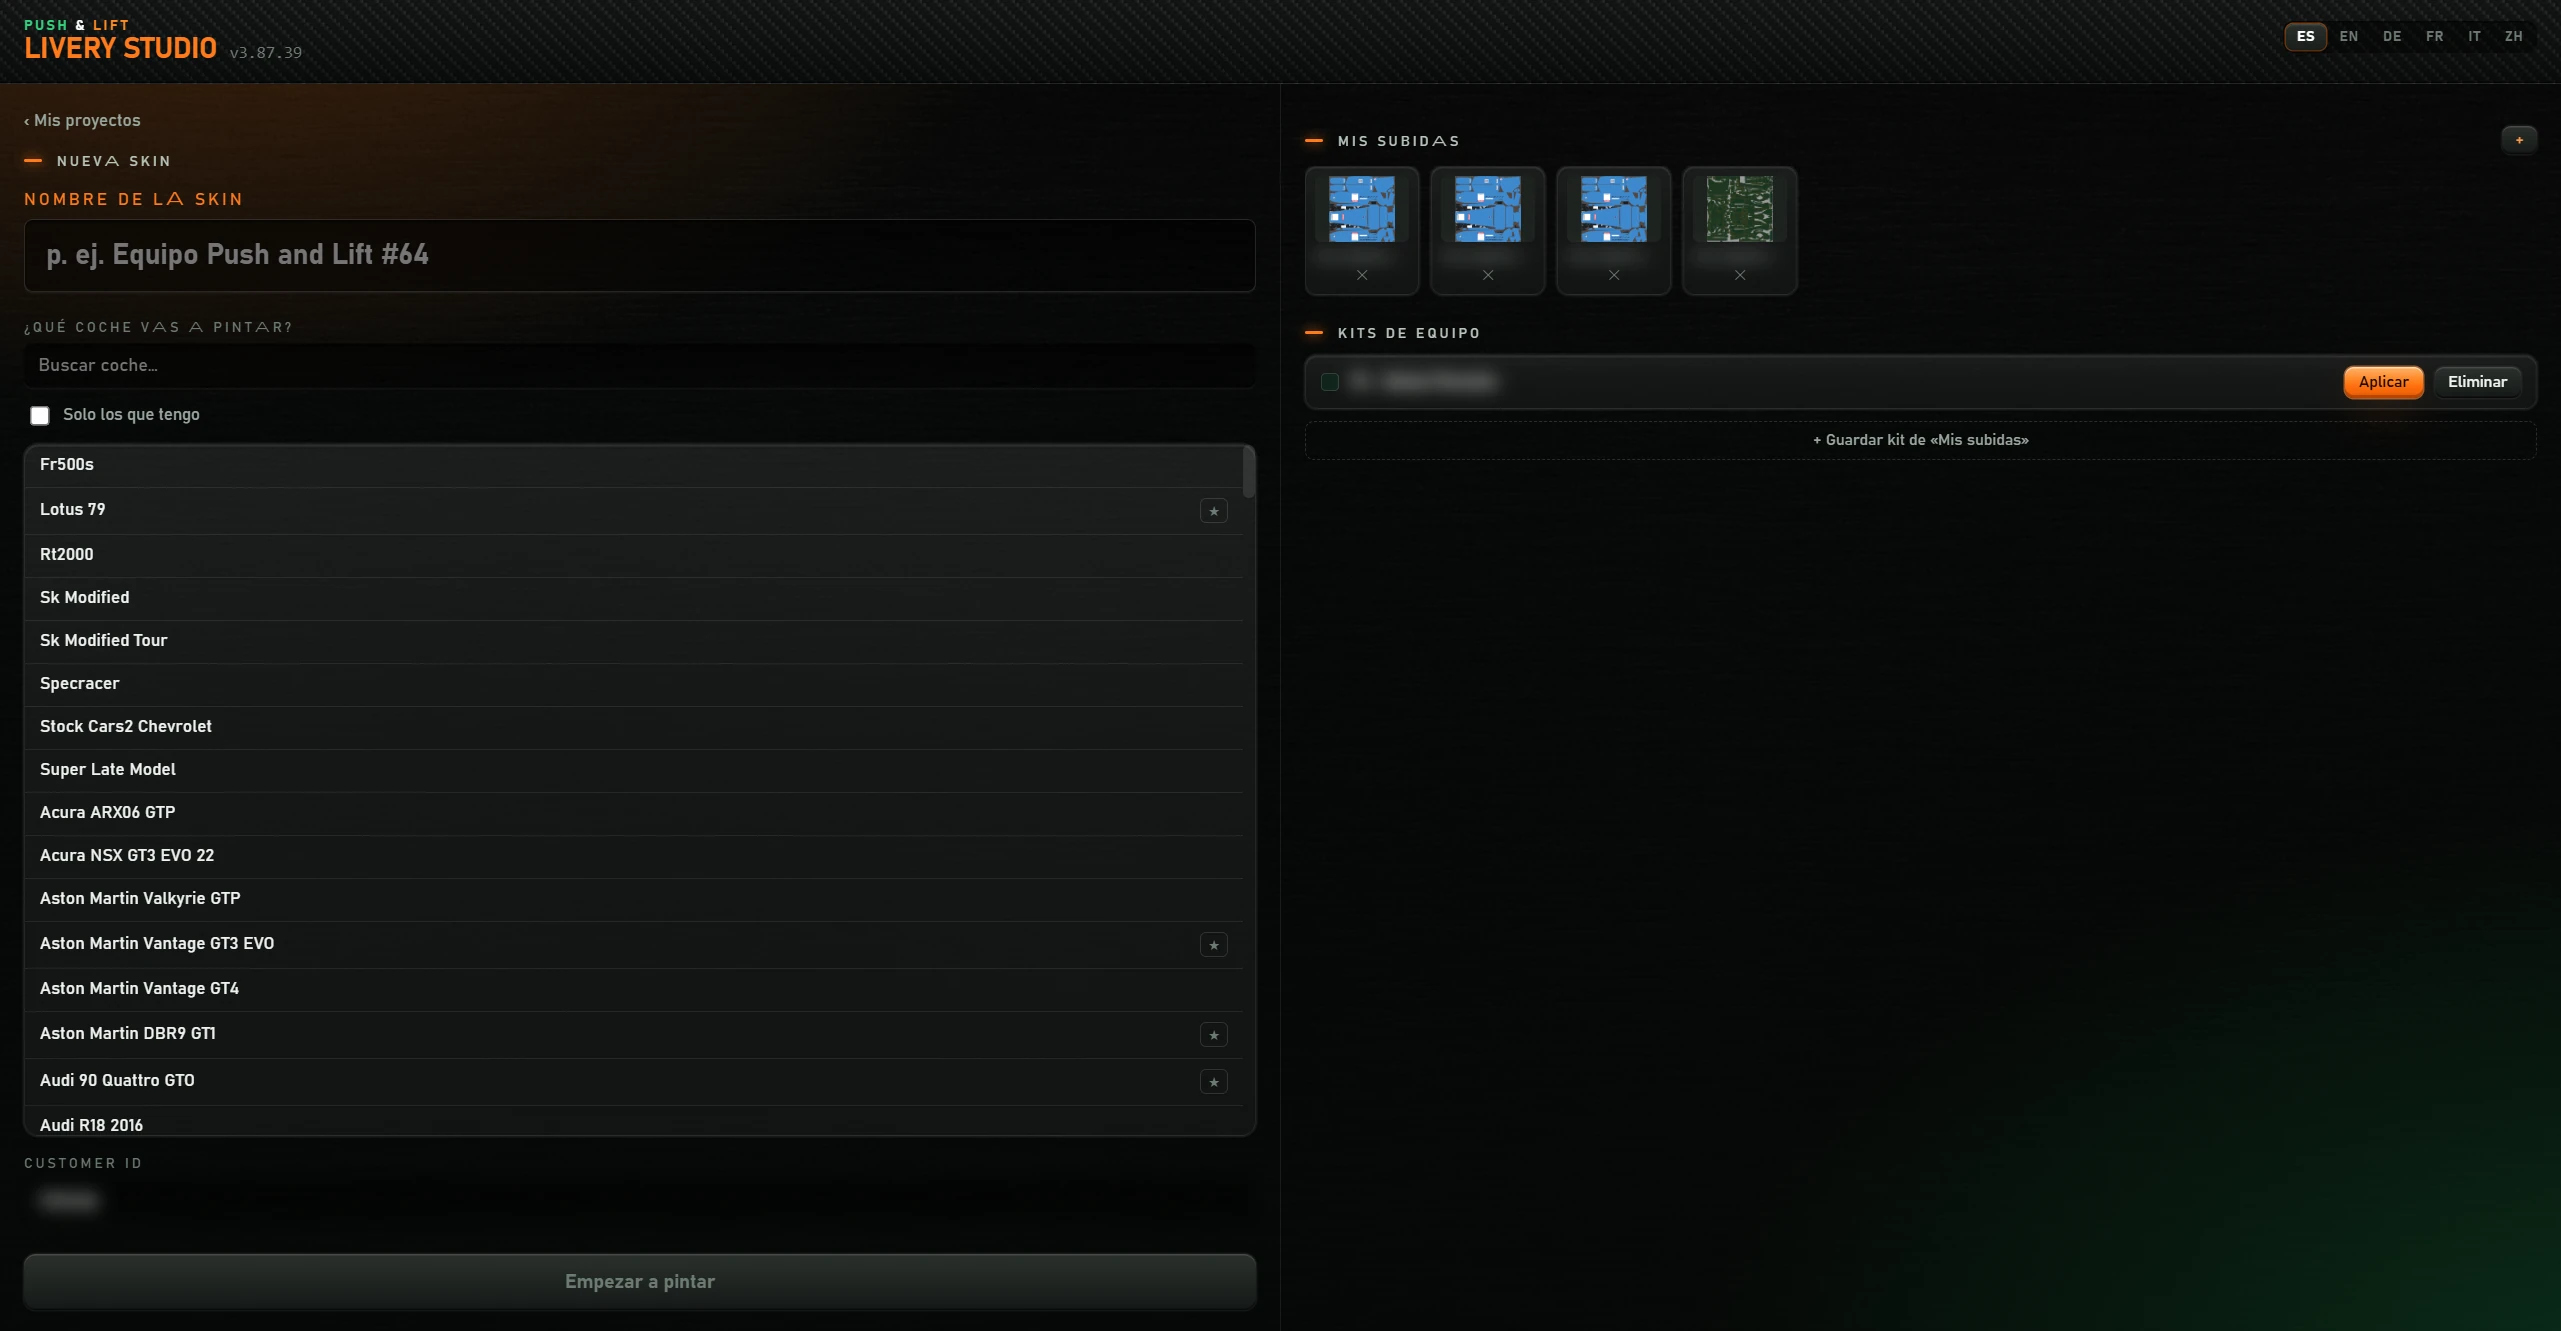
| Item | What it does |
|---|---|
| ‹ Mis proyectos (my projects) | Returns to the library. |
| Nombre de la skin (skin name) | Project name. |
| ¿Qué coche vas a pintar? · Buscar coche… (which car? · search car) | Filters the car list by name. |
| Solo los que tengo (only cars I own) | Shows only cars you own. |
| Car list | Click a car to select it. ★ means previously painted. sin plantilla (no template) means iRacing does not publish a template for that car (see below). |
| Customer ID | Your iRacing customer number. Tooltip: find it at members.iracing.com, next to your name at the top, or My Account → Profile. |
| Empezar a pintar (start painting) | Creates the project and opens the editor. Enabled after selecting a car with a template and once templates are available. |
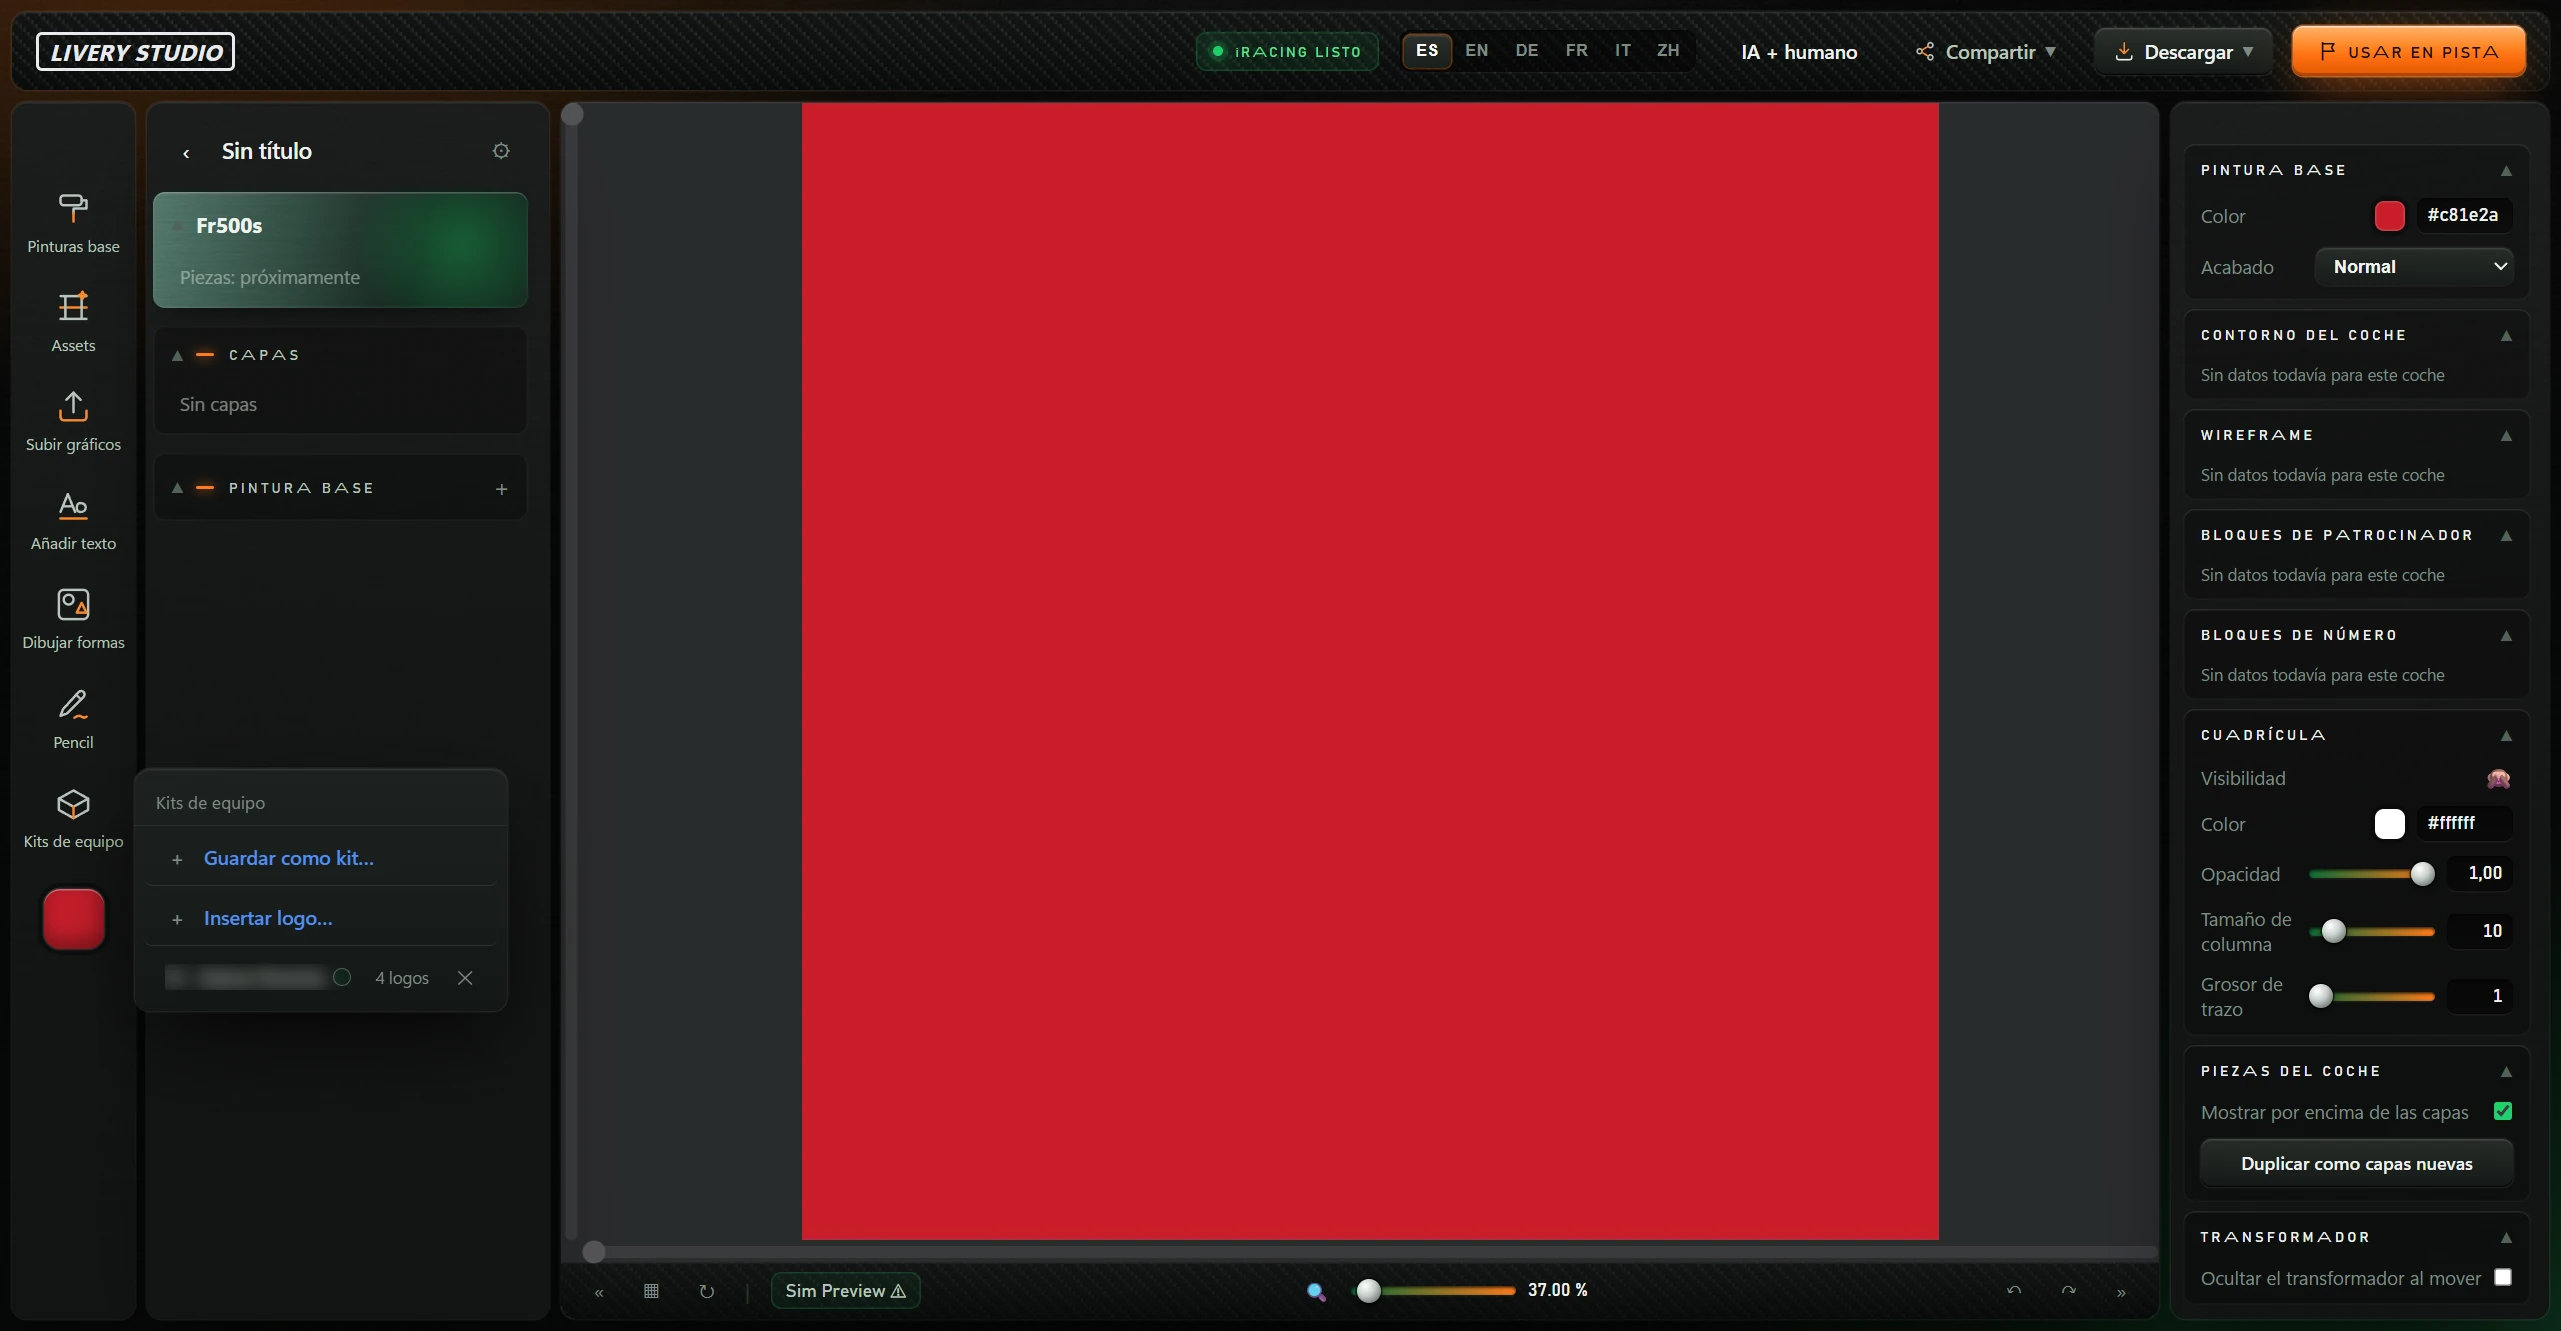
| Mis subidas (my uploads) · + | Uploads your logo via the Windows file picker. Each logo has an ✕ that deletes it without confirmation. |
| Kits de equipo (team kits) · Aplicar (apply) | Here it only displays kit colours in a message. Kits are actually applied inside the editor (see 4.9). |
| Kits de equipo (team kits) · Eliminar (delete) | Asks for confirmation and deletes the kit. No kits: “Sin kits guardados todavía”. |
| + Guardar kit de «Mis subidas» (save kit from my uploads) | Asks for team/customer name and up to 3 comma-separated team colours, such as #0a3d91,#ffffff, then saves the kit. |
While downloading, the top shows official templates downloading and progress percentage.
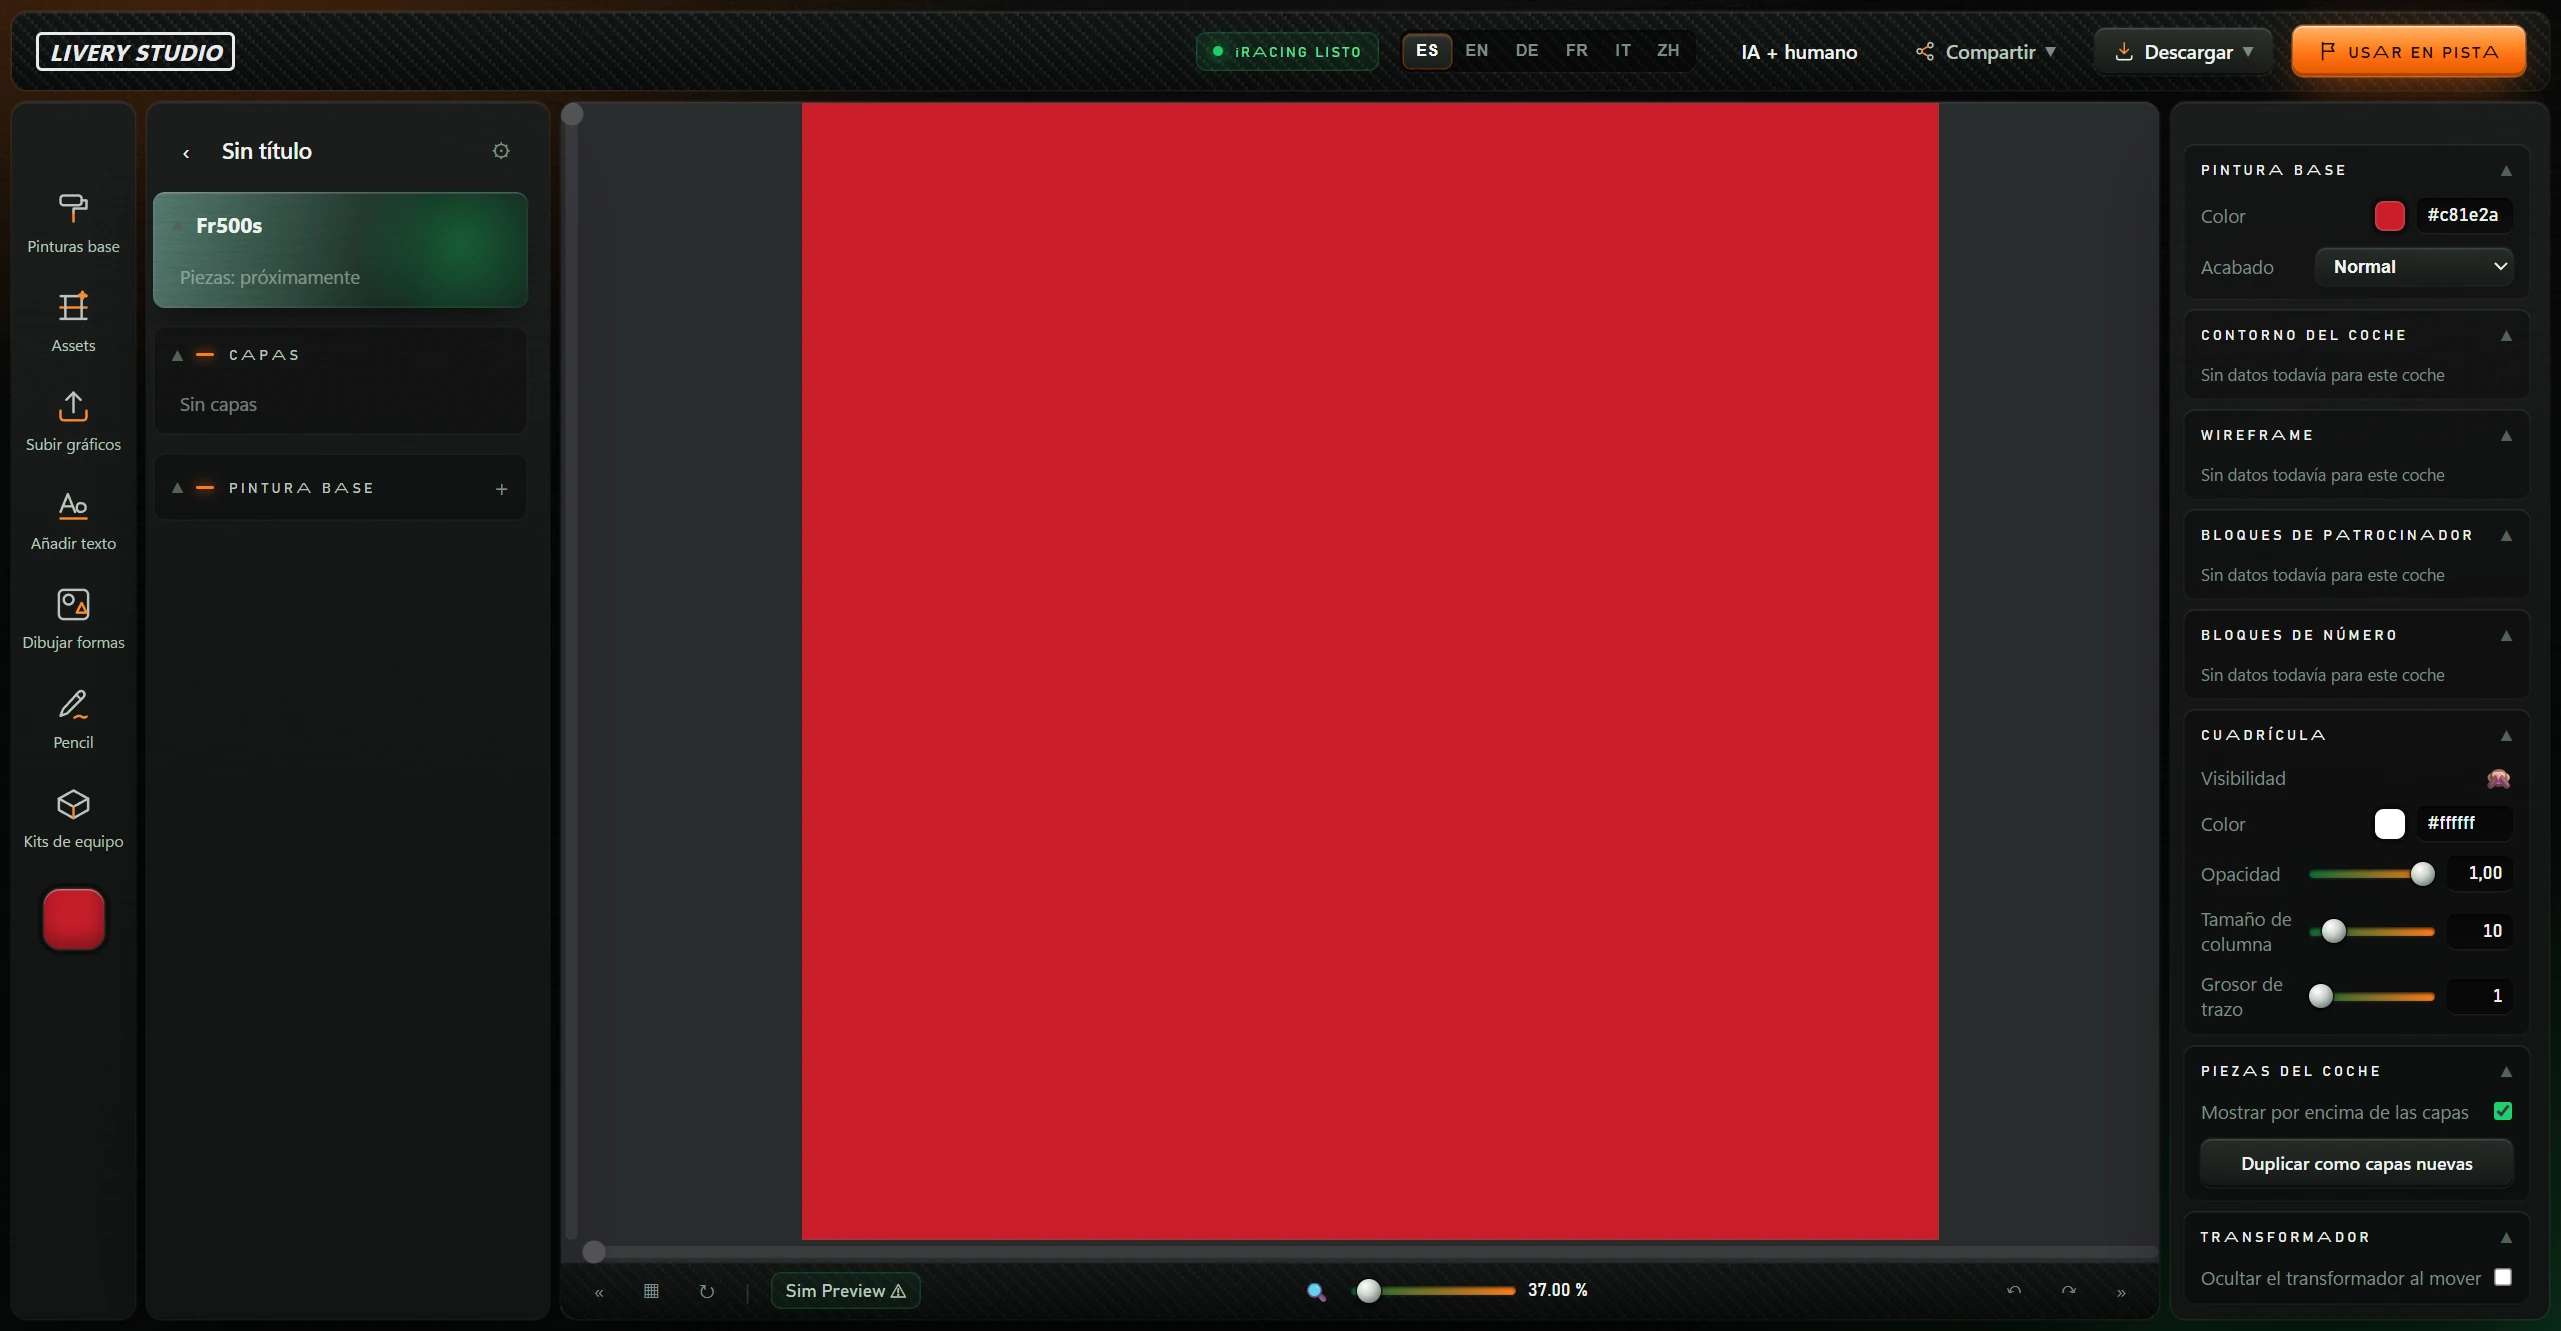
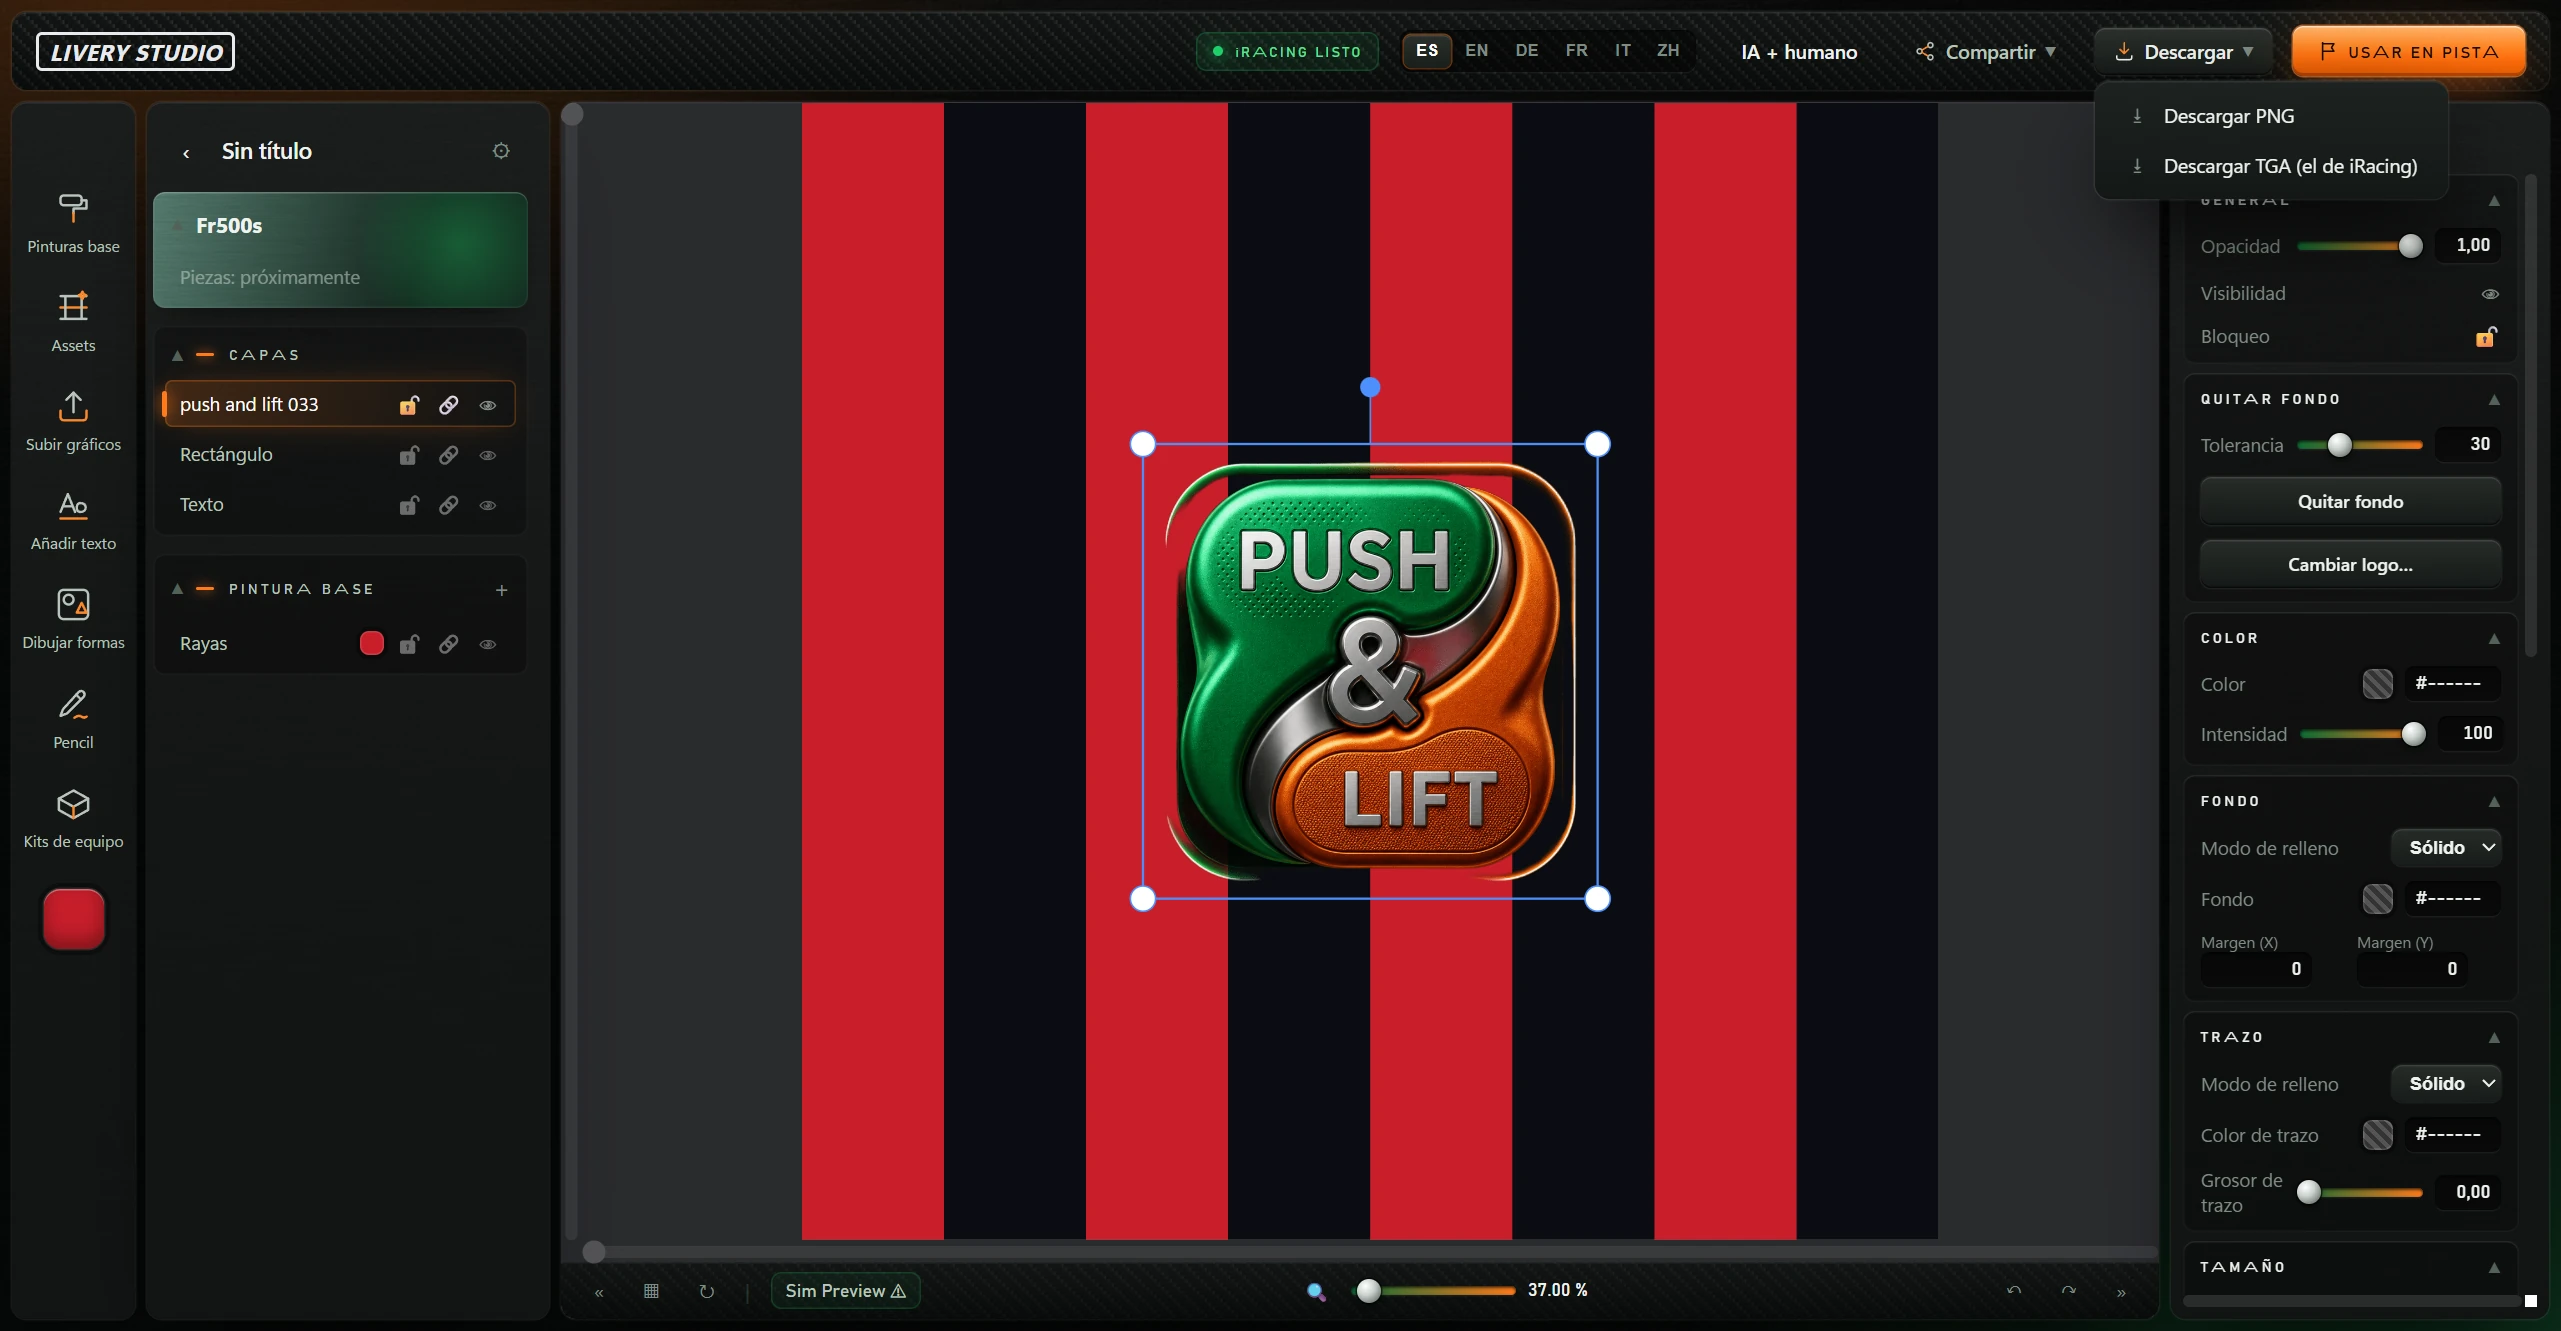
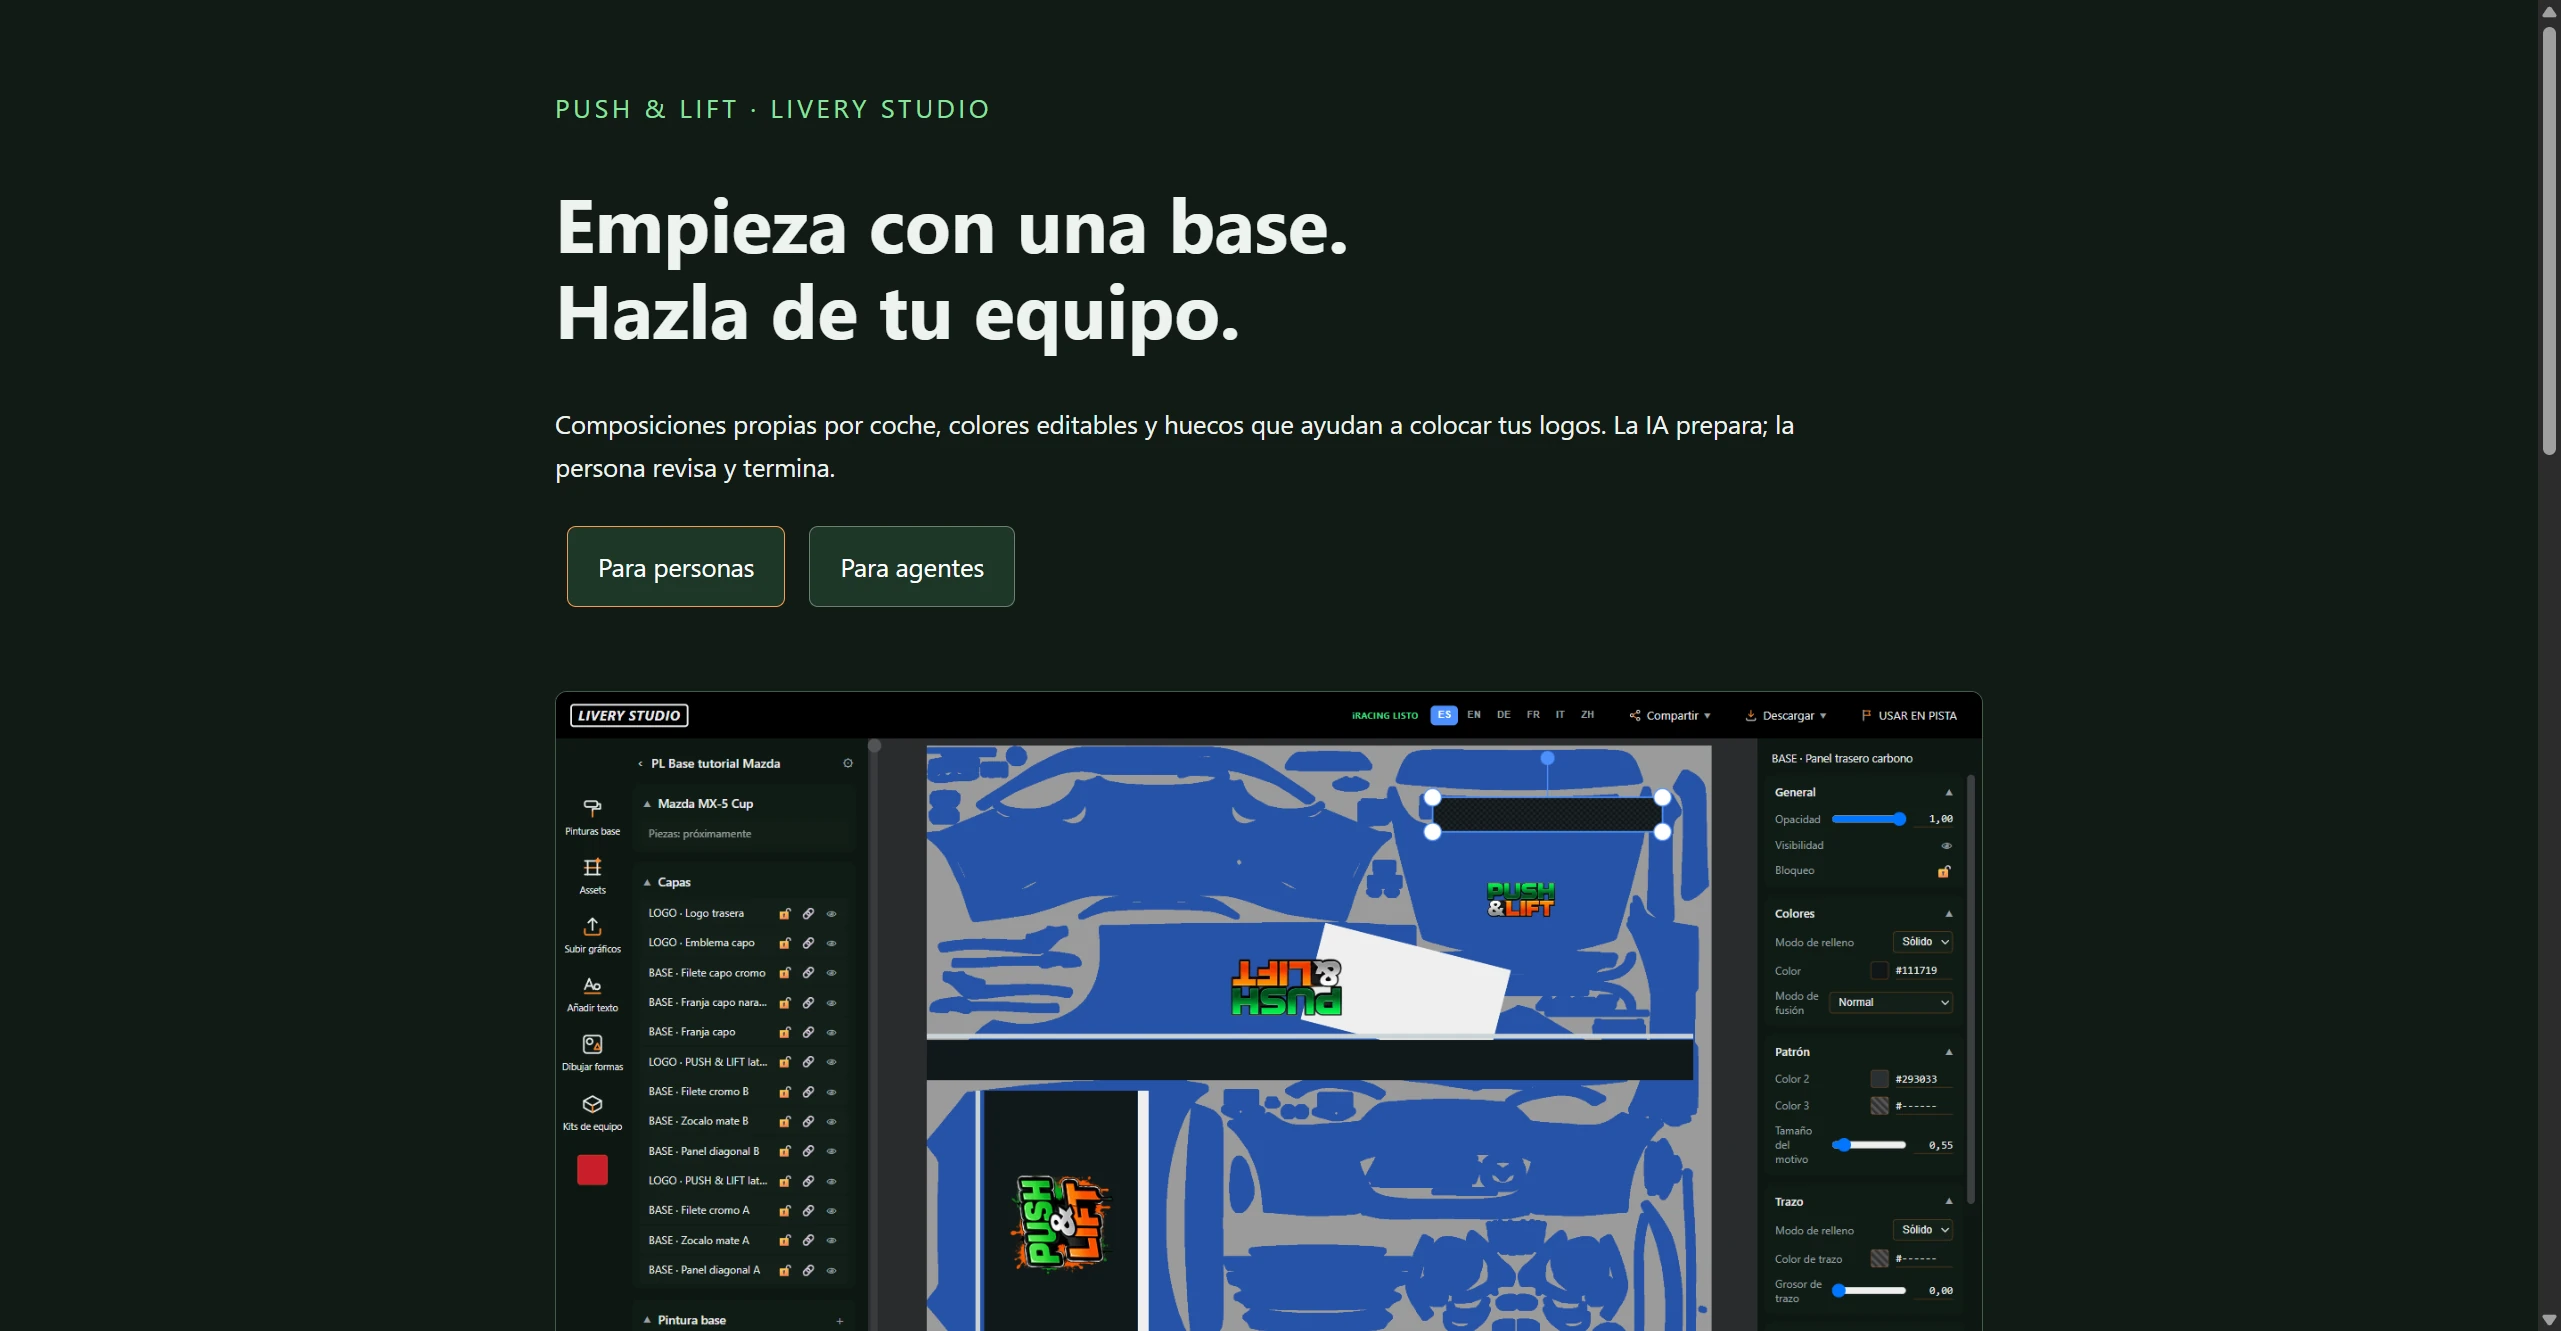
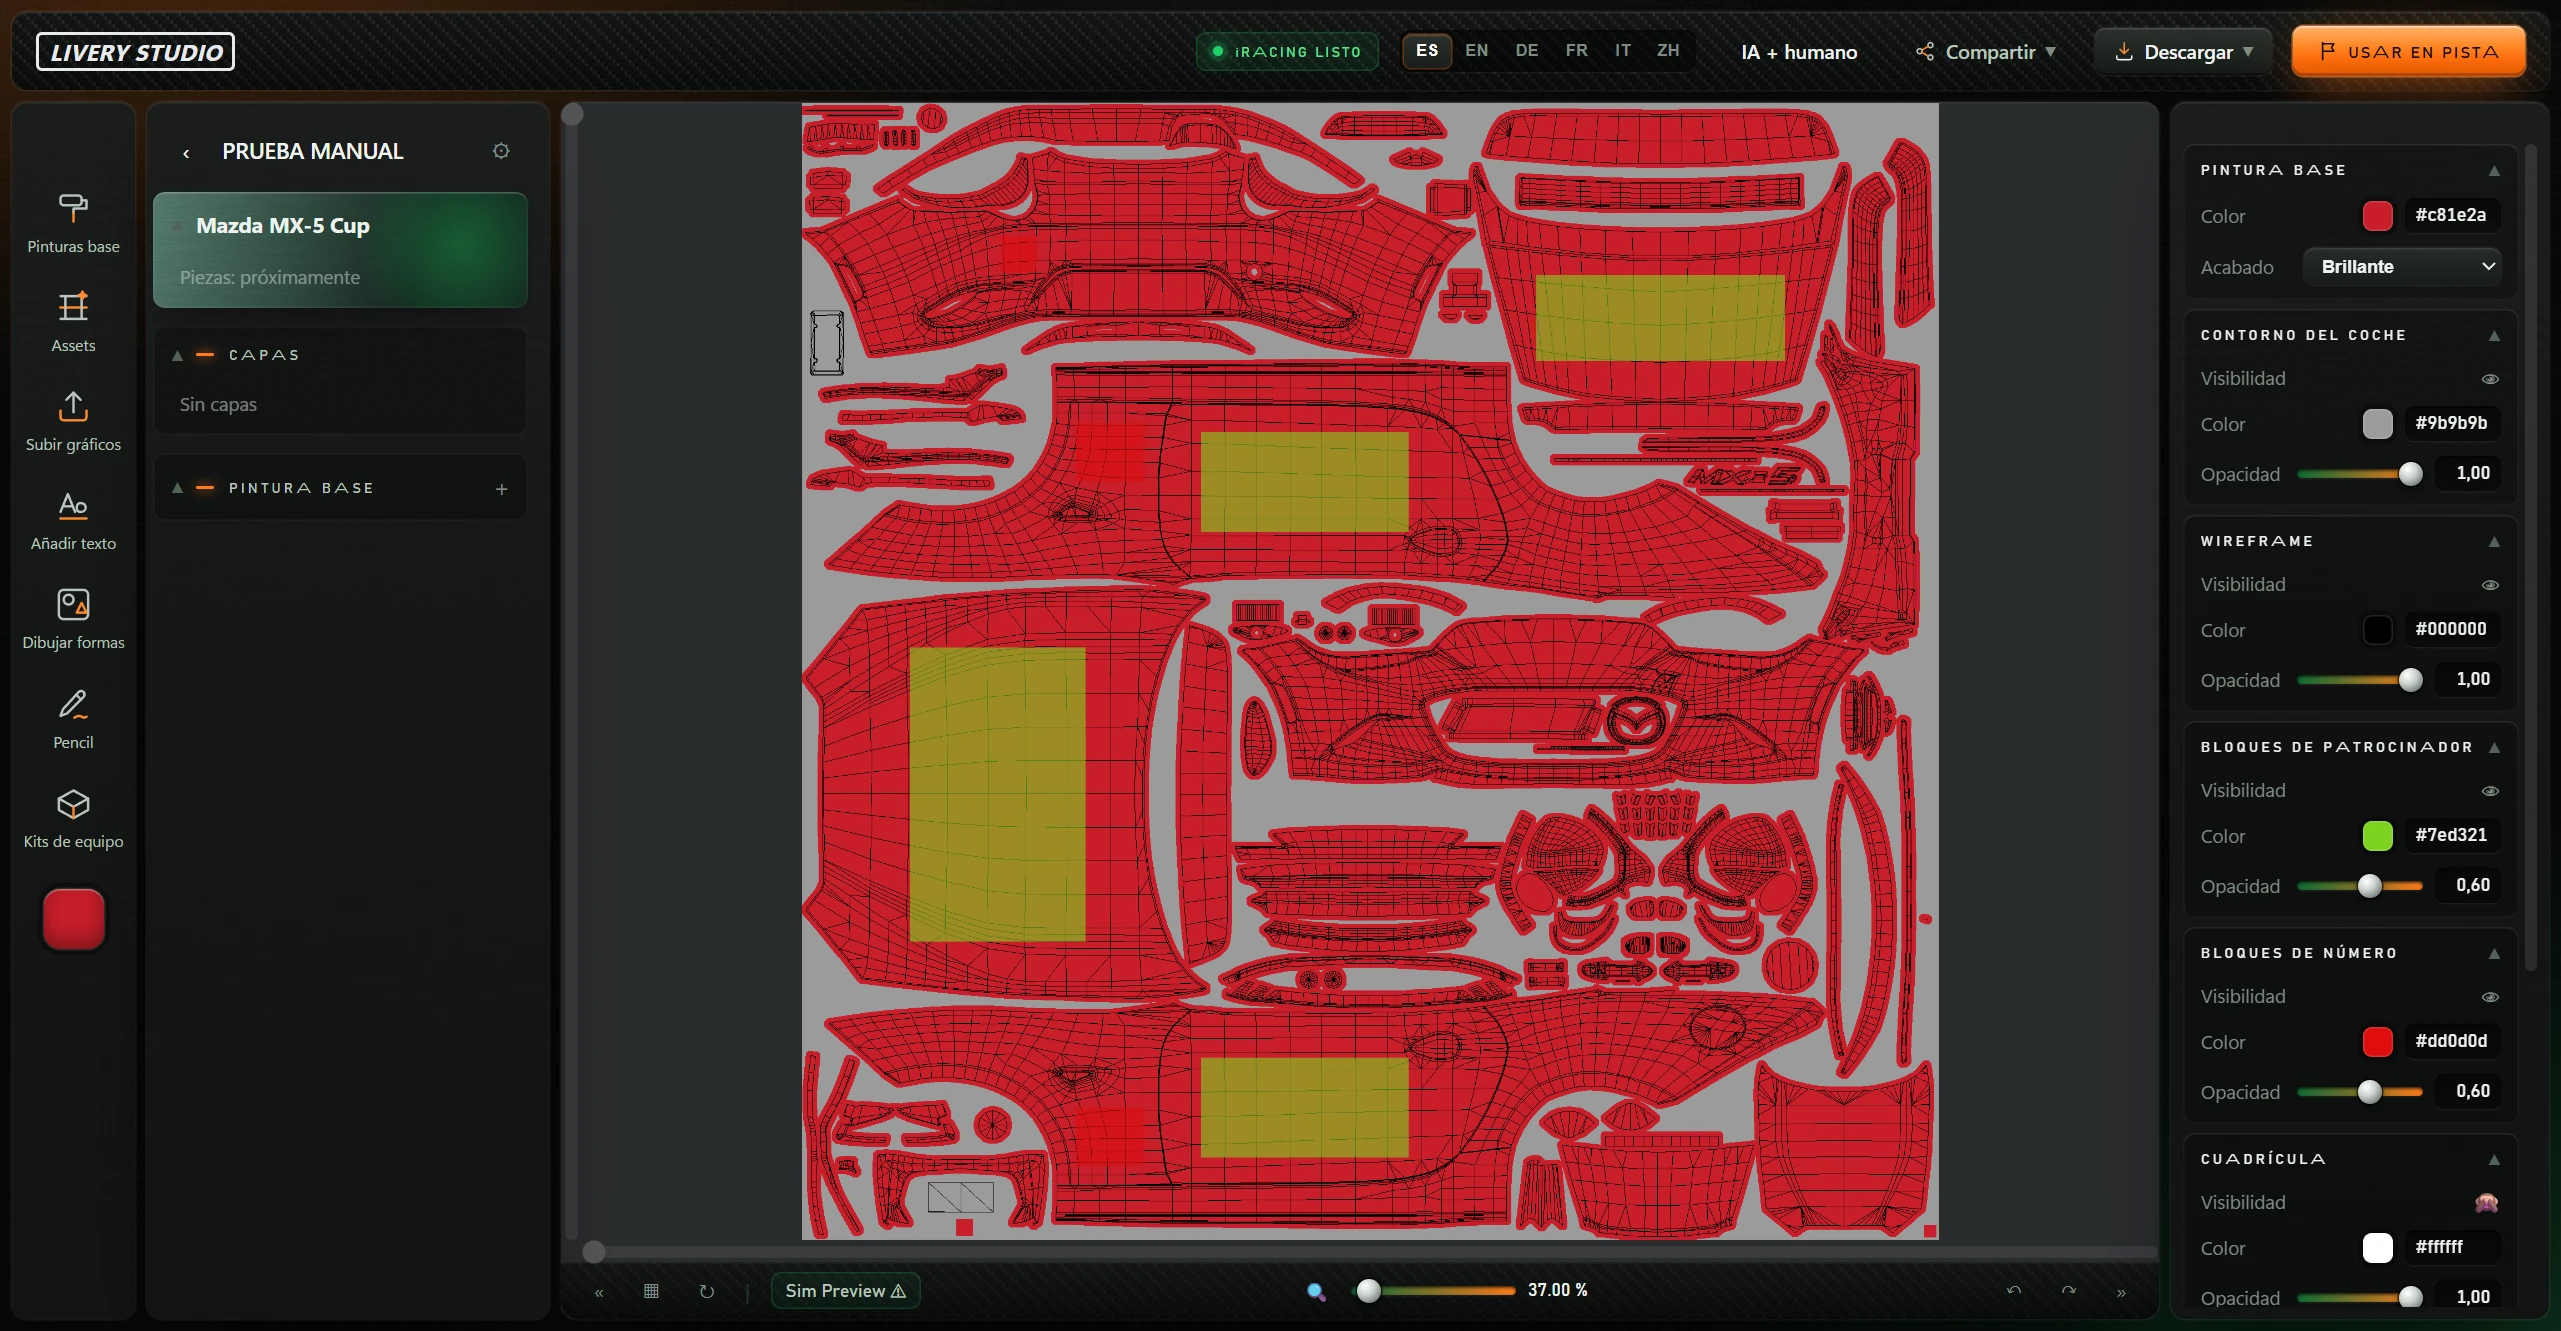
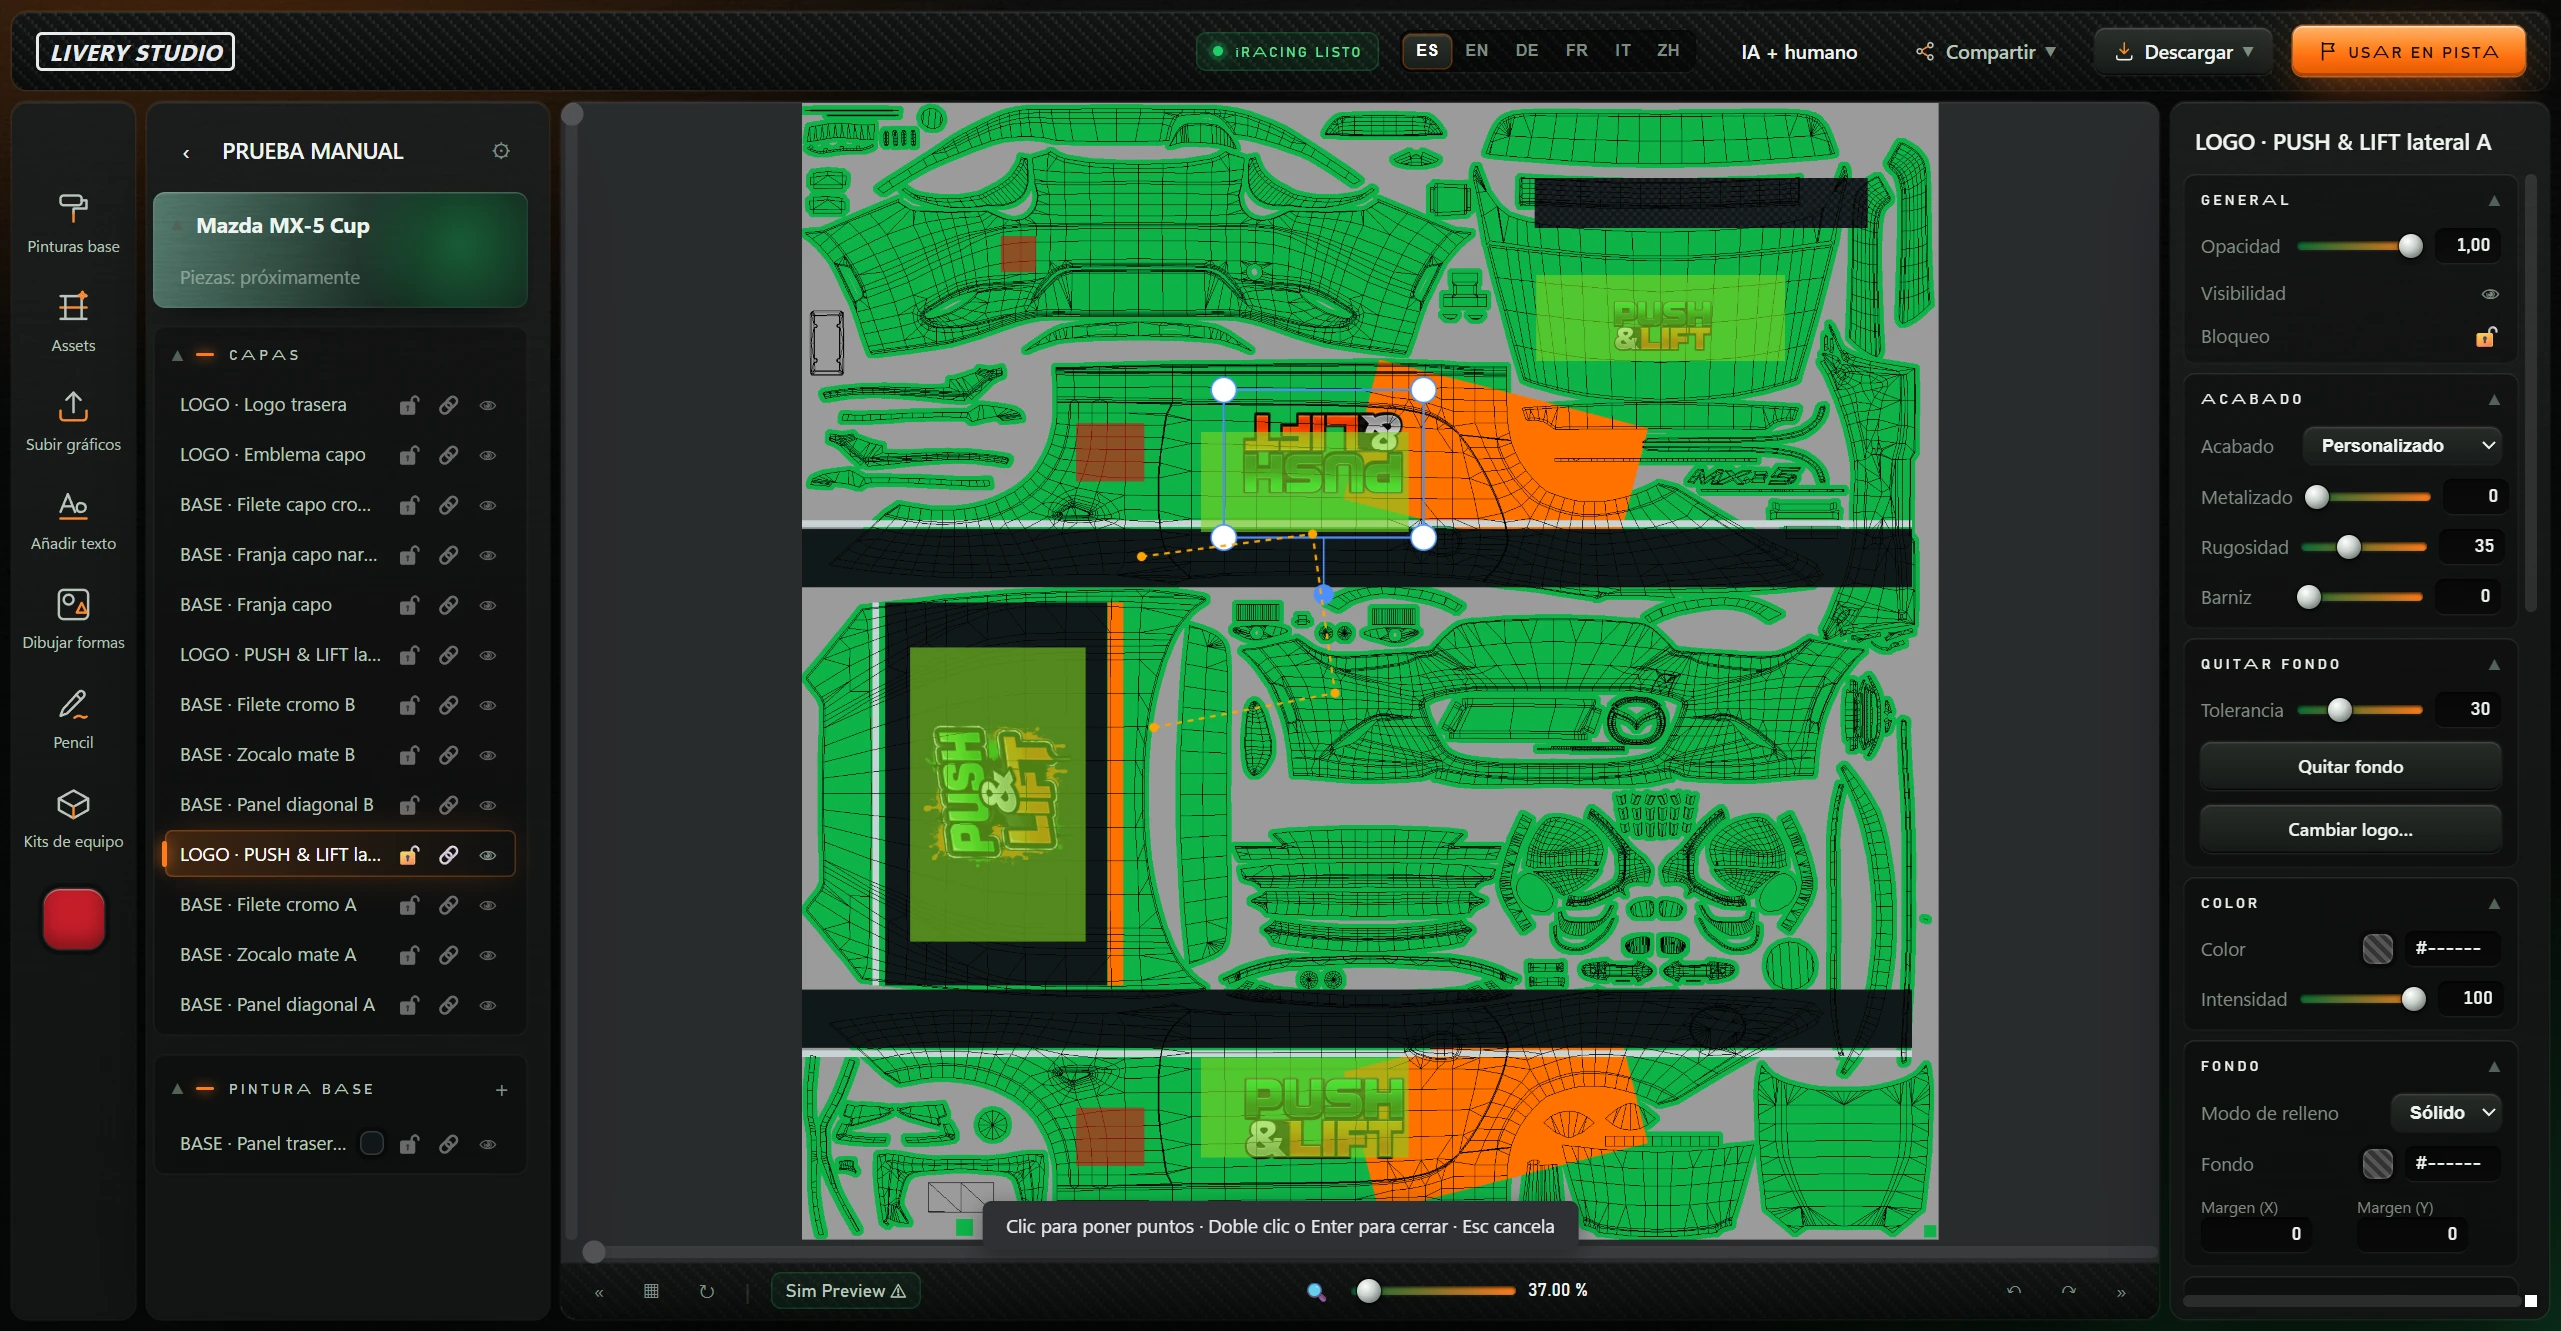
Five areas: top bar, left toolbar, project panel, canvas with bottom bar and right properties panel.
| Item | What it does |
|---|---|
| iRACING LISTO (iRacing ready) / SIN CARPETA DE iRACING (no iRacing folder) | Whether the app finds the iRacing paint folder. |
| ES EN DE FR IT ZH | Changes language immediately. |
| IA + humano (AI + human) | Opens a page explaining how to take turns painting with AI (see 4.12). |
| Compartir ▼ (share) | Shares nothing: only displays “No se puede subir desde aquí. Descarga y súbelo tú.” (Cannot upload here; download and upload it yourself.) |
| Descargar ▼ (download) | Menu with Descargar PNG (download PNG) and Descargar TGA (el de iRacing) (download TGA for iRacing). Opens the Windows save dialog. While saving: “Guardando…”. When finished: “Exportado · (path)”. |
| USAR EN PISTA (use on track) | Installs paint and finish map in iRacing for the selected car and Customer ID. While working: “Instalando…”. See 6. |

| Tool | What it does |
|---|---|
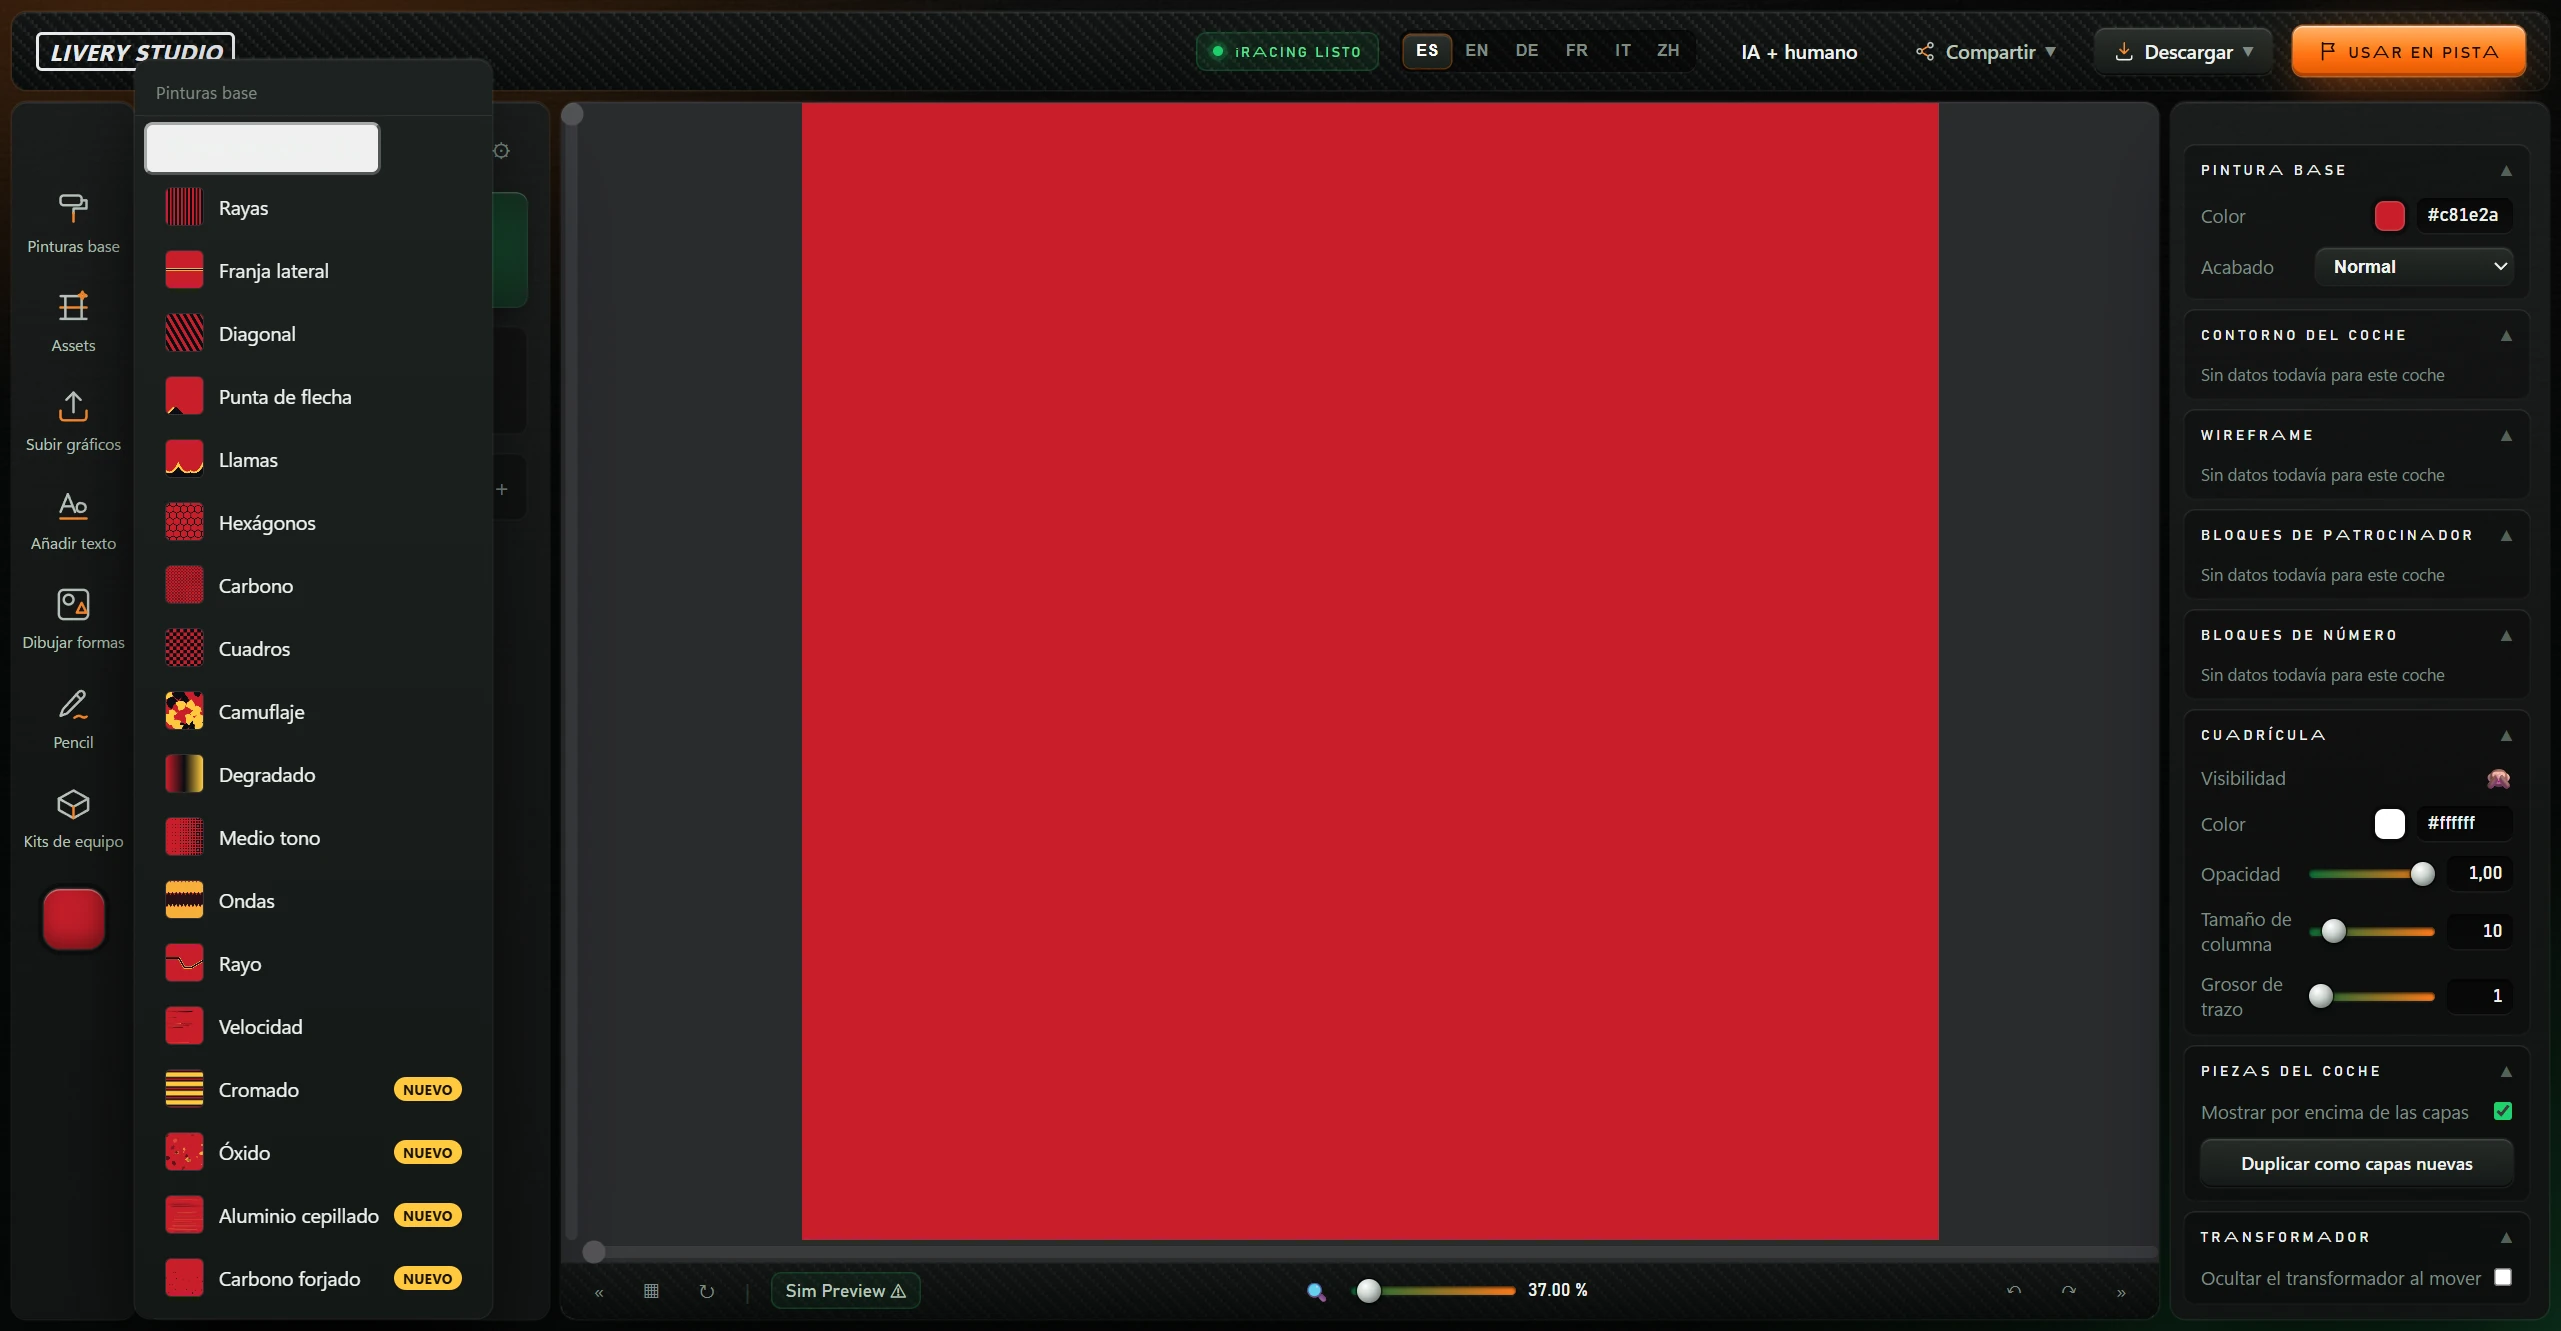
| Pinturas base (base paints) | Menu with Bases del coche · PL (PL car bases) and 18 full-canvas patterns (see 4.6). |
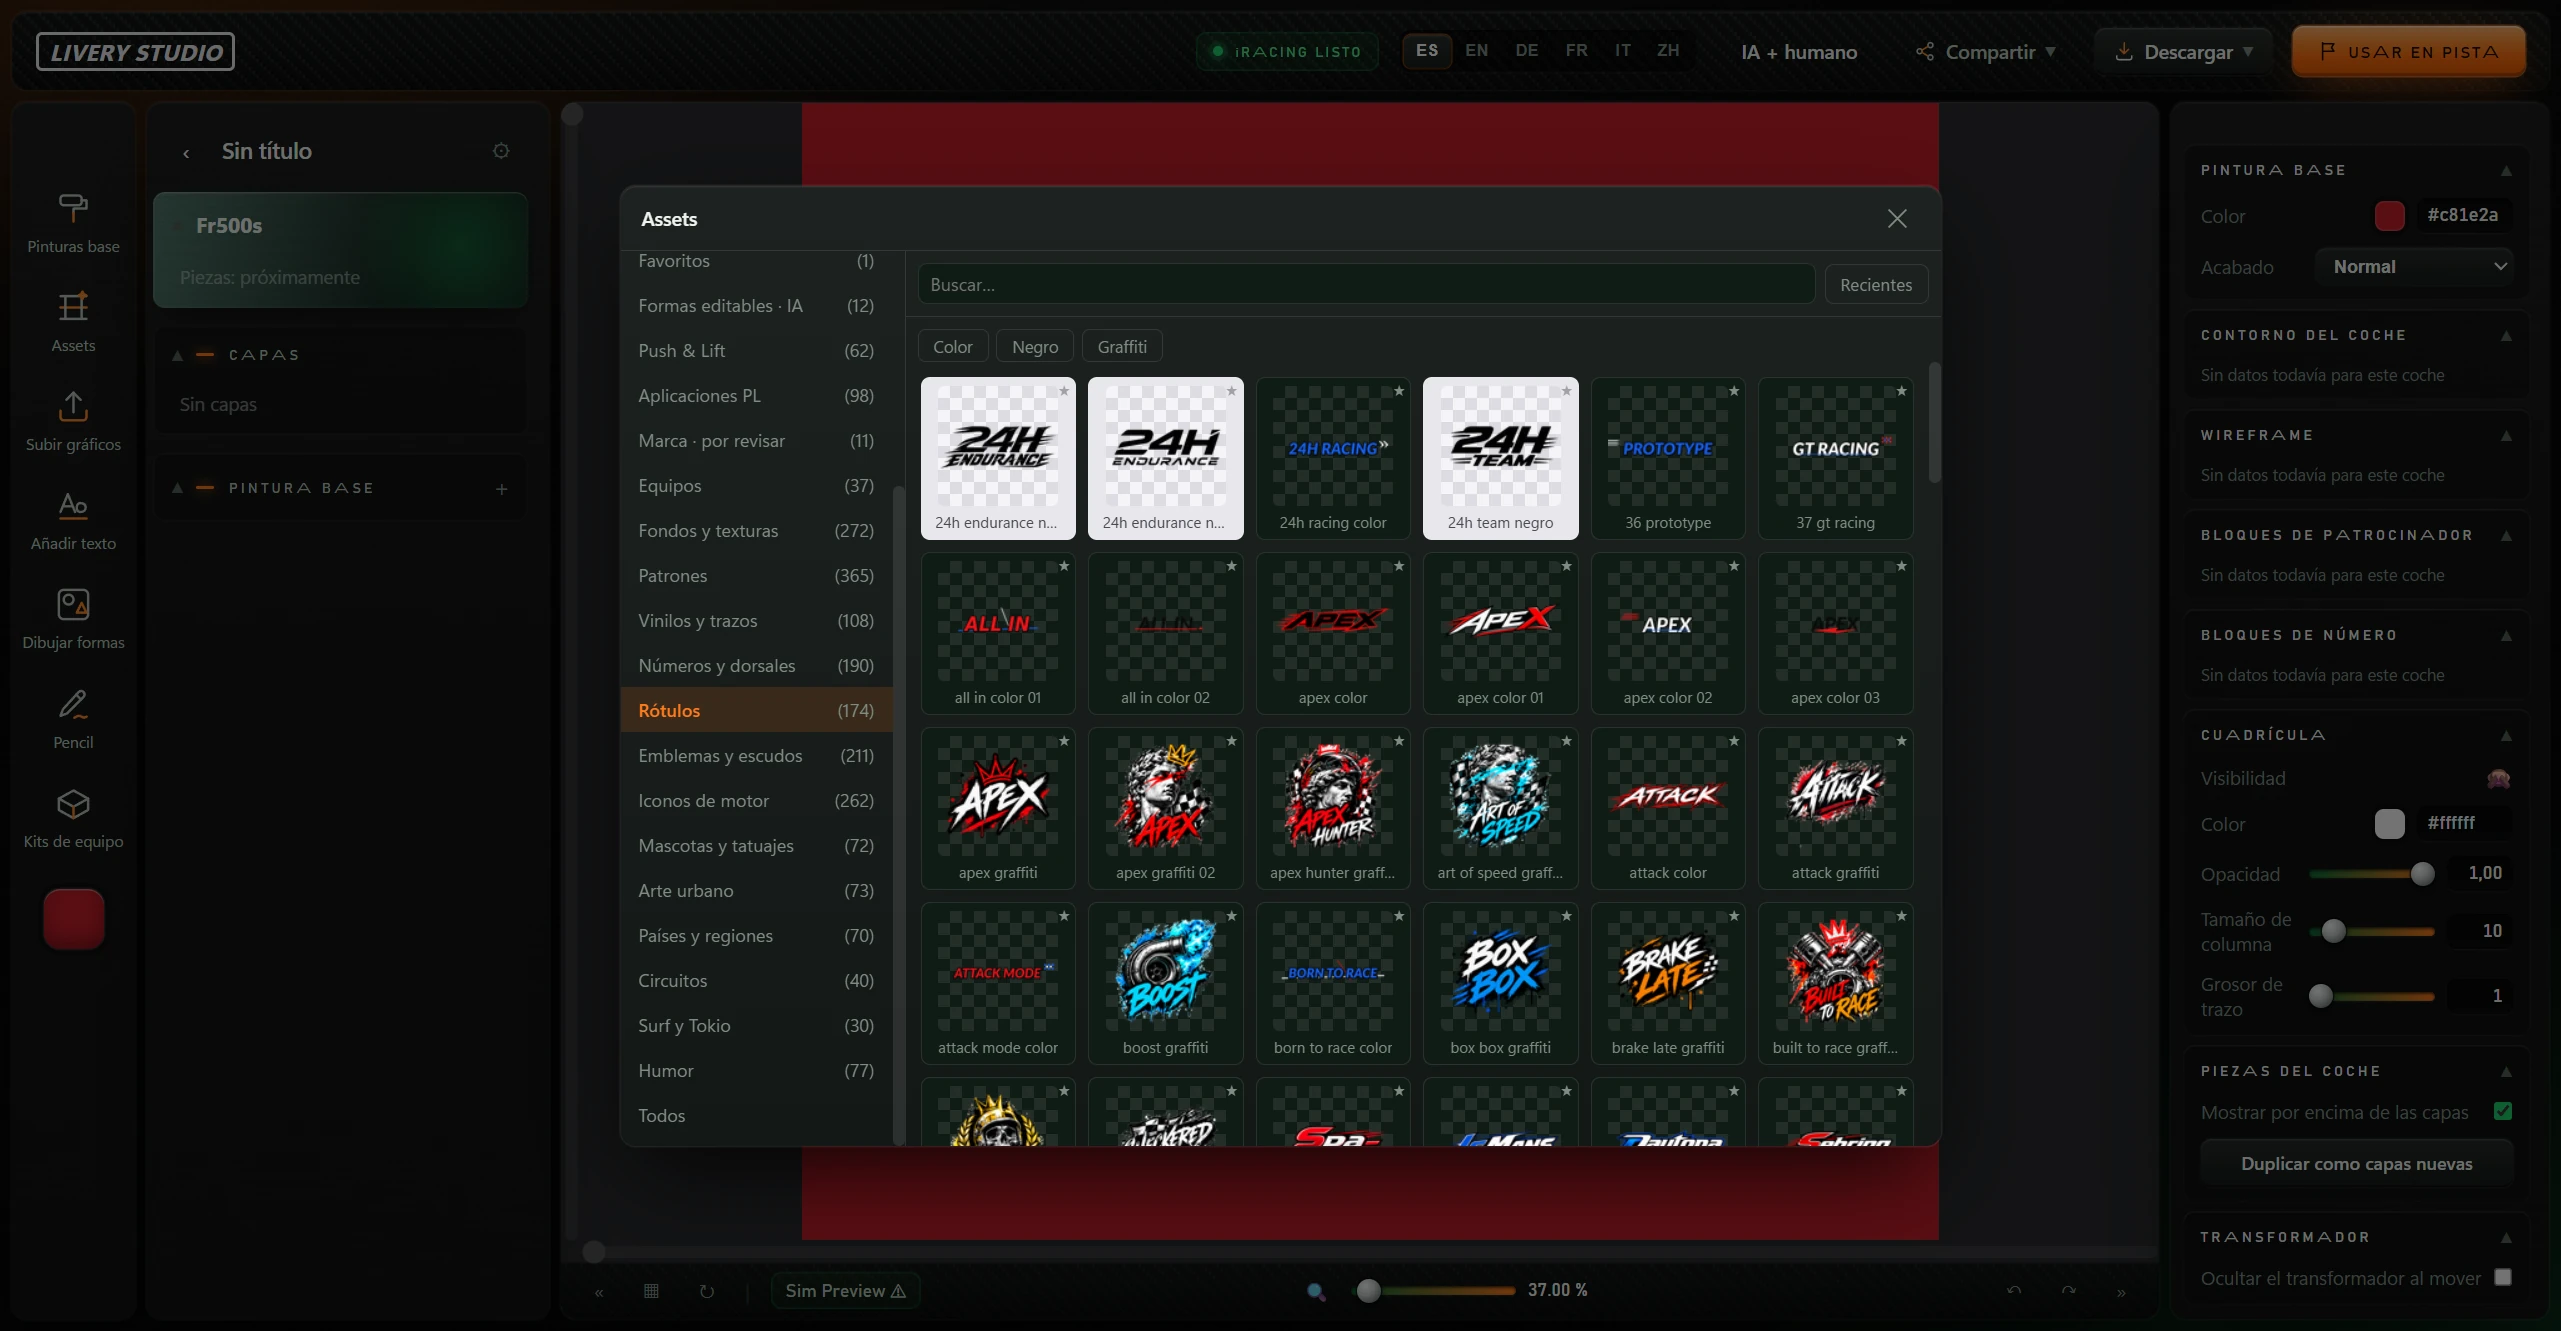
| Assets | Opens graphics and library (see 4.7). |
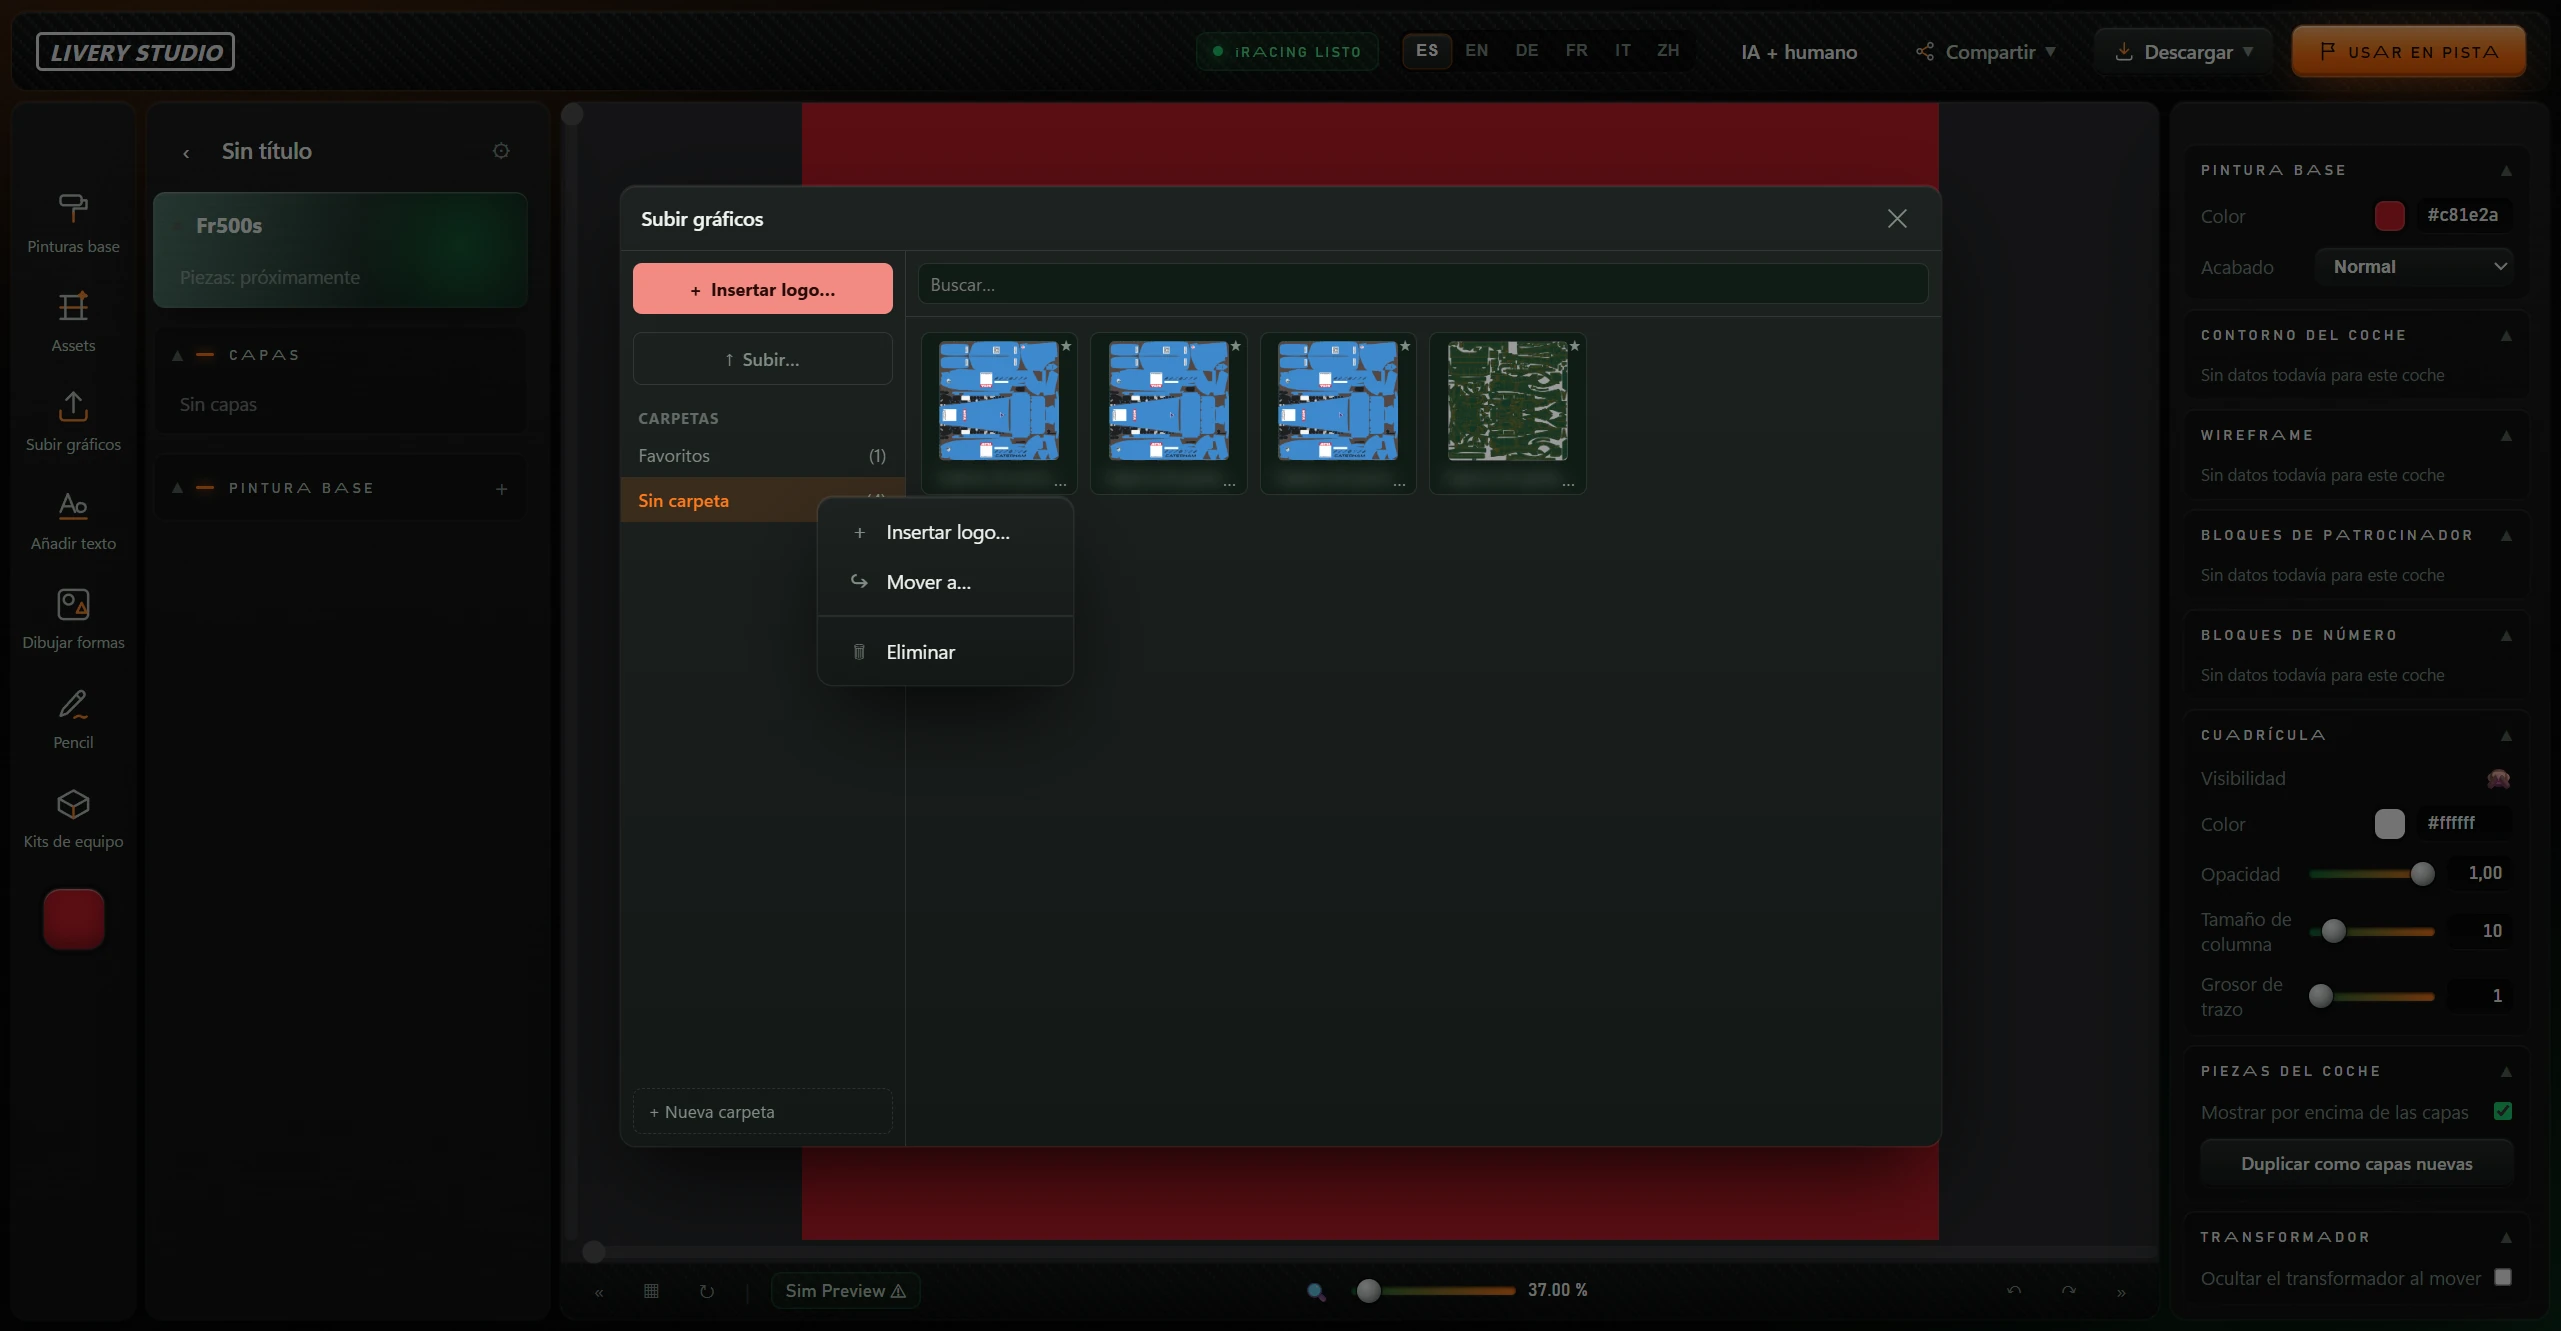
| Subir gráficos (upload graphics) | Opens uploaded logos and folders (see 4.8). |
| Añadir texto (add text) | Menu with A · Texto (text) (a text layer) and # · Número (dígitos de la biblioteca) (number from library digits). |
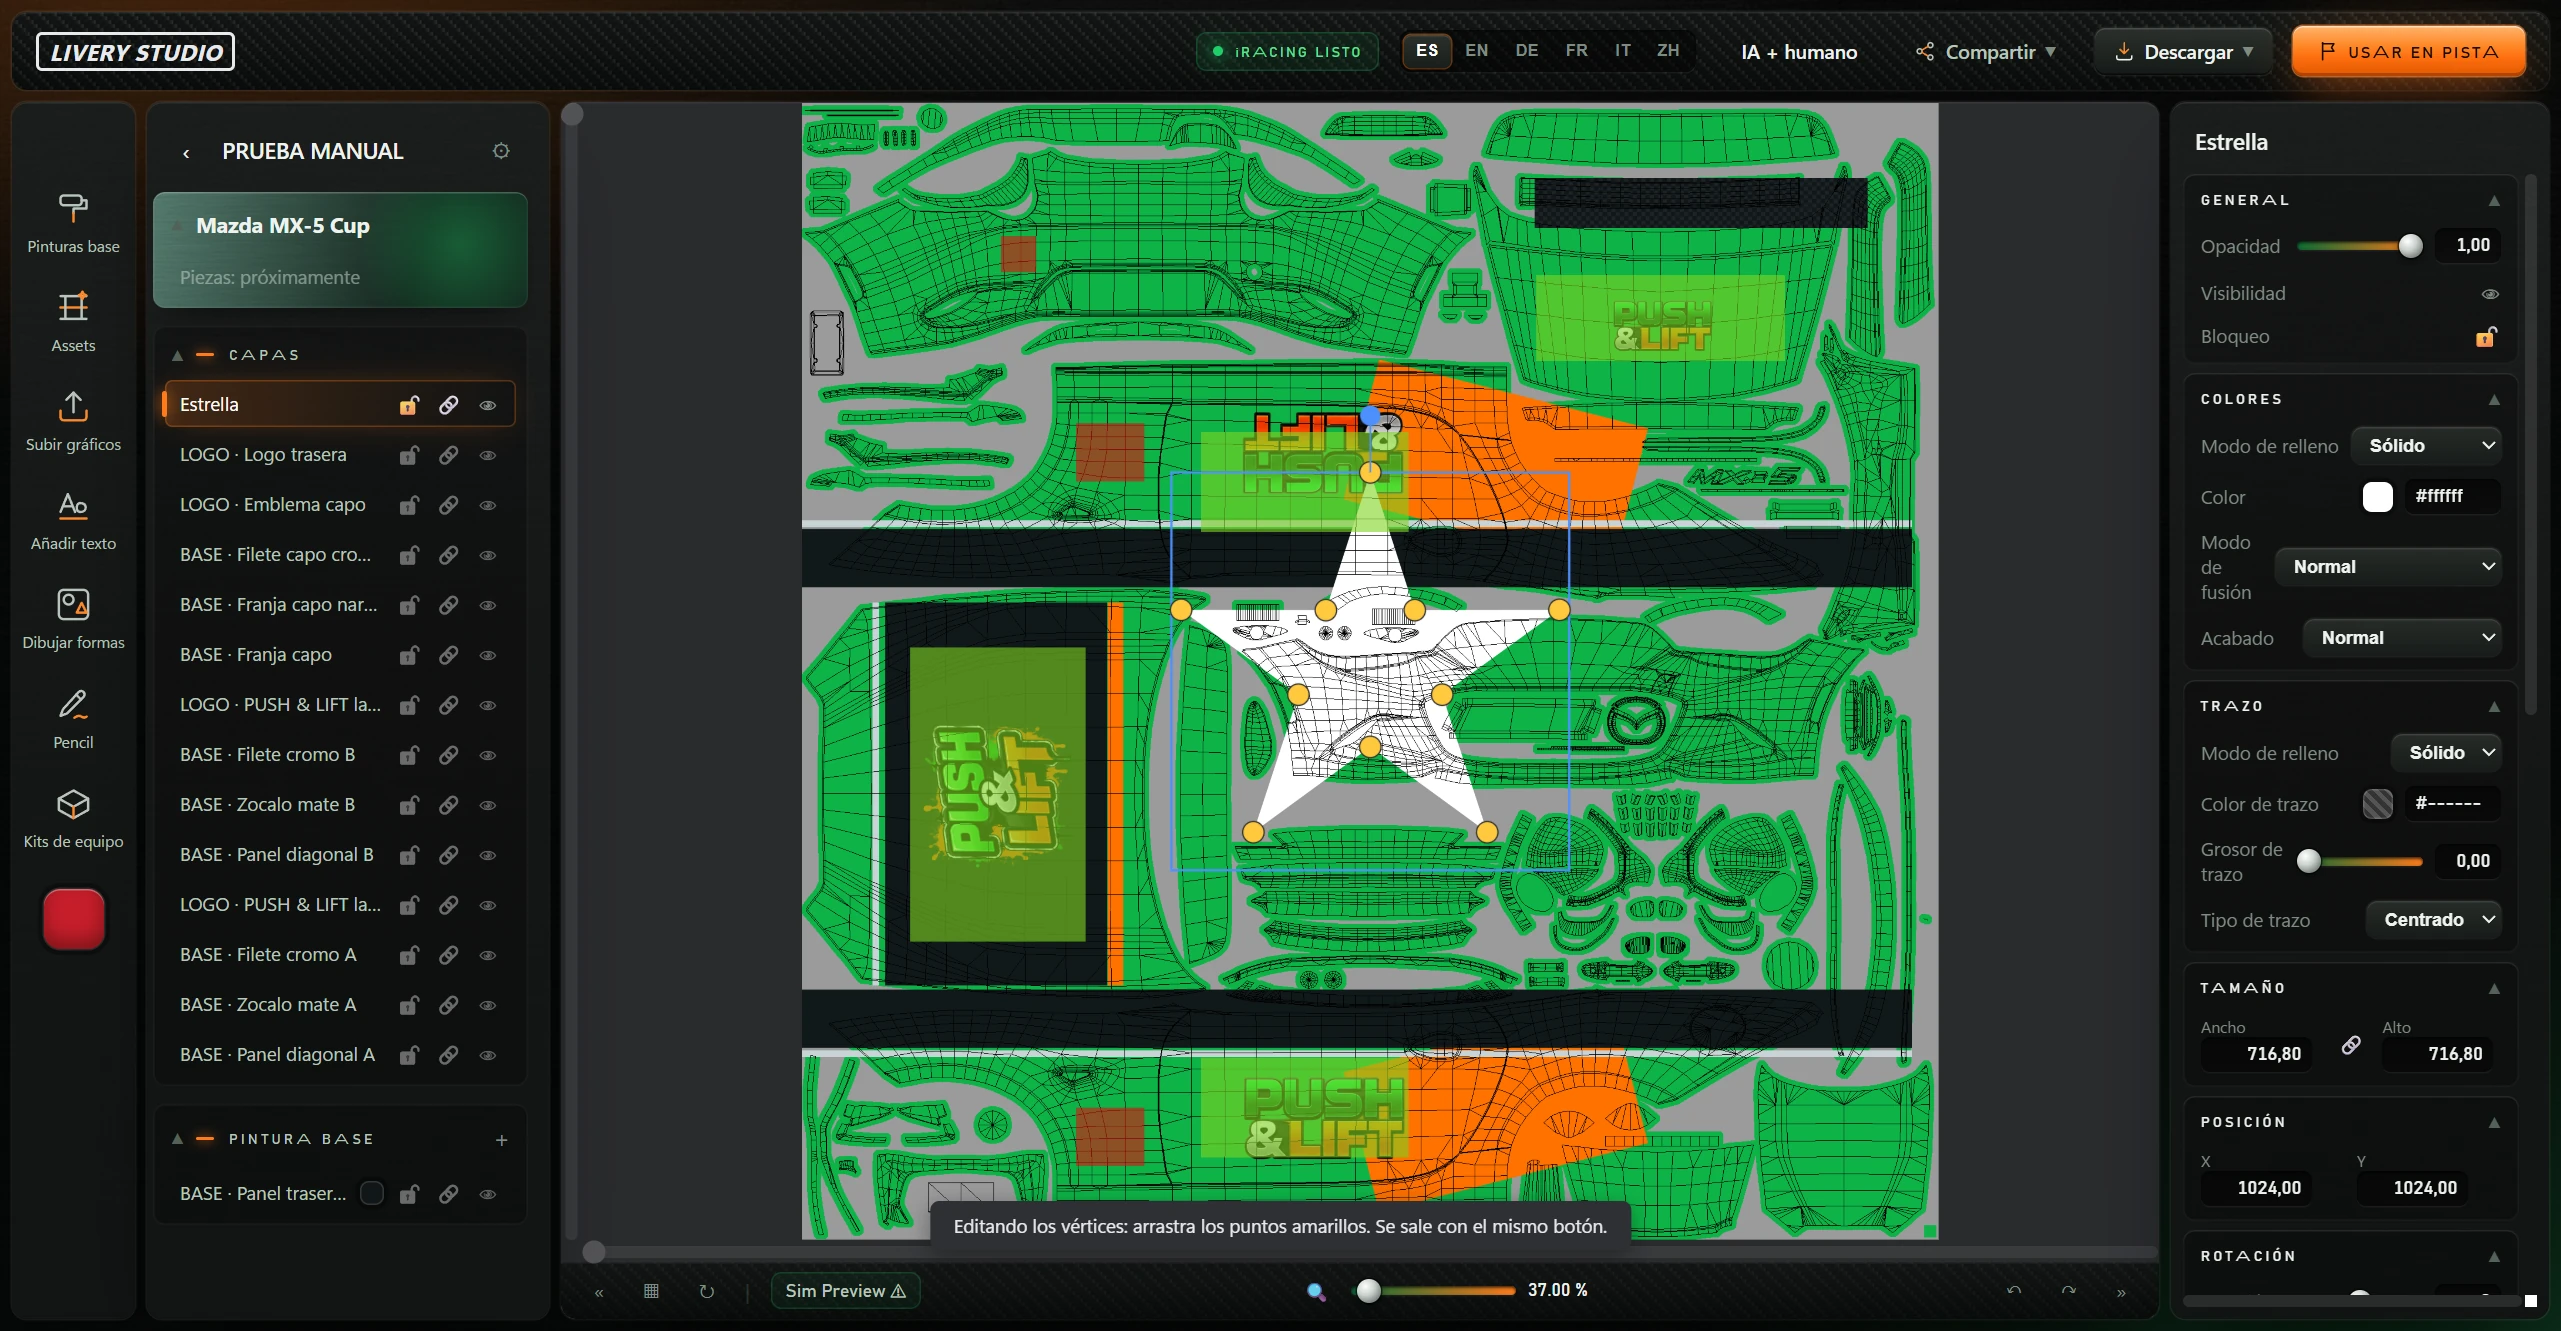
| Dibujar formas (draw shapes) | Menu with 13 shapes: Rectángulo (rectangle), Elipse (ellipse), Triángulo (triangle), Estrella (star), Flecha (arrow), Anillo (ring), Hexágono (hexagon), Meta (chequered), Línea (line), Curva (curve), Polígono (polygon), Cuña (wedge) and Arco (arc). |
| Pencil | Freehand painting. Toggle with the same button or B (see 4.10). |
| Kits de equipo (team kits) | Your kits menu (see 4.9). |
| Colour square at the bottom | Active colour, also the base-paint colour. Click to open the colour picker. |
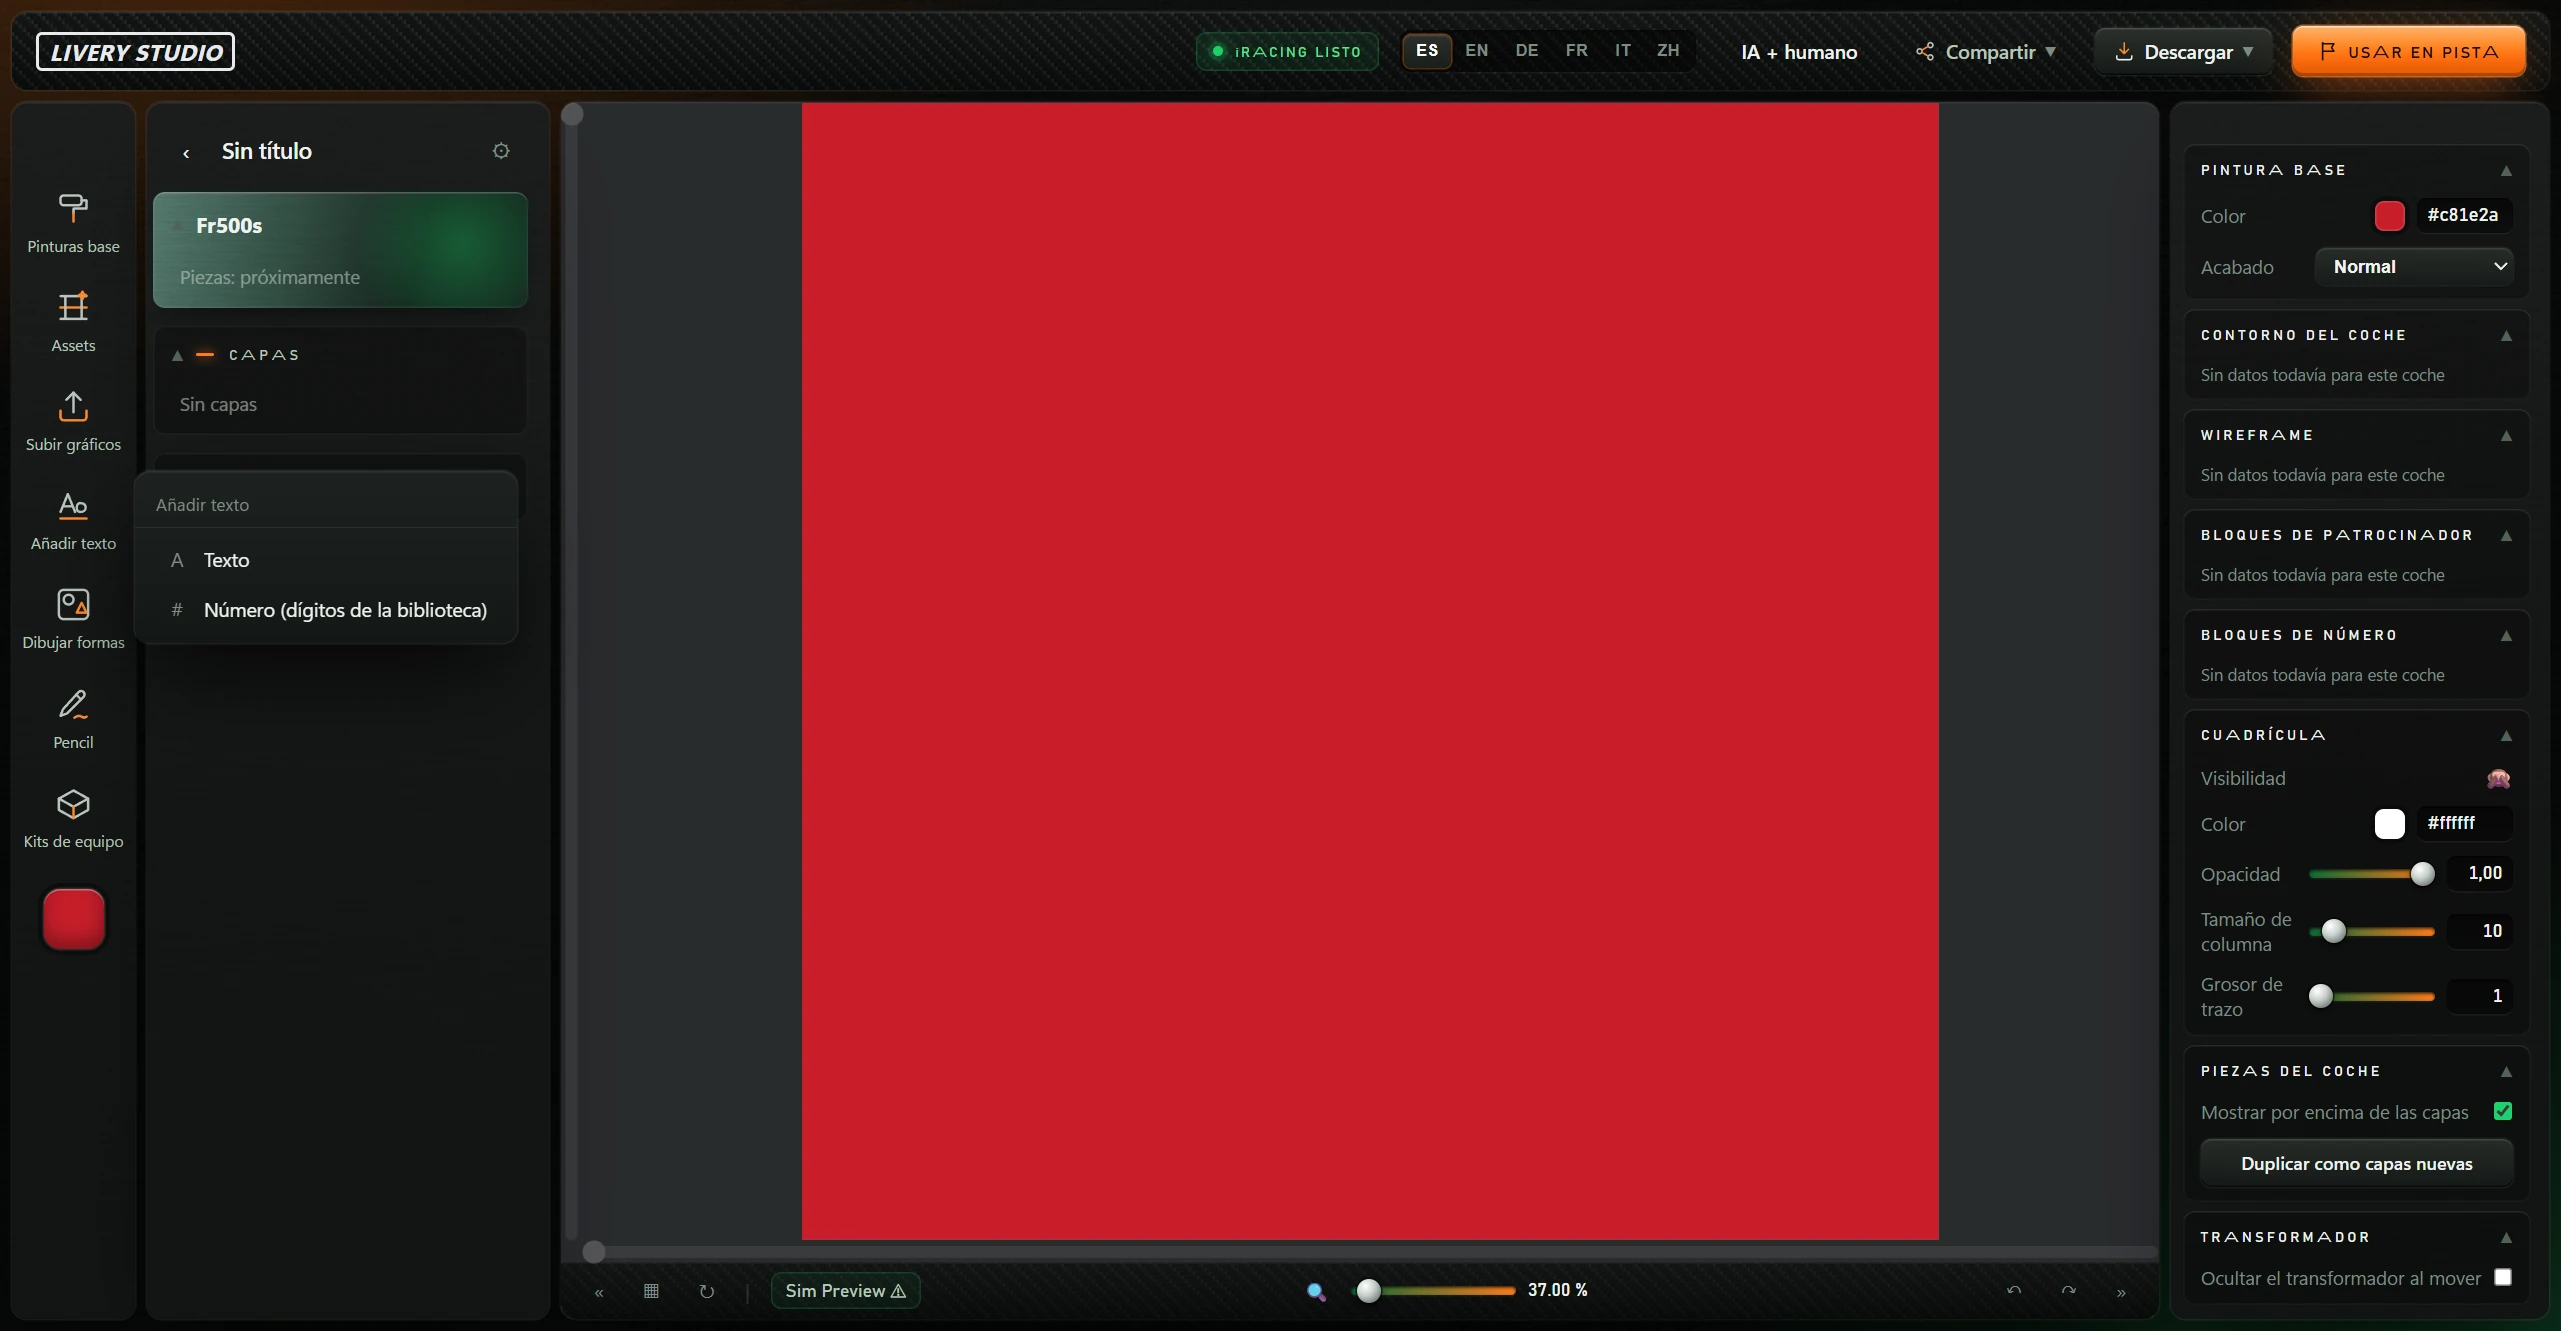
Número (dígitos de la biblioteca) (number from library digits) Asks for a 1–6 digit number and builds it from library digits, each on a layer, grouped together. Confirms the digit count. Non-digits show “Escribe sólo dígitos (de 1 a 6)”; missing digit sets show “Ningún juego de dígitos tiene esos números”.
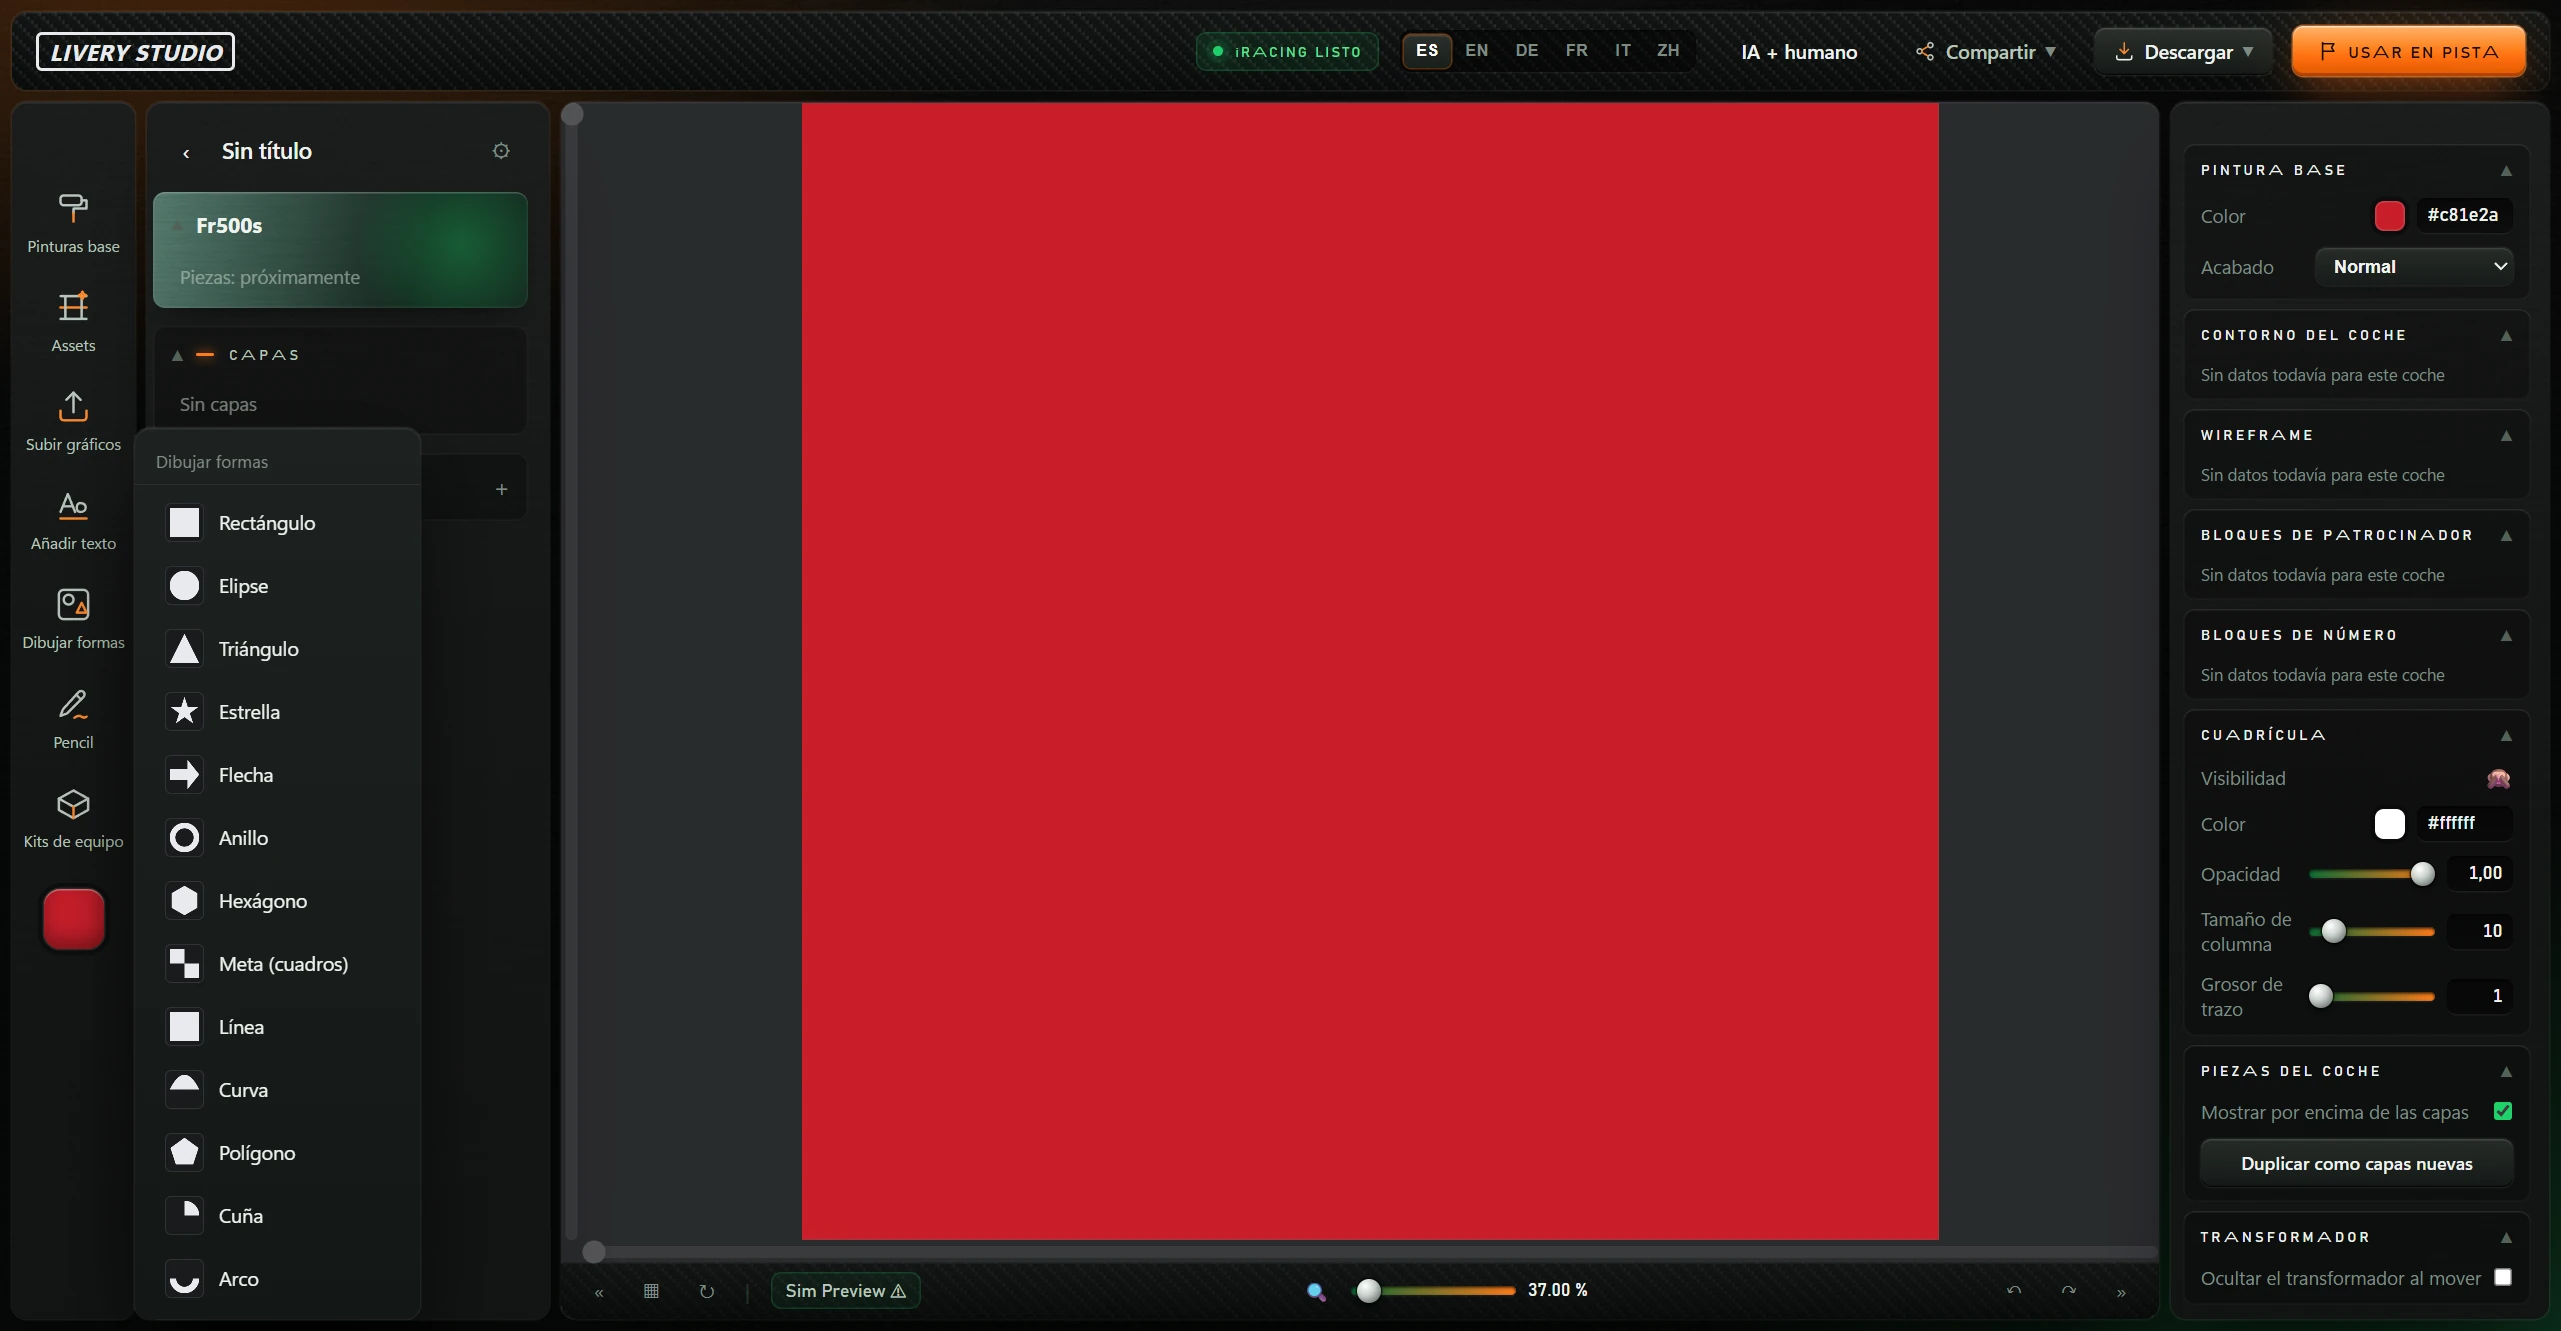
| Item | What it does |
|---|---|
| ‹ | Returns to the library. |
| Project name | “Sin título” (untitled) if unnamed. |
| ⚙ | Opens project settings (see 4.11). |
| Car block | Car name and “Piezas: próximamente” (parts coming soon). |
| Capas (layers) | Everything added; the top item is painted on top. Empty: “Sin capas”. |
| Pintura base (base paint) · + | Background patterns. + opens the Pinturas base menu. |
Click block headings to collapse/expand. Each layer row has:
| Button | What it does |
|---|---|
| Name | Selects the layer and shows properties. |
| Colour swatch (patterns only) | Changes the pattern’s main colour. |
| 🔓 / 🔒 (Bloqueo — lock) | Locks the layer against movement or dragging. |
| 🔗 / ⛓ | 🔗 groups with the layer above; ⛓ removes from group. Grouped layers move, scale and rotate together. Requires a compatible layer above; otherwise an error appears. |
| 👁 / 🙈 (Visibilidad — visibility) | Hides or shows the layer. |
| Drag row | Reorders layers, except locked layers. |
| Right-click | Opens the layer menu (below). |
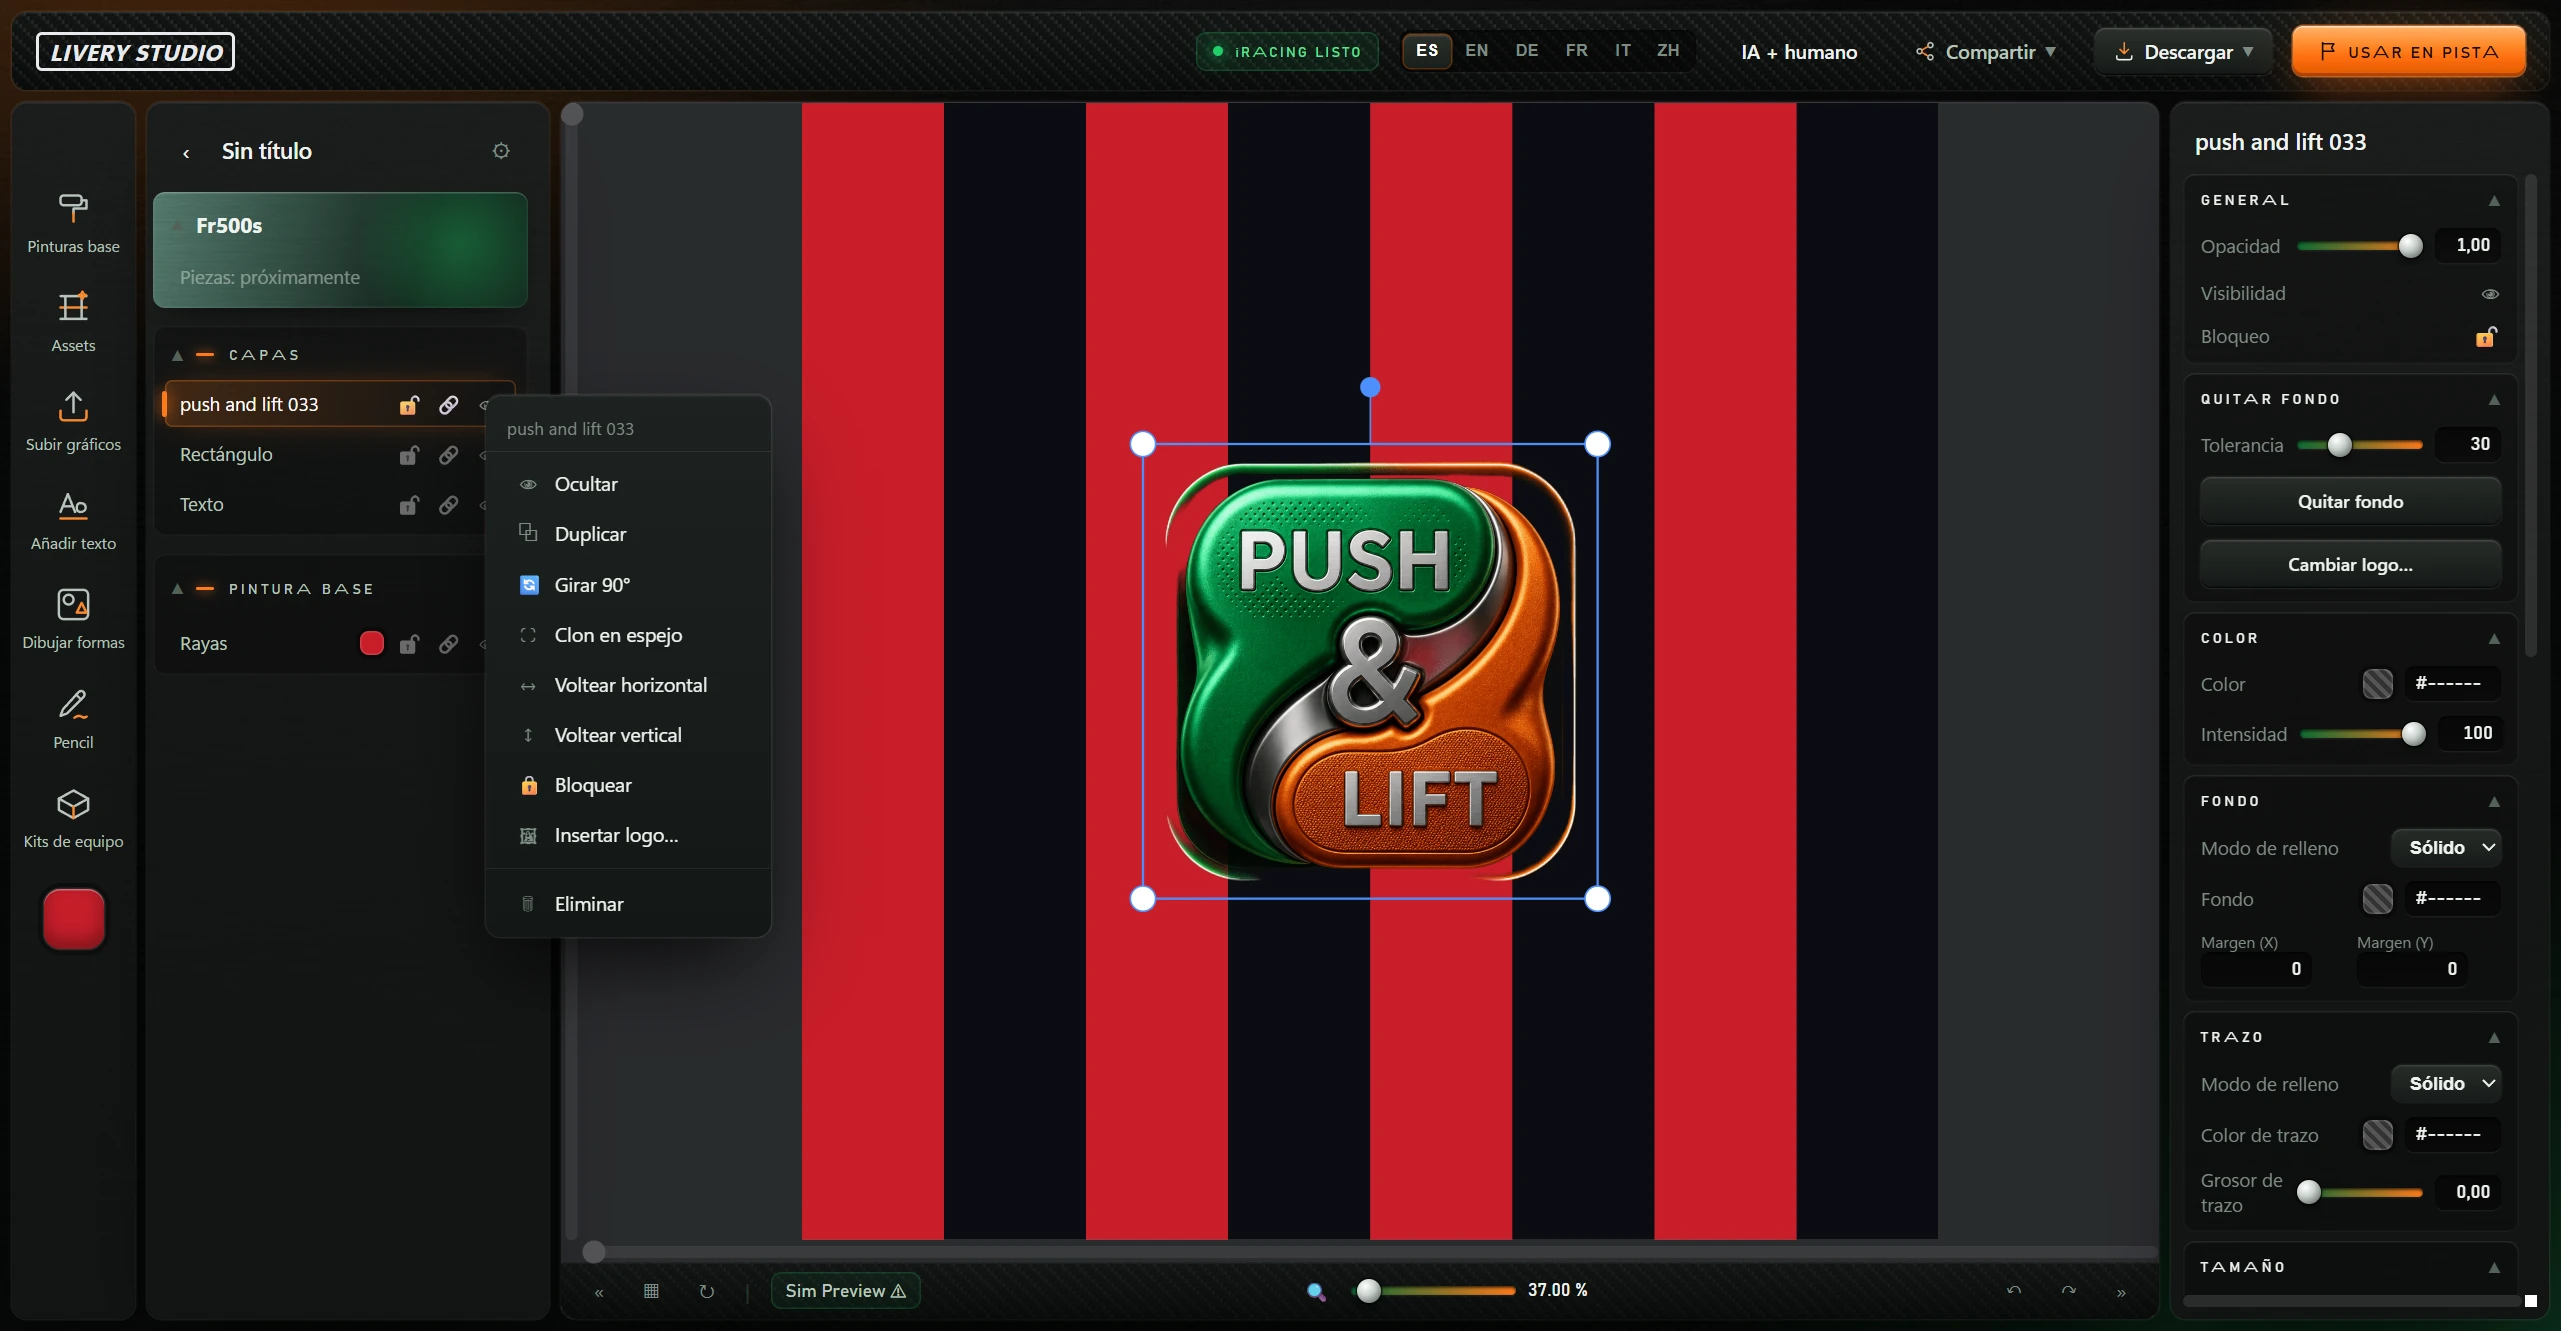
The layer menu (right-click) shows its name and: Ocultar (hide), Duplicar (duplicate), Girar 90° (rotate 90°), Clon en espejo (mirror clone), Voltear horizontal (flip horizontally), Voltear vertical (flip vertically), Bloquear (lock) or Desbloquear (unlock), Insertar logo… (insert logo) and Eliminar (delete). Right-clicking empty canvas shows only Insertar logo… (insert logo). Close with Esc or click outside.
| Button | What it does |
|---|---|
| « / » (Contraer panel — collapse panel) | Hides/shows the left project or right properties panel. |
| ▦ (Cuadrícula — grid) | Shows/hides the guide grid. |
| ↻ | Rotate view 90° (Alt+← / Alt+→). Paint is unchanged and saves straight. |
| Sim Preview ⚠ | Same as USAR EN PISTA: installs the paint in iRacing. |
| 🔍 (Ajustar a pantalla — fit to screen) | Fits the whole canvas in view. |
| Zoom slider | From 5% to 800%. Adjacent number shows zoom. |
| ↶ / ↷ | Undo and redo. |
Canvas-edge scrollbars move the view horizontally or vertically when zoomed in.
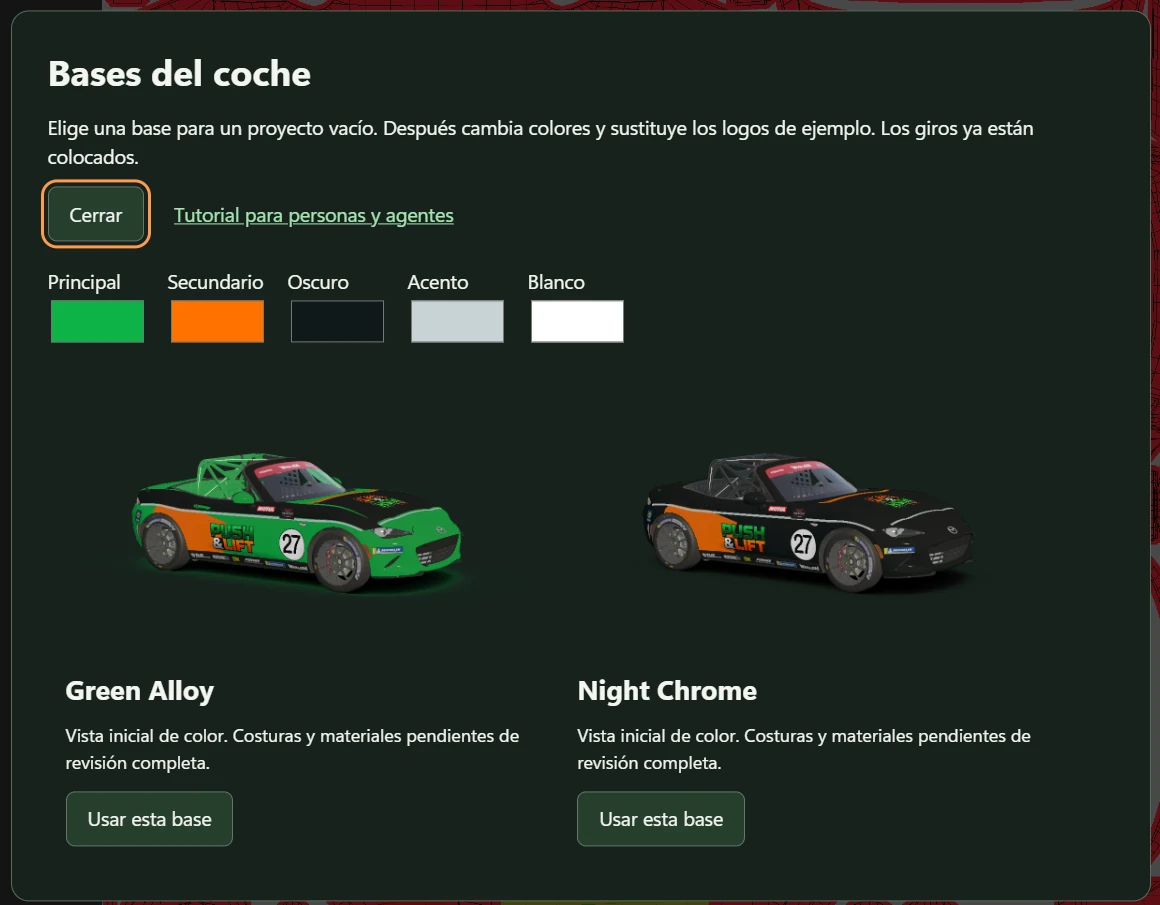
Opens the Bases del coche (car bases): complete Push & Lift liveries for specific cars, with logo slots. This dialog is always in Spanish.
Bases currently cover Caterham 420R, Mazda MX-5 Cup and McLaren 720S GT3 EVO: two each, Green Alloy and Night Chrome.
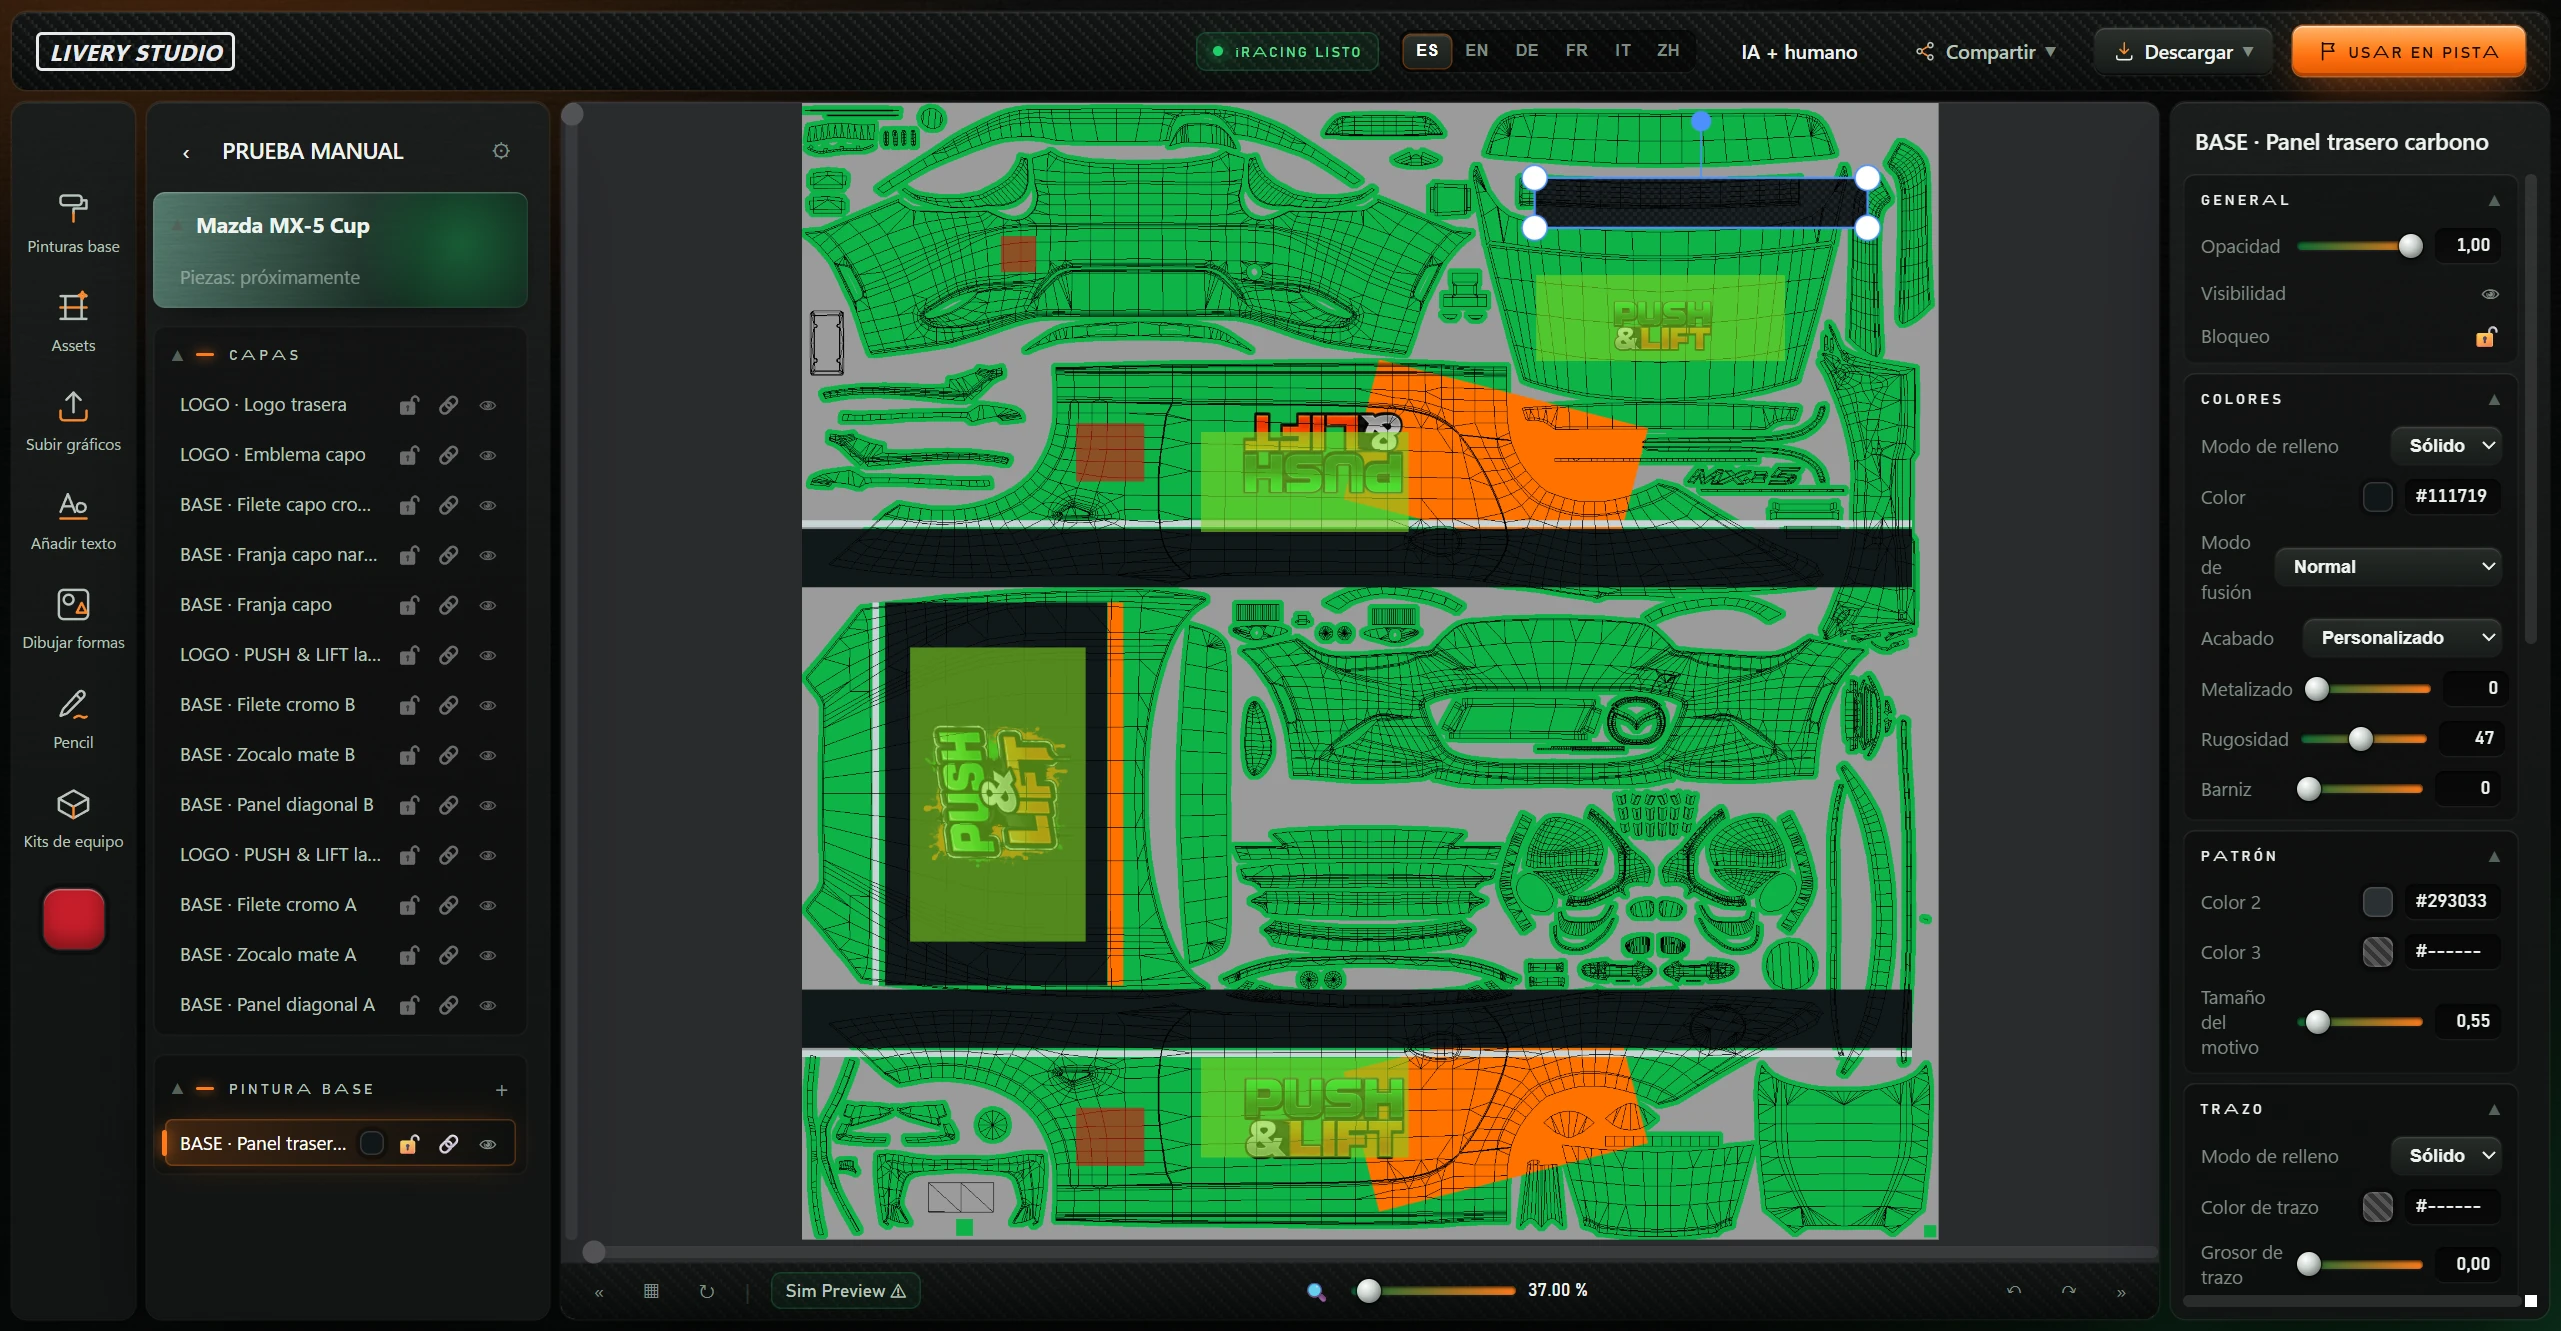
If your car has no bases, the app suggests textures from the previous menu.
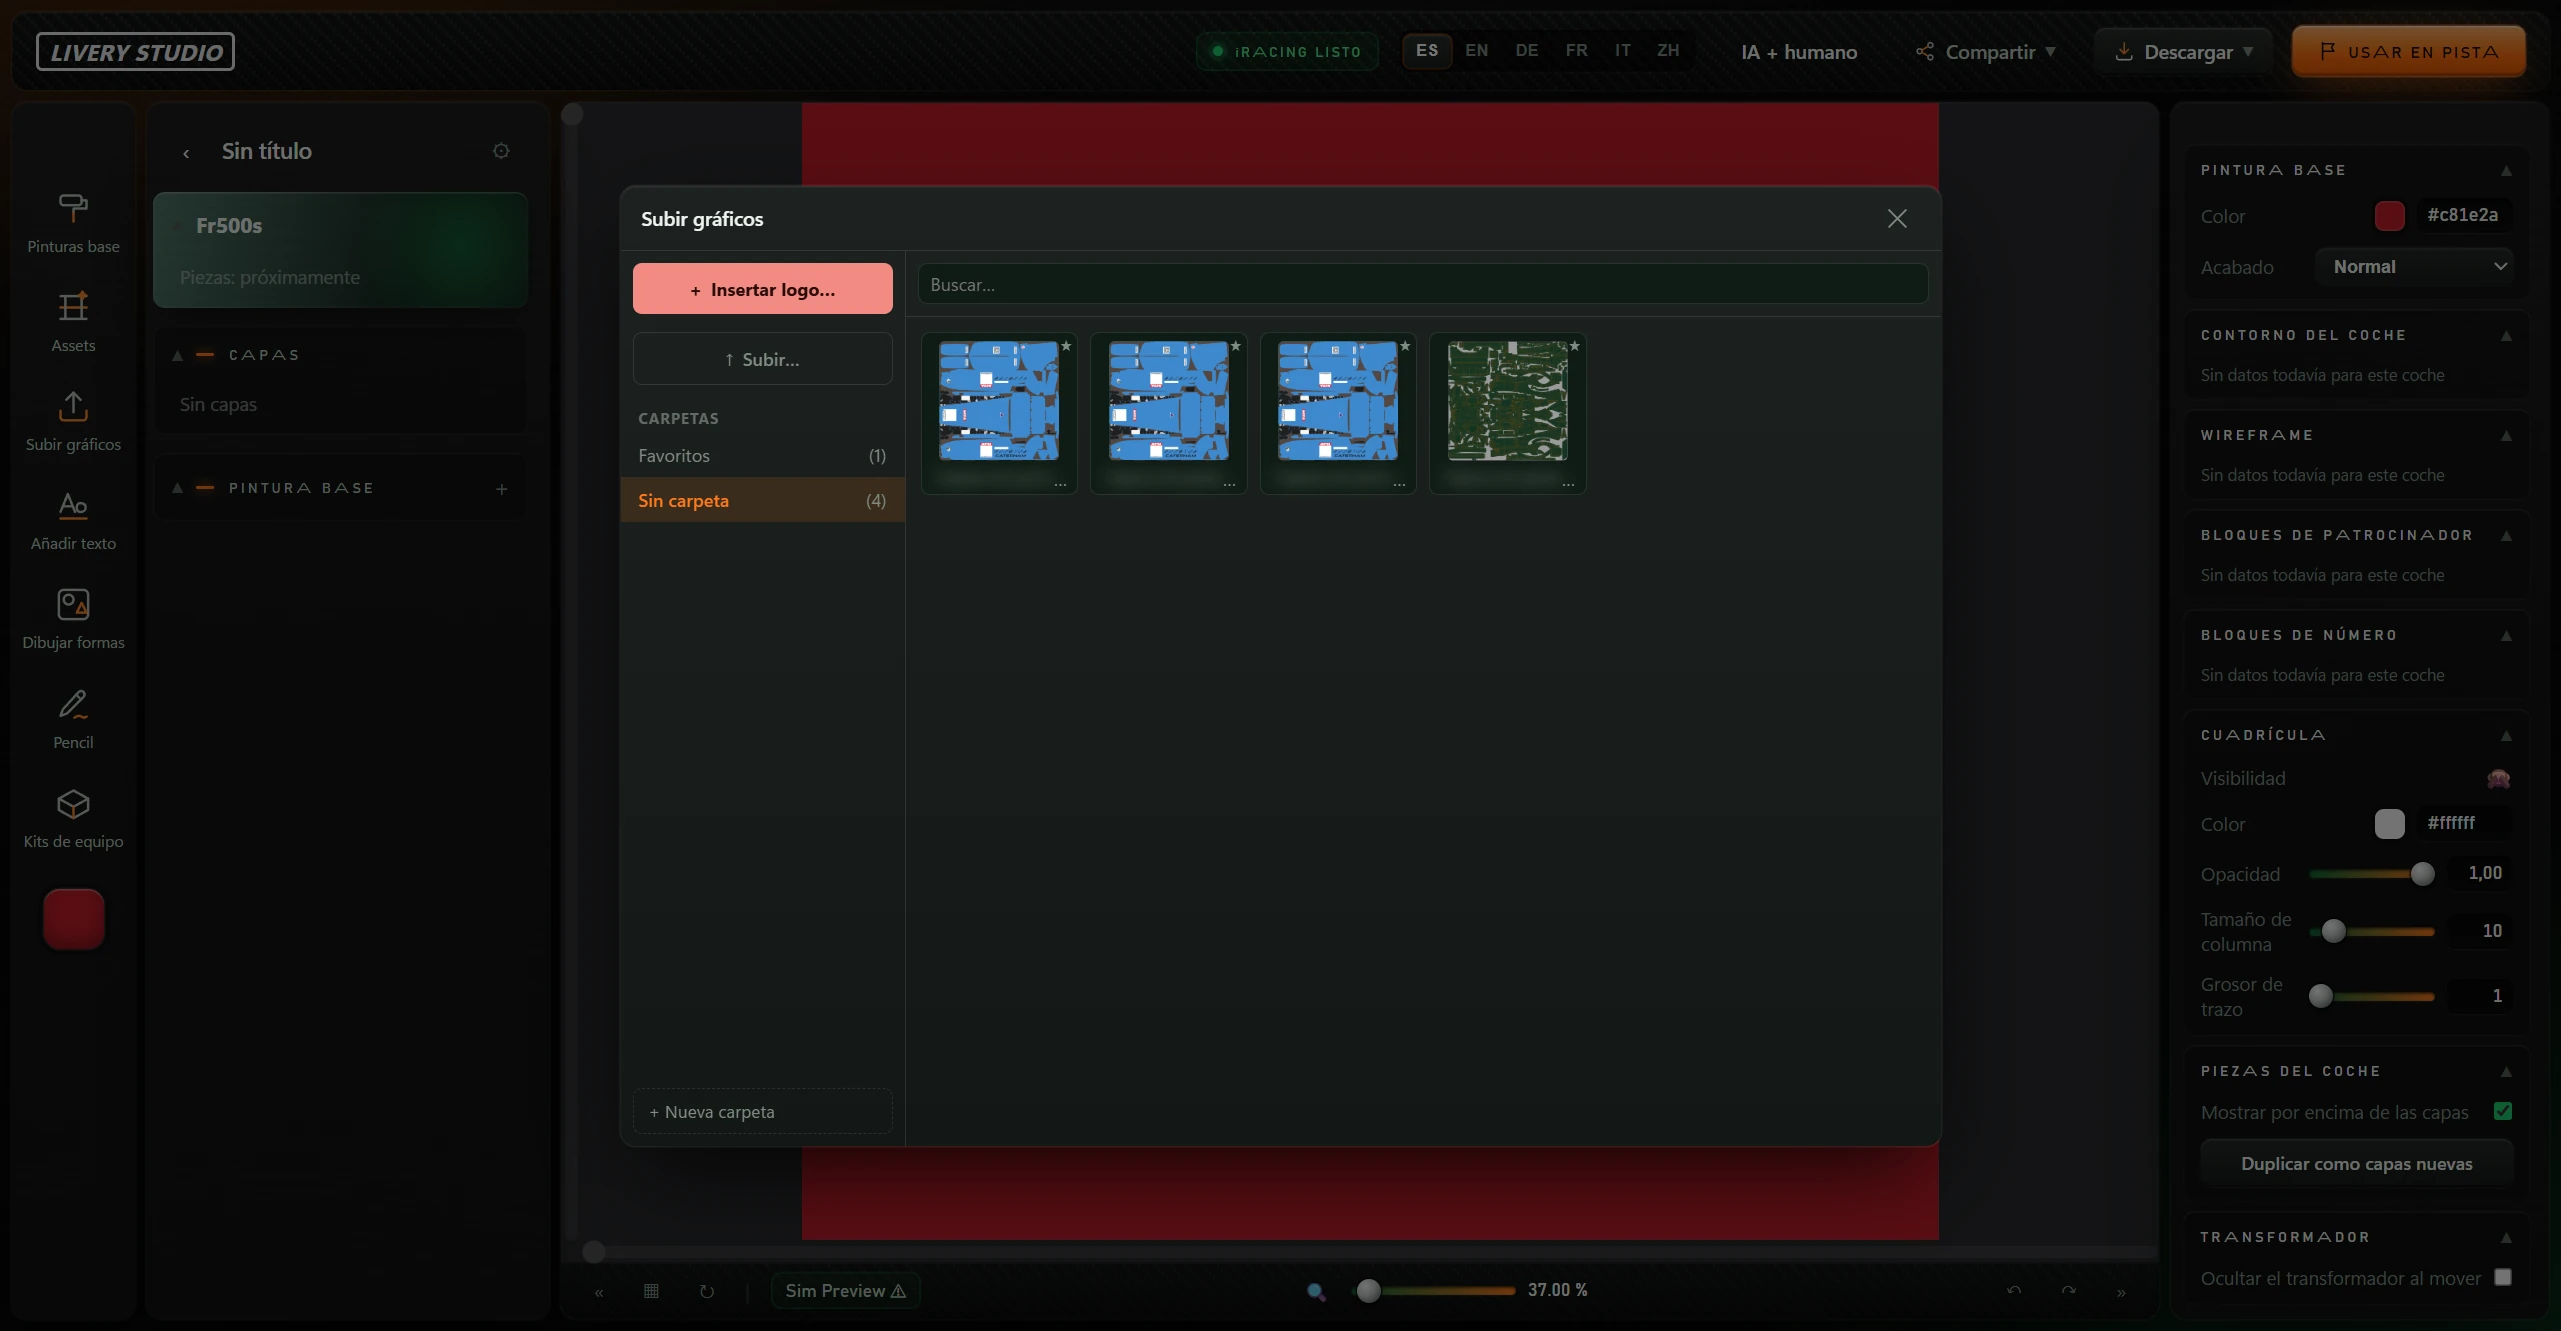
| Button | What it does |
|---|---|
| + Insertar logo… (insert logo) | Uploads a file and places it on the canvas, confirming upload and insertion. |
| ↑ Subir… (upload) | Uploads without adding to the canvas. |
| Favoritos (favourites) | Items marked ★. If empty, explains that any asset’s star adds it here. |
| Sin carpeta (no folder) | Your logos not assigned to folders. |
| Your folders | Hover for ✎ Renombrar (rename) and ✕ Borrar carpeta (delete folder). Confirmation explains assets return to Sin carpeta. |
| + Nueva carpeta (new folder) | Enter a name, up to 40 characters, and Enter. Esc cancels. |
| Each logo’s ⋯ (Más acciones — more actions) | Insertar logo… (insert logo), Mover a… (move to) (Sin carpeta or a folder) and Eliminar (delete) (asks to delete the logo). |
Uploading with a folder open puts the logo in that folder.
From the layer or Kits de equipo menu. Opens a list with ↑ Subir uno nuevo… (upload new) and uploaded logos. Click to insert. Empty: “Sin logos subidos todavía”.
Without a selected layer: base paint and car guides. With a layer: its properties. With Pencil enabled: pencil settings. See 5.
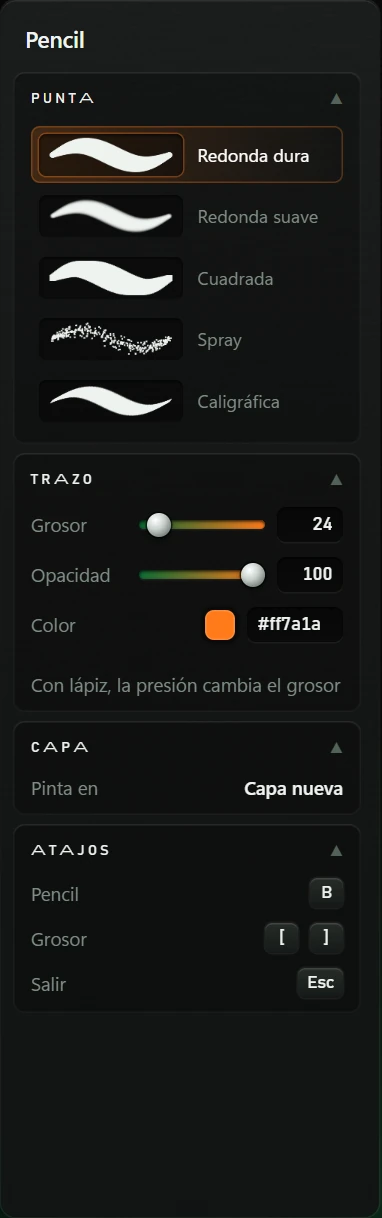
Pencil highlights its button and paints on the canvas. [ ] changes thickness; Esc exits. Each new stroke creates Pencil 1, Pencil 2…; a selected Pencil layer receives further strokes. Tablet pressure changes thickness. Choosing another tool turns Pencil off.
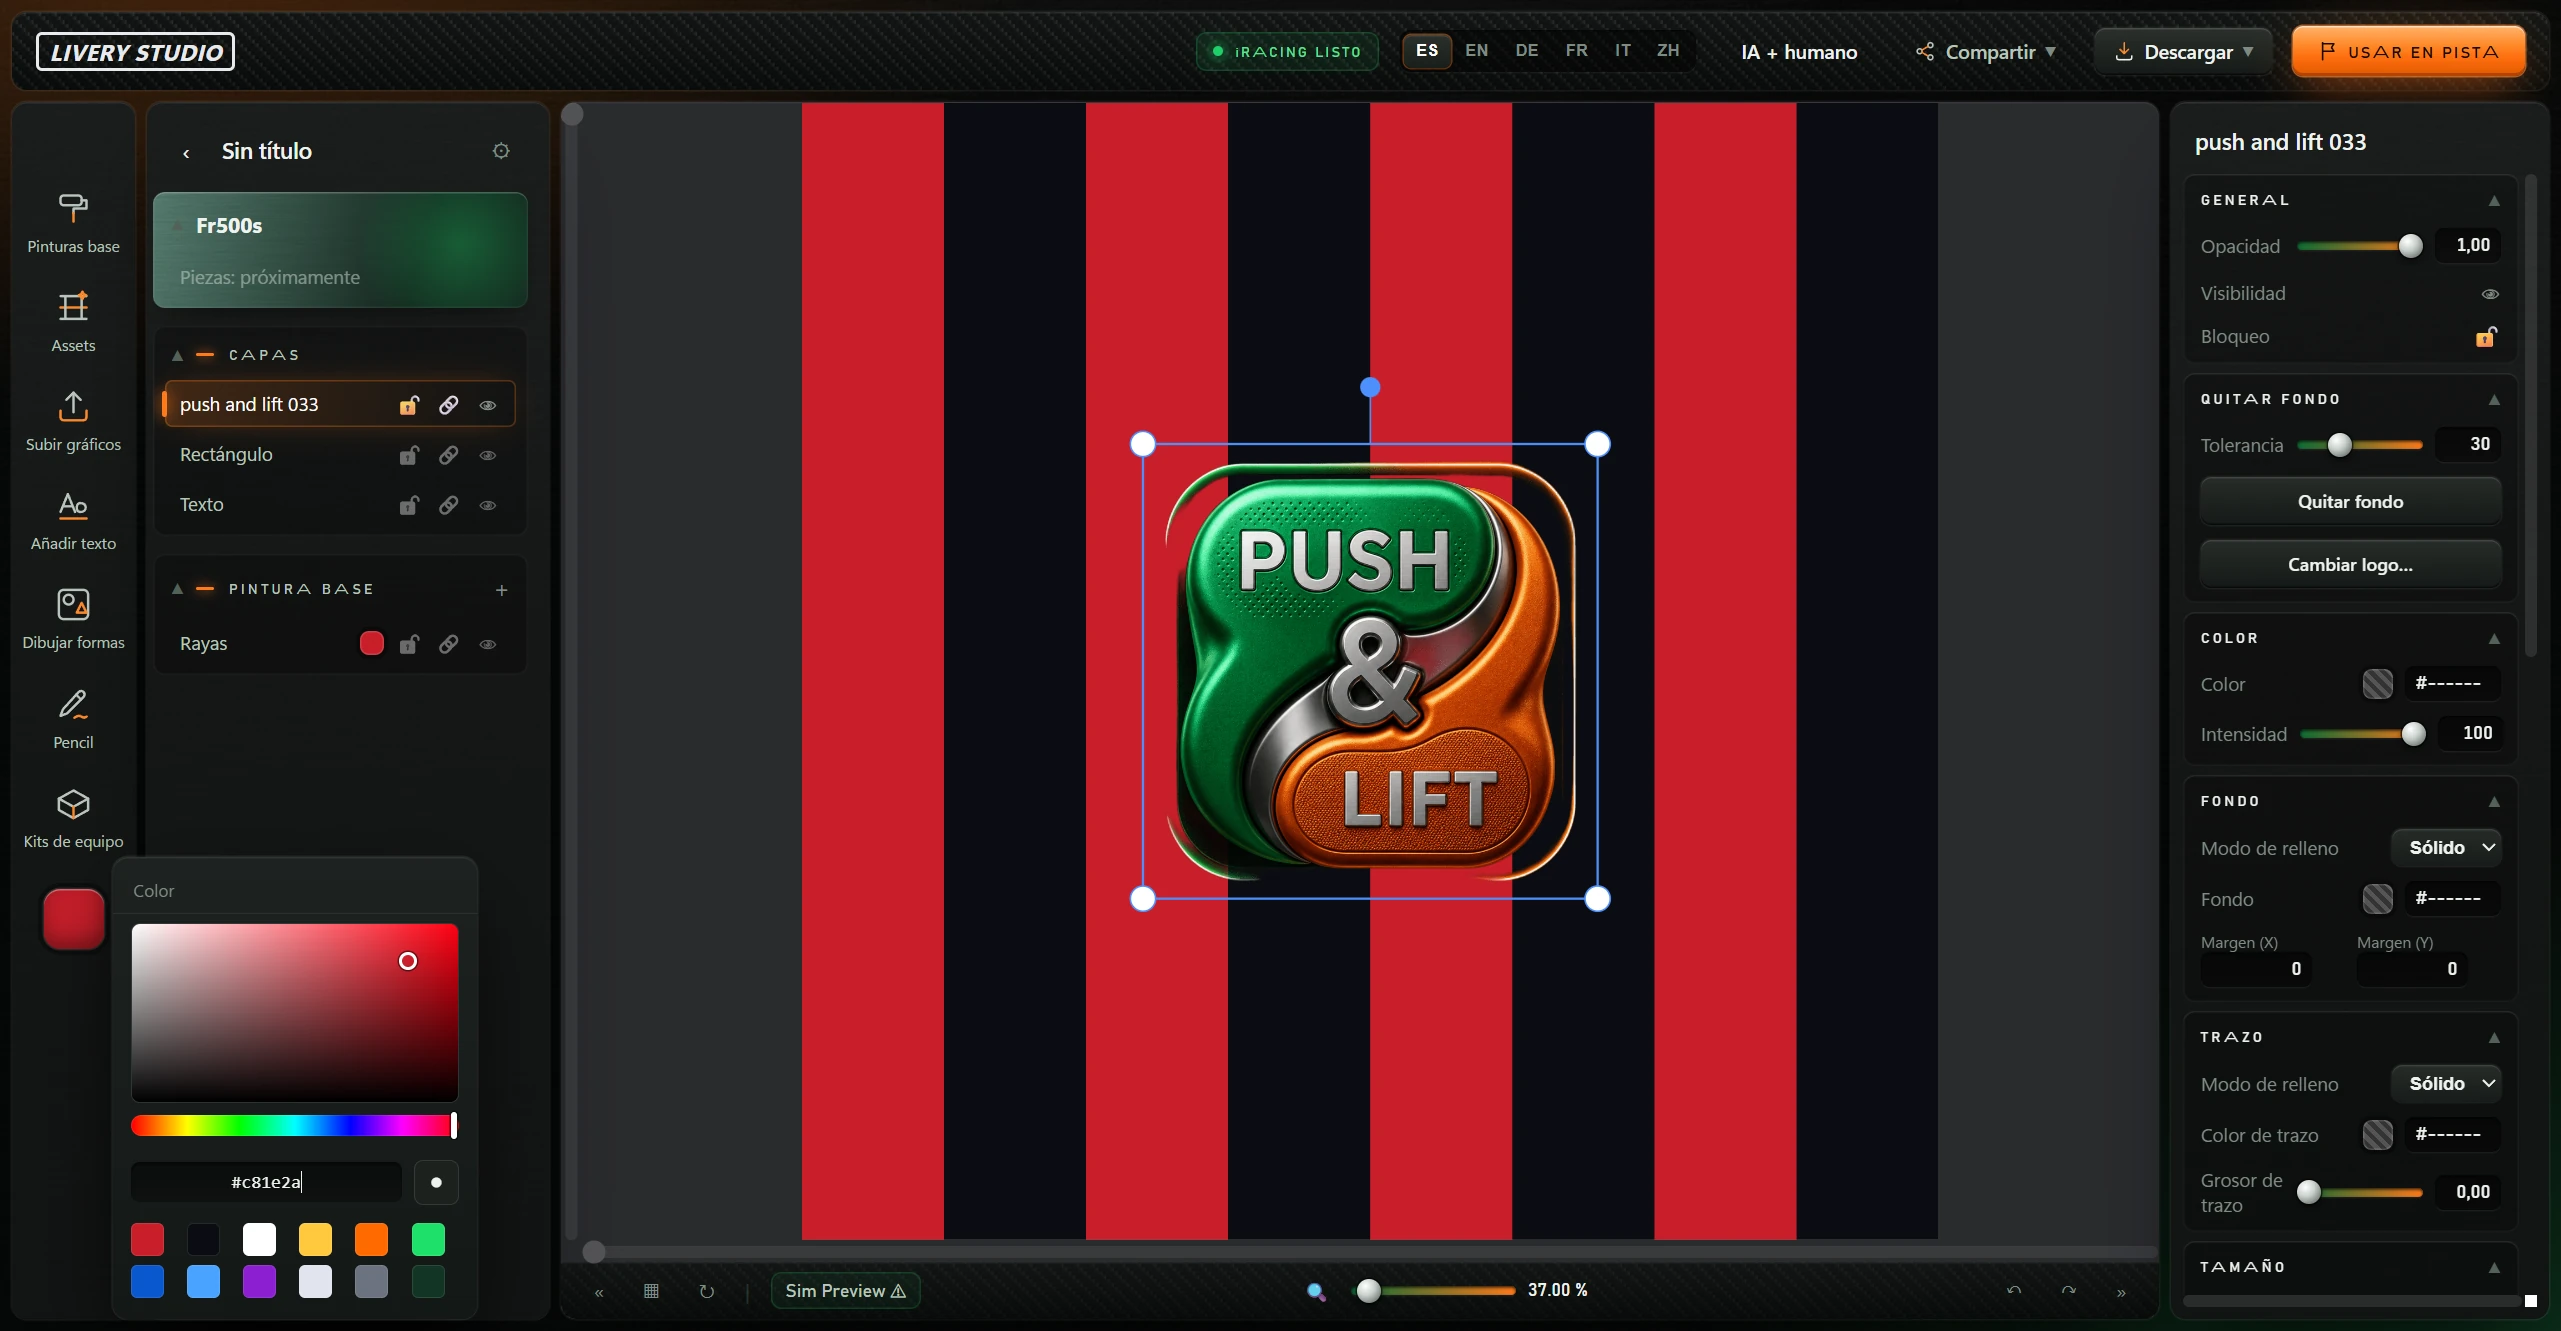
Each colour also has a code field: enter it and press Enter.
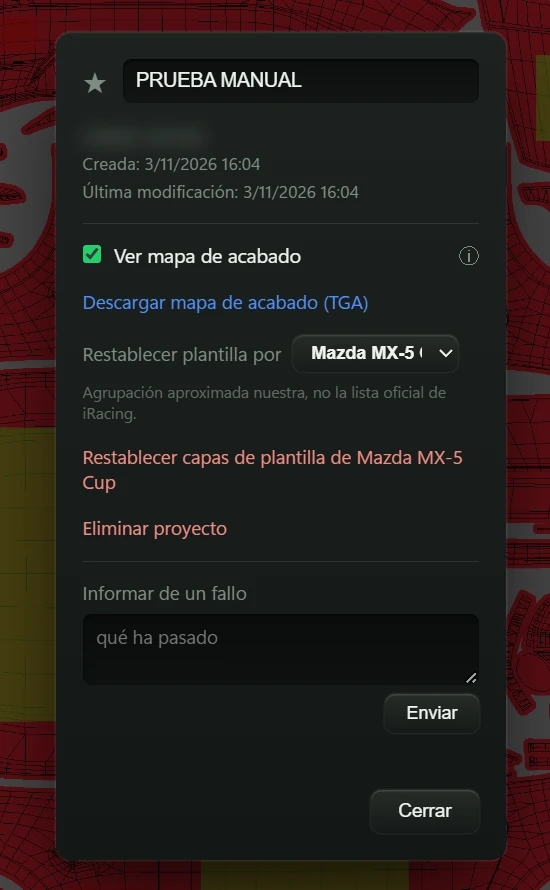
Open with the gear beside the project name. Close with Cerrar (close) or by clicking outside.
| Item | What it does |
|---|---|
| ★ (Favorito — favourite) | Marks the project as favourite. |
| Name | Renames, up to 80 characters. Saves on Enter or leaving the field; confirms “Nombre cambiado”. |
| “Cliente” (customer), “Creada” (created), “Última modificación” (last modified) | Your Customer ID and project dates. |
| Ver mapa de acabado (show finish map) (ⓘ) | Shows each layer’s Acabado (finish). ⓘ explains matte/gloss/chrome finishes for base paint, layers and logos. |
| Descargar mapa de acabado (TGA) (download finish map) | Saves only the metallic/roughness/clearcoat map in a separate file; never painted over the colour. |
| Restablecer plantilla por (reset template to) | Car groups: Oval, Tierra (dirt), Fórmula, GT, Prototipos (prototypes), Turismos (touring), Otros (other). Approximate app grouping, not iRacing’s official list. |
| Restablecer capas de plantilla de … (reset template layers for…) | Replaces Car Mask, Wireframe, Sponsor Blocks, Number Blocks and Car Parts with the selected car’s guides, after confirmation. Your painted content is untouched. |
| Eliminar proyecto (delete project) | Asks for confirmation, warns it cannot be undone, deletes and returns to the library. |
| Informar de un fallo (report a bug) · Enviar (send) | Describe what happened and send to Push & Lift. Internet required. Confirms success or failure. |
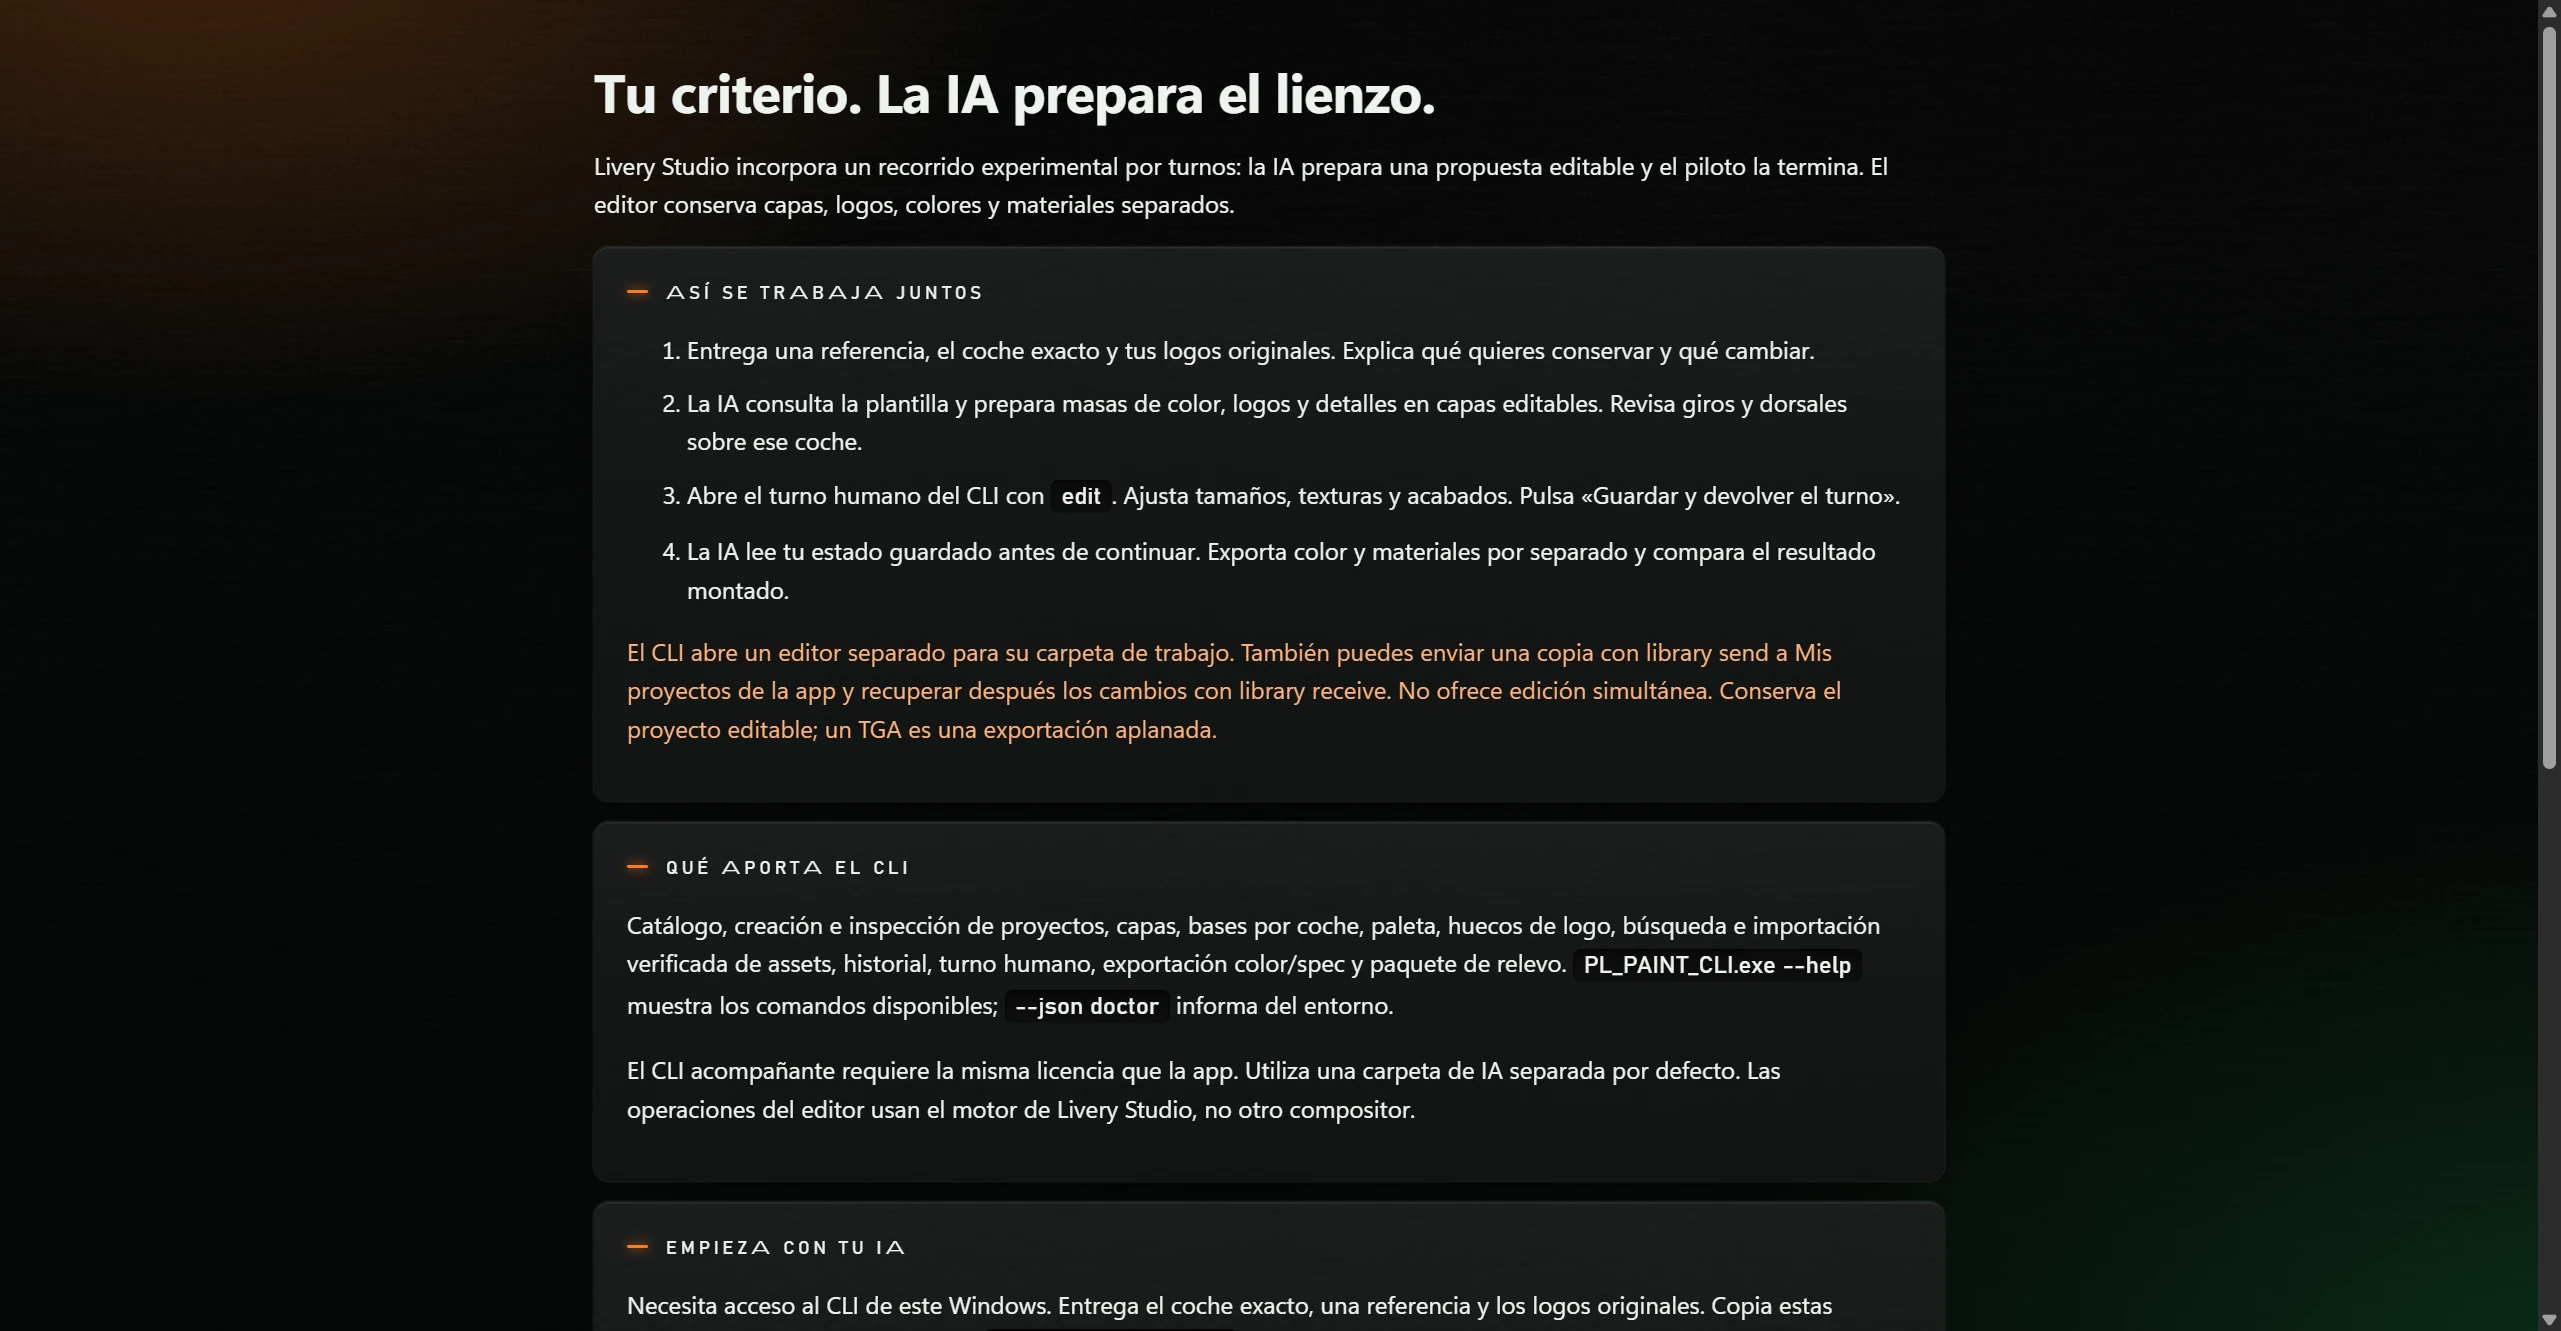
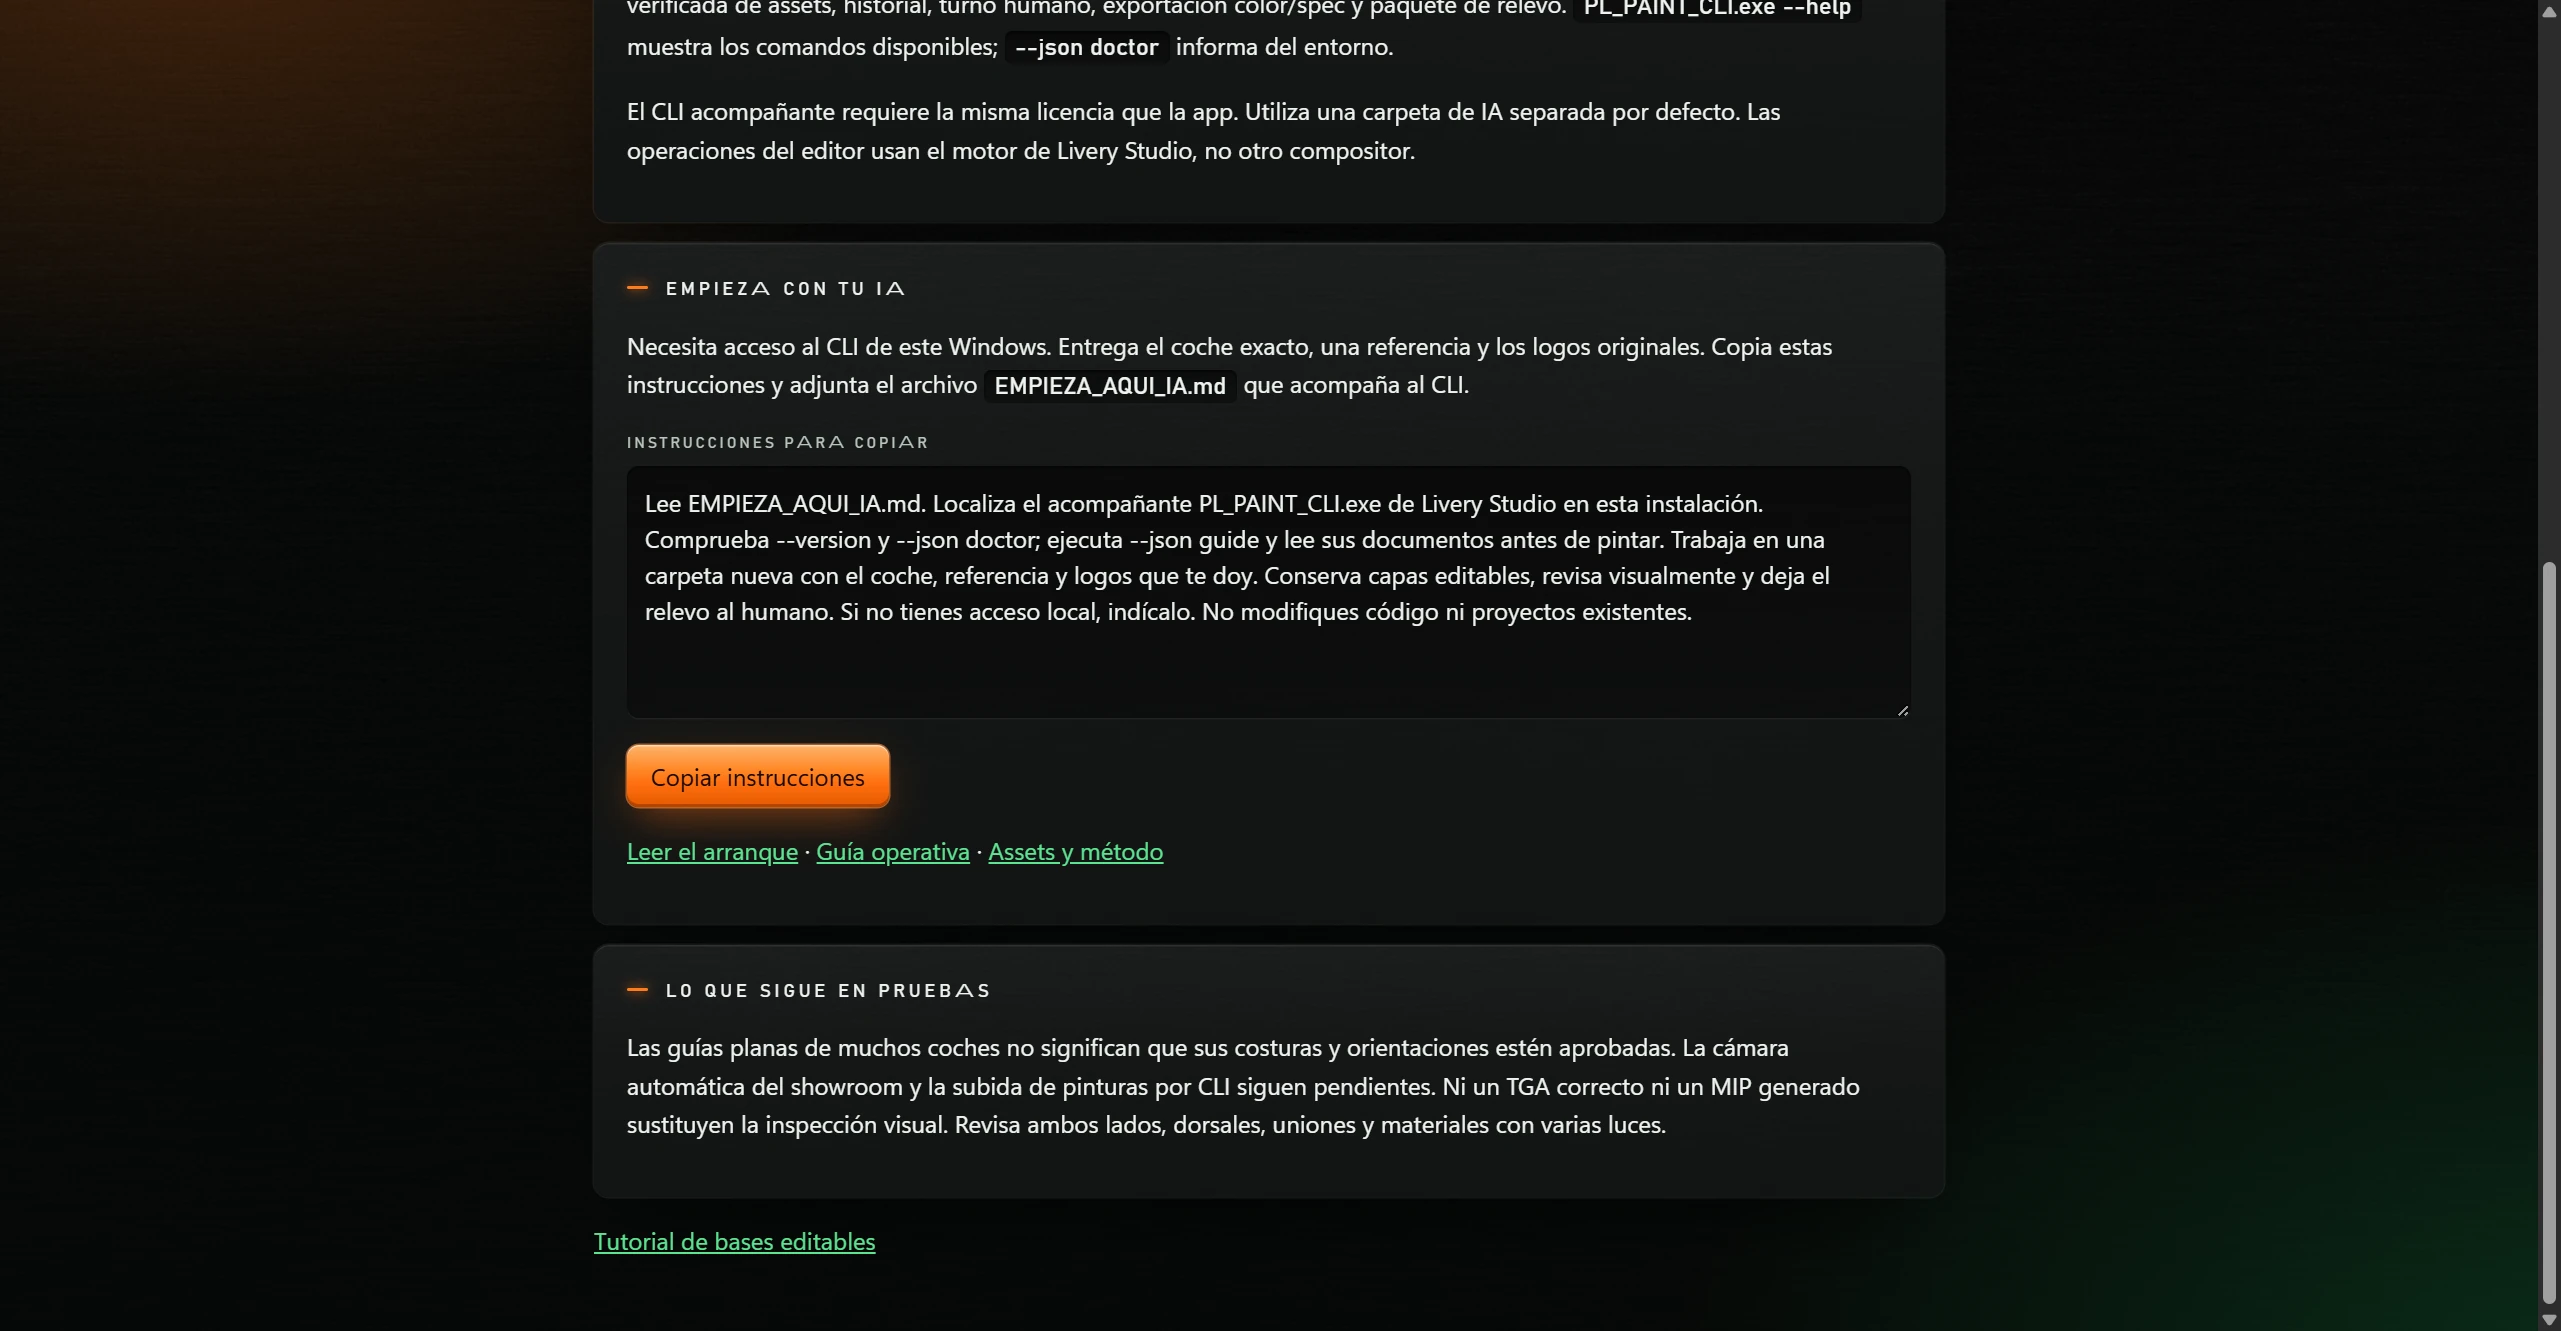
Explains alternating work with AI using the LIVERY STUDIO command-line tool. Contains:
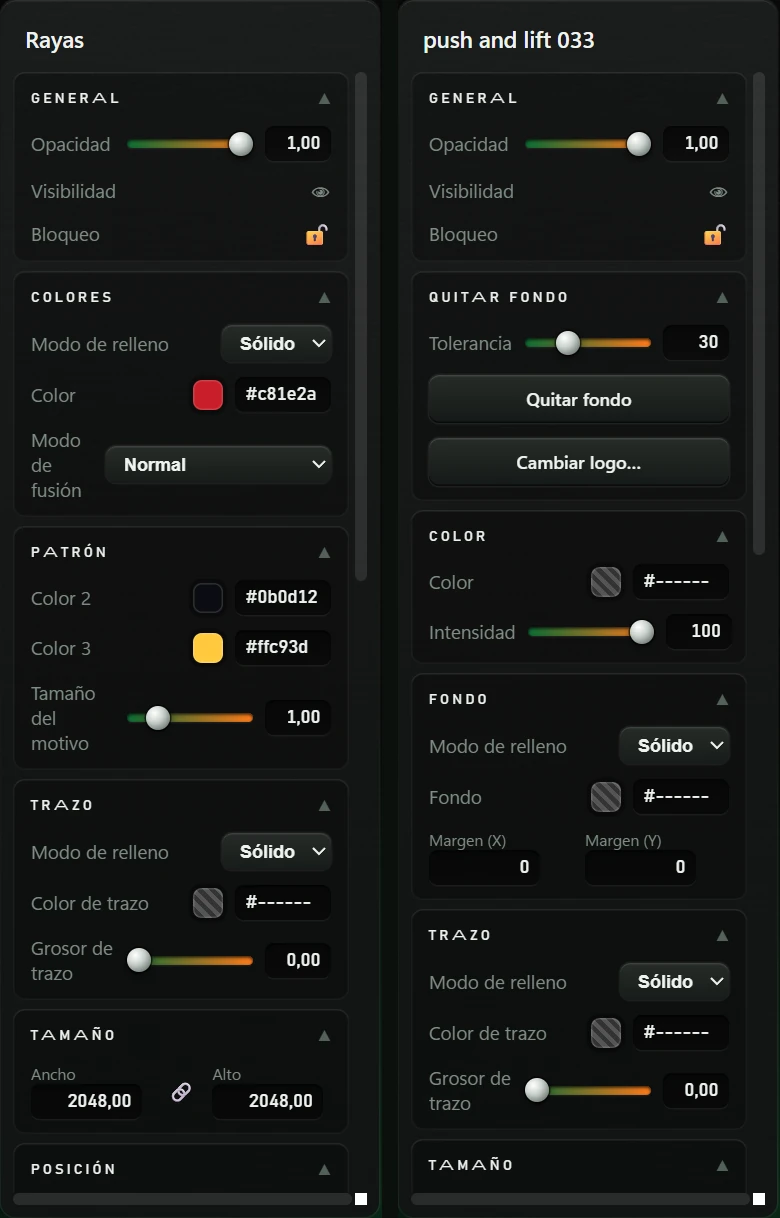
Change settings in the properties panel; all save automatically. Sliders have numeric fields for exact values. Click headings to collapse blocks.
| Block | Options |
|---|---|
| Pintura base (base paint) | Color (colour). Acabado (finish): Normal, Brillante (glossy), Plano (flat), Mate (matte), Semi-metalizado (semi-metallic), Metalizado (metallic), Cromo (chrome) or Personalizado (custom). Custom reveals Metalizado (metallic), Rugosidad (roughness) and Barniz (clearcoat) (0 to 100). |
| Contorno del coche (car outline), Wireframe, Bloques de patrocinador (sponsor blocks), Bloques de número (number blocks) | Official-template guides. Each has: Visibilidad (visibility) (👁 / 🙈), Color (colour) and Opacidad (opacity) (0 to 1). Initially outline visible, others hidden. Missing guide or missing car data produces a message. |
| Cuadrícula (grid) | Visibilidad (visibility), Color (colour), Opacidad (opacity) (0 to 1), Tamaño de columna (column size) (2 to 64) and Grosor de trazo (stroke width) (1 to 8). |
| Piezas del coche (car parts) | Mostrar por encima de las capas (show above layers) (checkbox). Duplicar como capas nuevas (duplicate as new layers): copies parts to a paintable layer and confirms they can now be painted over. |
| Transformador (transform controls) | Ocultar el transformador al mover (hide transform handles while moving): hides frame and handles while dragging. |
Guides are excluded from installed or downloaded paint.
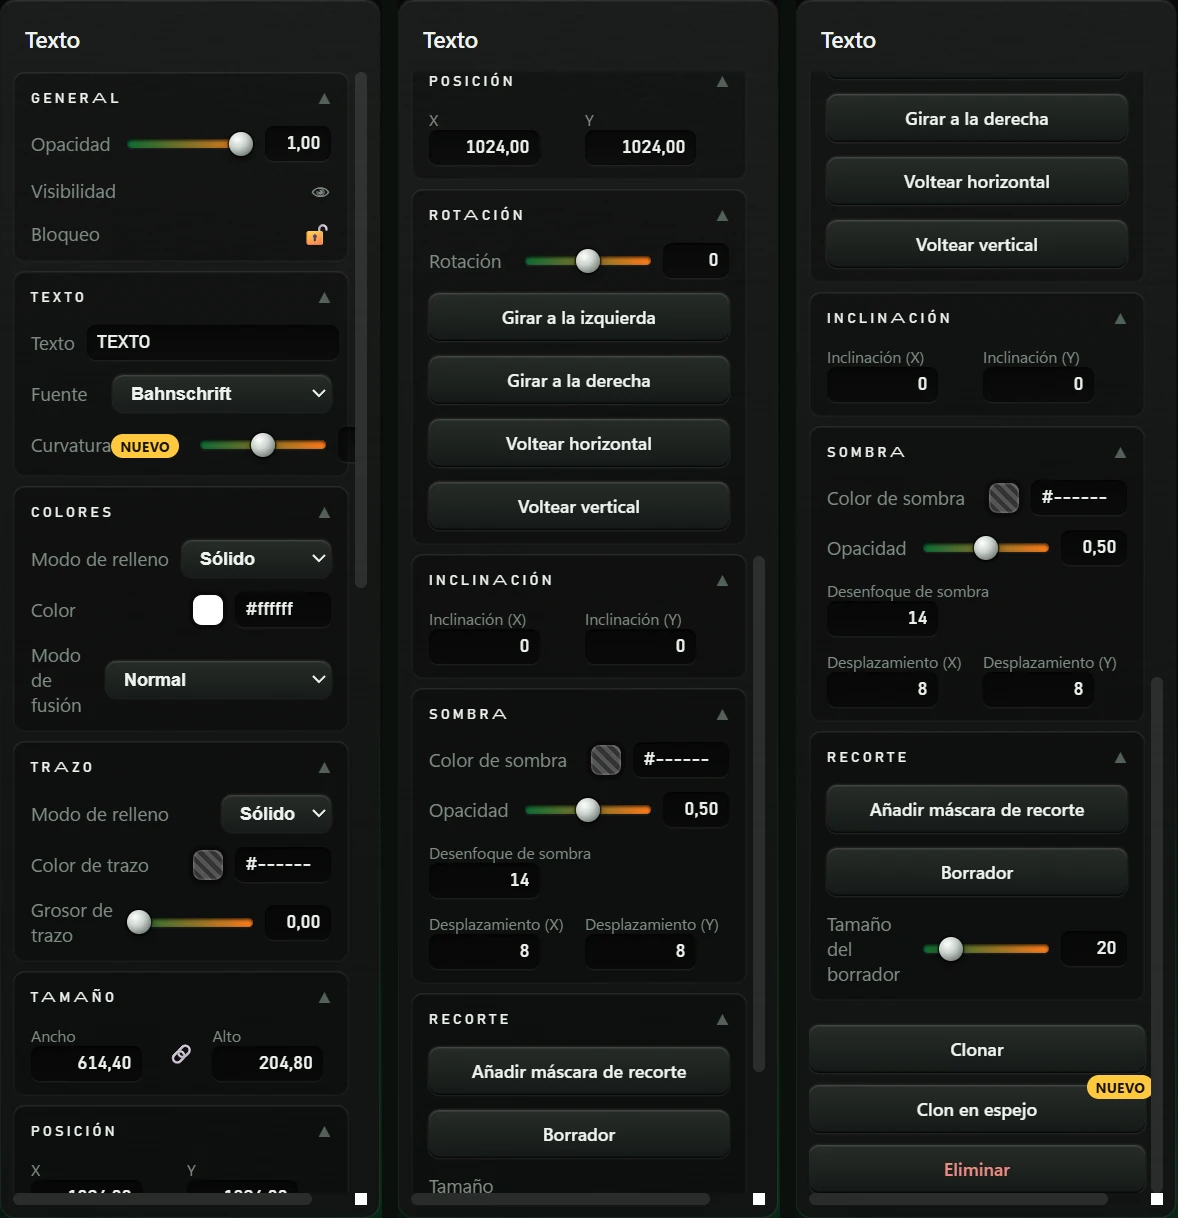
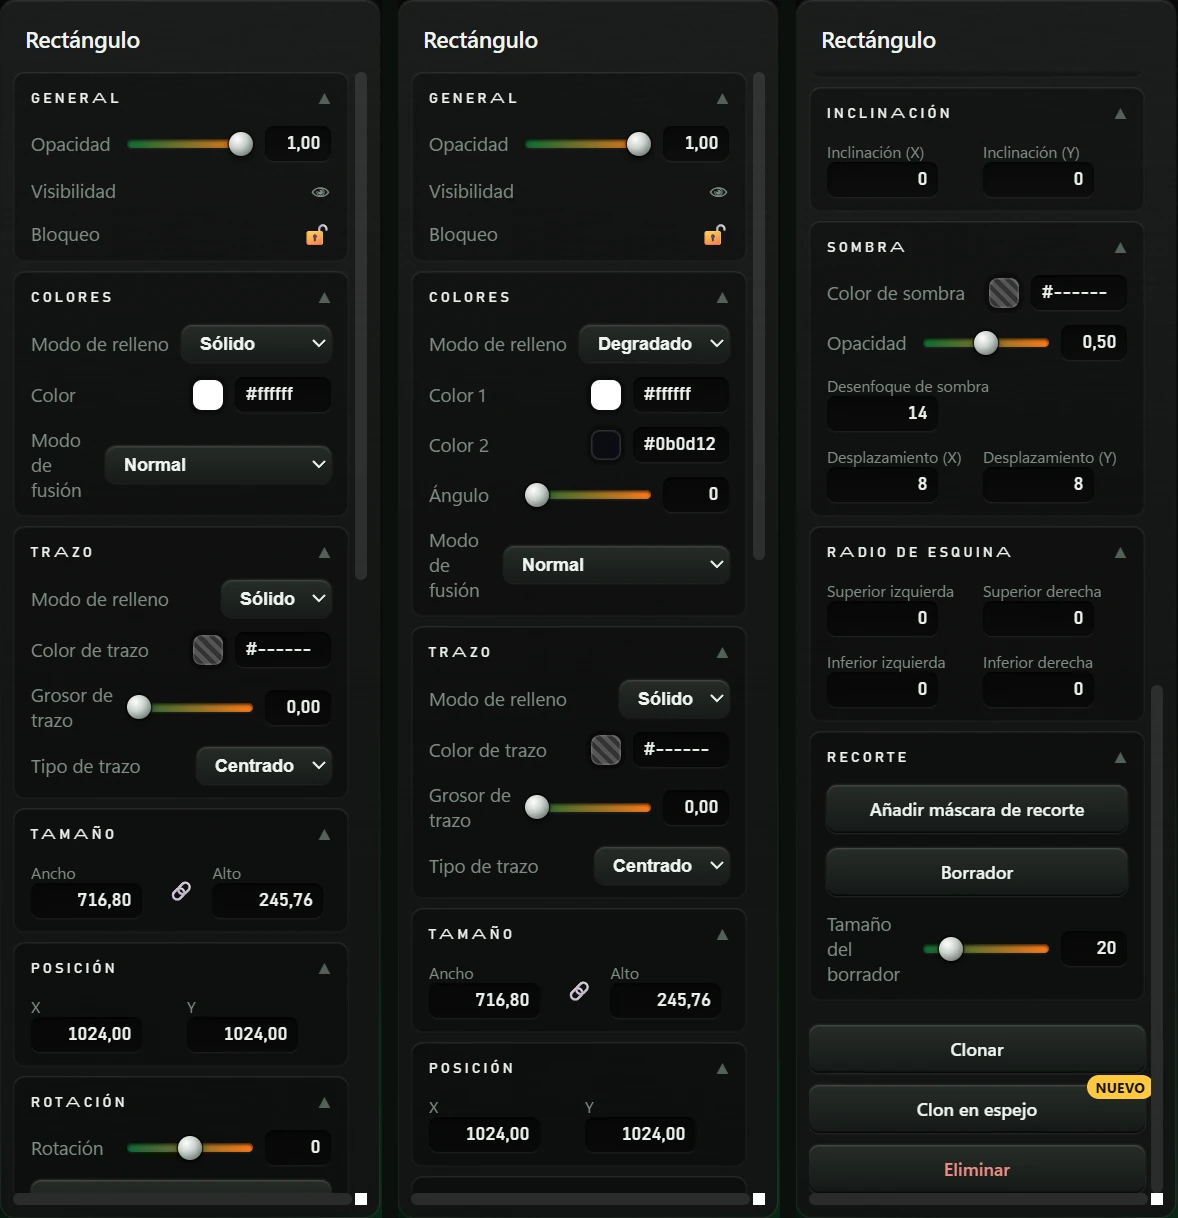
Layer name at the top. Available blocks depend on layer type:
| Block | Options | Layer types |
|---|---|---|
| General (general) | Opacidad (opacity) (0 to 1), Visibilidad (visibility) (👁 / 🙈), Bloqueo (lock) (🔓 / 🔒). | All |
| Texto (text) | Texto (text); Fuente (font): Bahnschrift, Arial, Arial Black, Impact, Segoe UI, Consolas, Times New Roman, added fonts and ➕ Añadir fuente… (add font) (a .ttf or .otf file; confirms the added font); Curvatura (curvature) (−100 to 100, with NUEVO (new)). | Texto (text) |
| Colores (colours) | Modo de relleno (fill mode): Sólido (solid) or Degradado (gradient, shapes/text only). Solid: Color (colour). Gradient: Color 1 (colour 1), Color 2 (colour 2) and Ángulo (angle) (0 to 360). Modo de fusión (blend mode): Normal, Multiplicar (multiply), Trama (screen), Superponer (overlay), Oscurecer (darken), Aclarar (lighten), Sobreexponer color (colour dodge), Subexponer color (colour burn), Luz fuerte (hard light), Luz suave (soft light), Diferencia (difference), Exclusión (exclusion). With Ver mapa de acabado (show finish map) enabled, also Acabado (finish). | All except images |
| Acabado (finish) | Same finish options as base paint; Custom has metallic, roughness and clearcoat. | Images, with Ver mapa de acabado enabled |
| Patrón (pattern) | Color 2 (colour 2), Color 3 (colour 3) and Tamaño del motivo (pattern scale) (0.1 to 5). Colour 1 is in Colores. | Patterns and graphics |
| Quitar fondo (remove background) | Tolerancia (tolerance) (0 to 100, initially 30) and Quitar fondo (remove background): removes the logo’s background colour; reports removed pixels or asks for higher tolerance if nothing is removed. Cambiar logo… (replace logo): replaces the logo. In a base’s LOGO slot, the replacement fits the same centre and rotation. | Images |
| Color (colour) (tint) | Color (colour) and Intensidad (intensity) (0 to 100): tints the image. Quitar color (remove tint) appears when tinted. | Images |
| Fondo (background) | Modo de relleno (fill mode) (solid), Fondo (background) (colour behind the image), Margen (X) (margin X) and Margen (Y) (margin Y). | Images |
| Trazo (stroke) | Modo de relleno (fill mode) (solid), Color de trazo (stroke colour), Grosor de trazo (stroke width) (0 to 40). For shapes, Tipo de trazo (stroke type): Interior (inside), Centrado (centred) or Exterior (outside). | All |
| Tamaño (size) | Ancho (width) and Alto (height) in pixels. 🔗 Proporción locks aspect ratio; click to unlink dimensions. Minimum 20. | All |
| Posición (position) | X and Y (layer centre). | All |
| Rotación (rotation) | Rotación (rotation) (−180 to 180 degrees), Girar a la izquierda (rotate left) and Girar a la derecha (rotate right) (90°), Voltear horizontal (flip horizontally) and Voltear vertical (flip vertically). | All |
| Inclinación (skew) | Inclinación (X) (skew X) and Inclinación (Y) (skew Y). | All |
| Sombra (shadow) | Color de sombra (shadow colour) (selecting it enables the shadow), Opacidad (opacity) (0 to 1, initially 0.50), Desenfoque de sombra (shadow blur) (14) and Desplazamiento (X) (offset X) and Desplazamiento (Y) (offset Y) (8 and 8). | All |
| Radio de esquina (corner radius) | Superior izquierda (top left), Superior derecha (top right), Inferior izquierda (bottom left) and Inferior derecha (bottom right). | Rectangle and shapes without their own drawing |
| Recorte (clipping) | Añadir máscara de recorte (add clipping mask): click to place points; double-click or Enter to close, Esc to cancel. Confirms applied/cancelled clipping. Borrador (eraser): drag to erase parts of the layer; Esc exits. Tamaño del borrador (eraser size) (1 to 120, initially 20). With a mask: Aplicar máscara de recorte (apply clipping mask), Bloquear tamaño de máscara (lock mask size) and Quitar máscara de recorte (remove clipping mask). | All |
At the bottom:
| Block | Options |
|---|---|
| Punta (tip) | Redonda dura (hard round), Redonda suave (soft round), Cuadrada (square), Spray or Caligráfica (calligraphic), each with a sample stroke. |
| Trazo (stroke) | Grosor (thickness) (1 to 300, initially 24), Opacidad (opacity) (1 to 100), Color (colour), Últimos colores (recent colours) (last 8 used, shown when available) and tablet-pressure thickness note. |
| Capa (layer) | Pinta en (paint on): selected Pencil layer or Capa nueva (new layer). With a Pencil layer selected: Nueva capa de trazo (new stroke layer) starts another. |
| Atajos (shortcuts) | Pencil: B. Thickness: [ and ]. Exit: Esc. |
Tip, thickness, opacity, colour and recent colours are remembered for next time.
Inactive while typing in a field.
| Key | What it does |
|---|---|
| Ctrl+Z / Ctrl+Y | Undo / redo. |
| Ctrl+J | Clone selected layer. |
| Ctrl+C / Ctrl+V | Copy/paste layer; the copy is slightly offset. |
| Ctrl+[ / Ctrl+] | Move layer down/up one position. |
| Delete or Backspace | Delete layer after confirmation. |
| Arrow keys | Move layer 1 pixel; Shift for 10. |
| Alt+← / Alt+→ | Rotate view 90°. |
| P | Edit selected shape’s vertices. |
| B, [ ], Esc | Pencil (see 5.3). |
| Esc | Closes menus, Assets and Subir gráficos windows; exits clipping, eraser and Pencil. |
The finish controls how each part reflects light in iRacing. Its separate map installs with the paint through USAR EN PISTA. Options: Normal, Brillante, Plano, Mate, Semi-metalizado, Metalizado, Cromo and Personalizado (metallic, roughness, clearcoat from 0 to 100). Layer finish settings only appear with Ver mapa de acabado (show finish map) enabled in project settings.
| Group | Gráficos (graphics) |
|---|---|
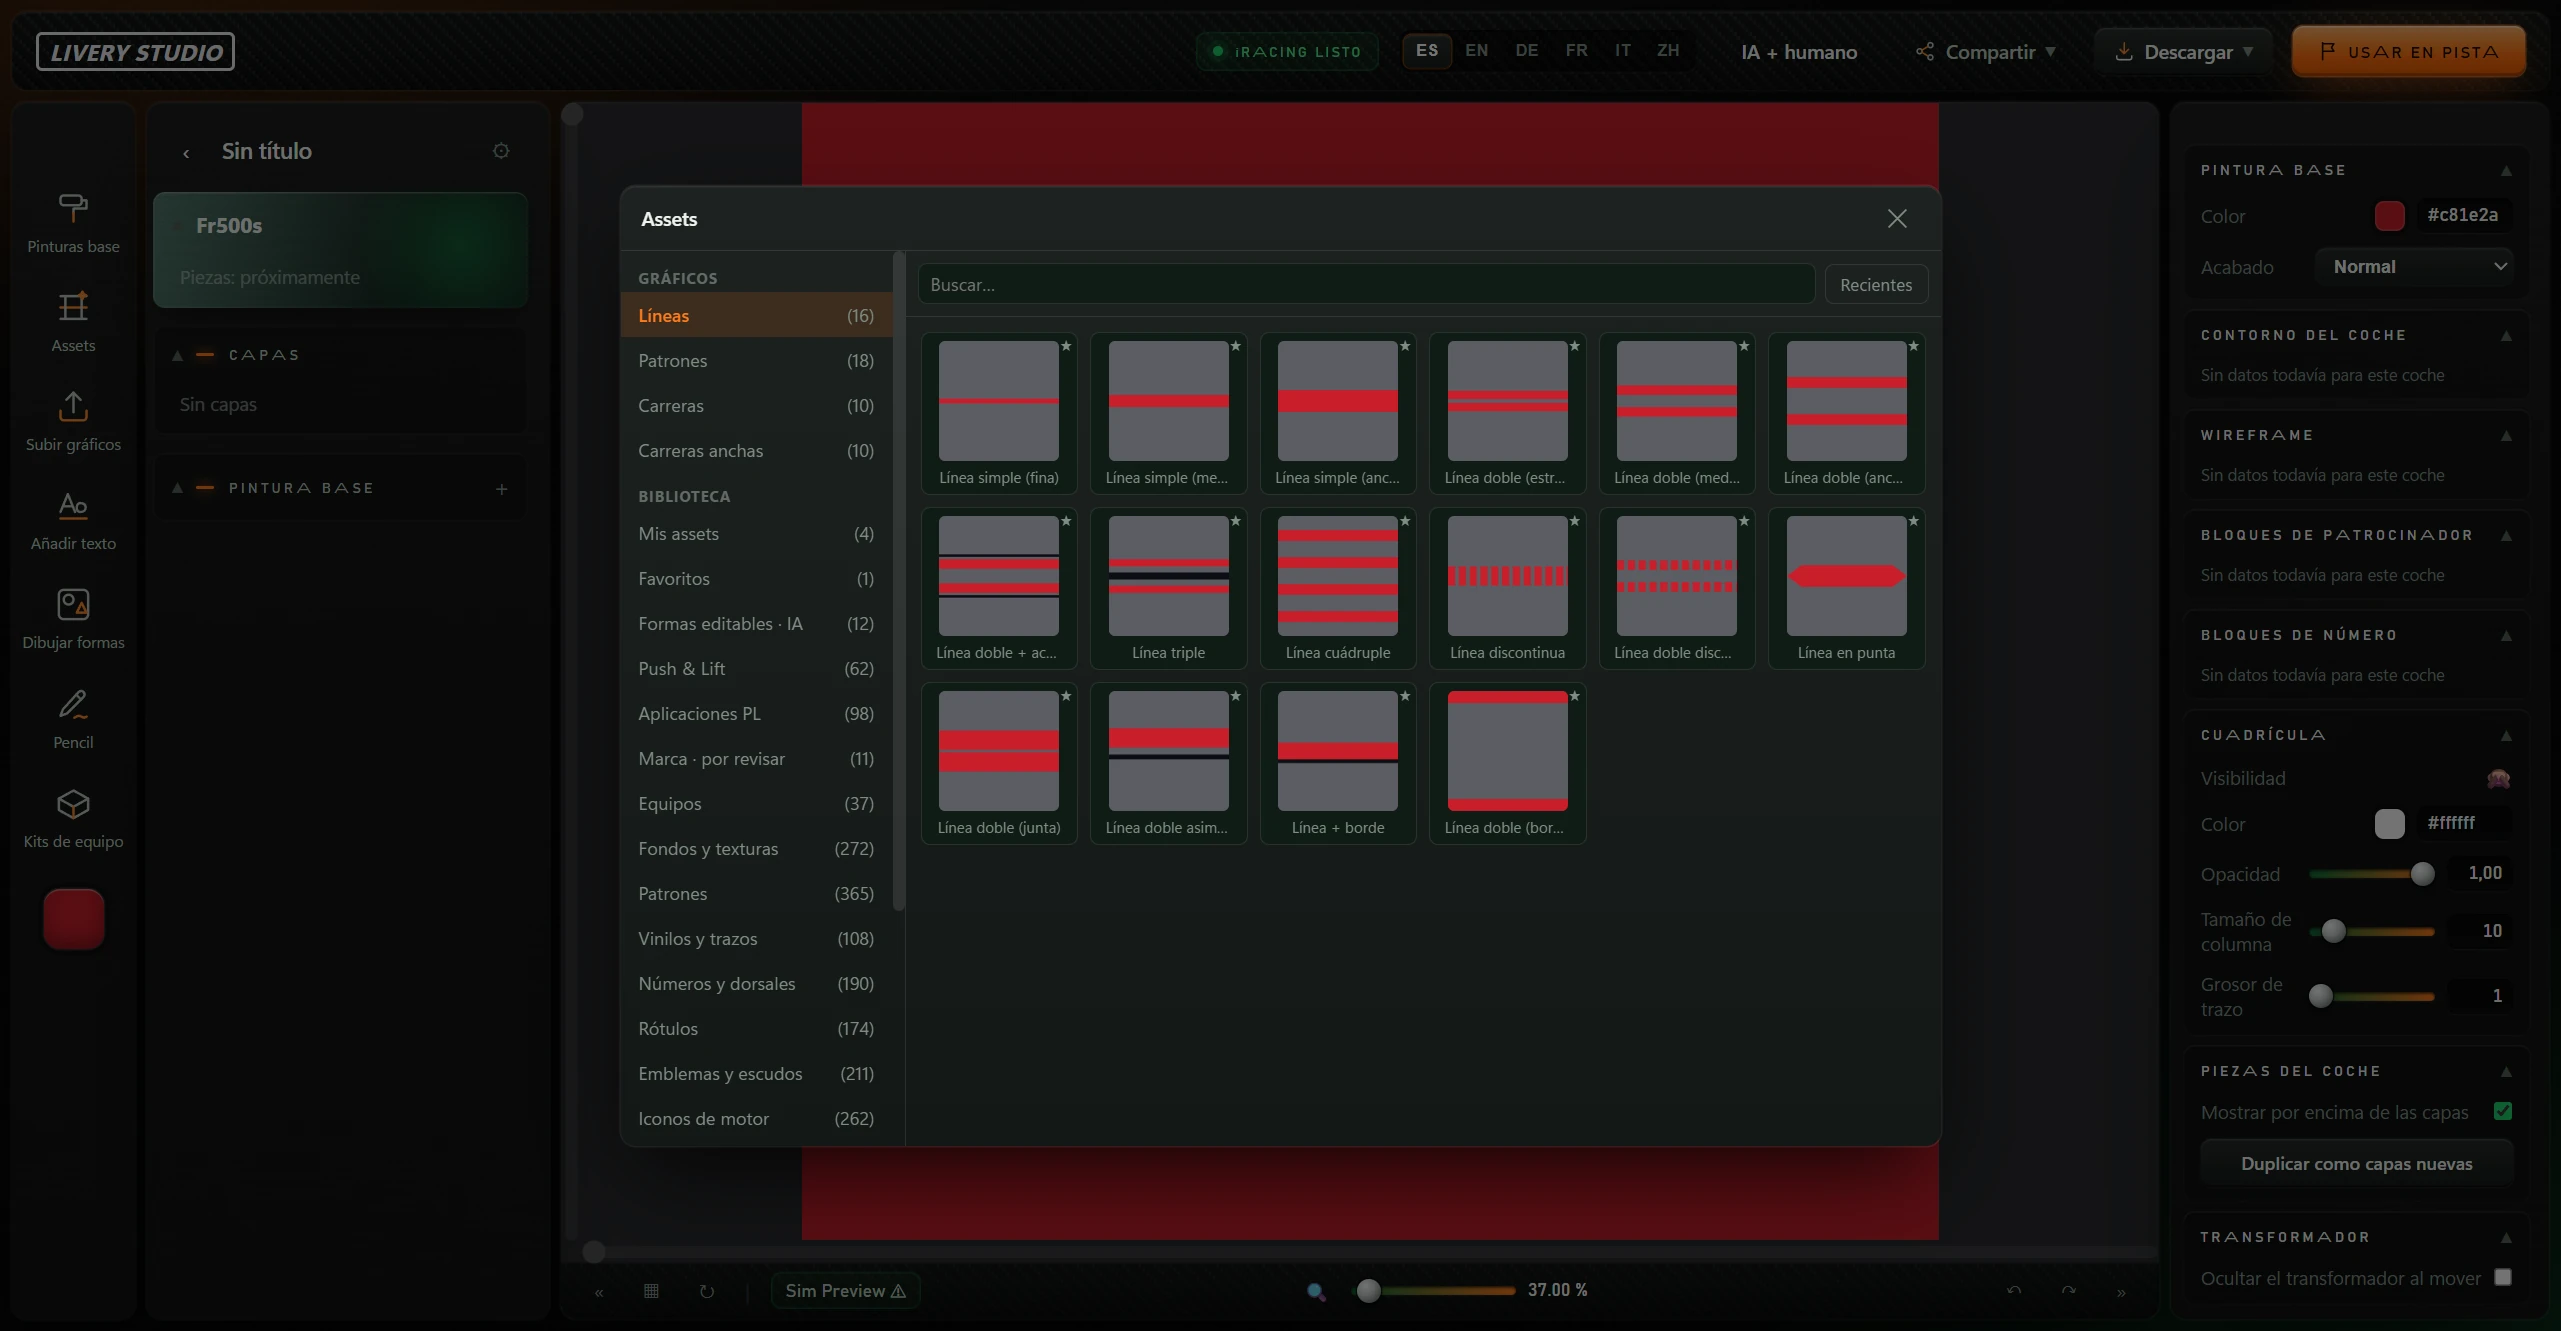
| Líneas (lines) (16) | Línea simple (single: thin/medium/wide), Línea doble (double: narrow/medium/wide), Línea doble + acompañante (double plus companion), Línea triple (triple), Línea cuádruple (quadruple), Línea discontinua (dashed), Línea doble discontinua (double dashed), Línea en punta (tapered), Línea doble (junta) (joined double), Línea doble asimétrica (asymmetric double), Línea + borde (line plus border), Línea doble (borde a borde) (edge-to-edge double). |
| Patrones (patterns) (18) | Puntos finos (small dots), Puntos grandes (large dots), Puntos alternos (alternating dots), Rayas finas (thin stripes), Rayas finas (verticales) (vertical thin stripes), Rejilla fina (fine grid), Trama diagonal (diagonal weave), Estrellas dispersas (scattered stars), Rombos (diamonds), Cruces (crosses), Triángulos dispersos (scattered triangles), Anillos (rings), Panal (honeycomb), Línea ondulada fina (thin wavy line), Trama cruzada (crosshatch), Cuadros dispersos (scattered squares), Festones (scallops), Guiones dispersos (scattered dashes). |
| Carreras (racing) (10) | Estallido (burst, small/large), Roundel (thin/thick rings), Fondo de número (number background, circle/square), Banderín de carreras (racing pennant), Parche de patrocinador (sponsor patch, oval), Cuña aerodinámica (aero wedge, standard/sharp). |
| Carreras anchas (wide racing) (10) | Flecha en V (V arrow, single/double), Estela de velocidad (speed trail, left/right), Estelas de esquina (corner trails, small/large), Banderines de carreras (triple racing pennants), Parche de patrocinador (rectangular sponsor patch), Bandera de cuadros (chequered flag, thin/wide). |
Recolour graphics using Color, Color 2 and Color 3, like patterns.
If installation fails, the following dialog opens: No se ha podido poner en iRacing (could not install in iRacing): download and install manually; it saves to Downloads with iRacing’s required filename. The button ⭳ Descargar (download) saves it and confirms the path. Below it explains Ponerla en iRacing (install in iRacing) (the car’s Documents\iRacing\paint\ folder, car_….tga and car_spec_….tga with your Customer ID; Ctrl+R in iRacing with the car on track reloads paints) and Subirla a TP (upload to TP). Close with Cerrar (close).
↶ or Ctrl+Z to undo; ↷ or Ctrl+Y to redo.
| What you see | What to do |
|---|---|
| SIN CARPETA DE iRACING (no iRacing folder) | The iRacing paint folder was not found. Use Descargar (download) and install manually (see 6). |
| “Customer ID: falta” or “Customer ID: solo números” (missing or non-numeric ID) | Invalid Customer ID. Create the project with the quick form using your number from members.iracing.com. |
| “Sin carpeta de pinturas de iRacing” (no iRacing paint folder) | Same as SIN CARPETA DE iRACING. |
| No se ha podido poner en iRacing (could not install in iRacing) | Click Descargar (download) in that dialog and follow its steps. |
| Export/install failed: restart the app. | Close LIVERY STUDIO using CERRARLA and reopen it. |
| “Este coche no tiene plantilla” (car has no template) | iRacing supplies no template for this car. Choose another. |
| “No se han podido bajar las plantillas…” (template download failed) | Check internet and reopen LIVERY STUDIO. |
| “Sin datos todavía para este coche” in guides (no data yet) | No guides for this car. Try ⚙ → Restablecer plantilla por with the correct car. |
| “No encuentro el archivo de esta skin” on a card (skin file missing) | Project file missing from your PC. |
| Red connection error asking you to retry or reopen the window. | Click Reintentar (retry). If it persists, close and reopen LIVERY STUDIO. |
| Red “No se ha podido guardar lo pintado” (could not save paint) | Autosave failed. Use Reintentar or reopen the app; check the save before closing. |
| “Todavía no está disponible.” (not available yet) | Compartidos conmigo, Favoritos and Novedades do not work yet. |
| Compartir says uploading from here is unavailable. | Download the paint and upload it yourself. |
| “Sin fondo que quitar — sube la tolerancia” (no background removed; increase tolerance) | Increase Tolerancia and click Quitar fondo again. |
| “No se puede agrupar: falta una capa afín encima” (no compatible layer above) | Only groups with the layer immediately above of the same type: pattern with pattern, layer with layer. |
| “Esta forma no tiene vértices que editar” (no editable vertices) | Elipse, Anillo, Meta, Curva and Arco have no vertices. |
| Font could not be added; is it .ttf or .otf? | Use a .ttf or .otf font file. |
| Create an empty project to use a base; current design preserved. | Bases require projects without layers. Create a new one. |
| Eyedropper requires a newer WebView2 (Windows Update). | Update Windows or enter the colour code. |
| Layer will not move | Locked (🔒) or mirror clone. Unlock it. |
| Layer disappeared | Hidden (🙈). Click the eye. |